Creating Subordinate CA from External Root CA
Note: If you are using the complimentary root CA created in
AppViewX, then you can create subordinate CA from external root CA as explained
here.
To create subordinate CA from external root CA:
-
Go to
 (Menu) icon > PKI+ > CA
Inventory.
The CA Inventory page appears.
(Menu) icon > PKI+ > CA
Inventory.
The CA Inventory page appears. -
Click +Create CA on the top-right corner of the page.
The Create CA page is displayed.
-
Enter the fields as described in the table.
Table 1. Field Description for PKIaaS Management page Field Description Select CA Type *CA Name Provide a friendly name for reference. Tier This is a ready-only field. In case of standard initialization, Standard is selected; else AppViewX PKIaaS - Native if it was used for initialization. Certificate Type Select Subordinate CA. On clicking Subordinate CA, you see Root CA field with External and PKIaaS options.
Root CA This field appears only on selecting Subordinate CA. Select External if root CA is outside of the AppViewX system.
*Template Select a template from the dropdown list. *Valid for Select the number of years to CA expiry. Configure CA Subject Name *Organization Enter the organization name owning the CA. Organization Unit Enter the business unit for CA operations. City Enter the city name. State Enter the state name. Country Enter the country of the organization. *CA Common Name Enter the root CA subject name. Configure CA Key Size and Algorithm CSR Generation Select AppViewX if you are generating keys using HashiCorp Vault, else select HSM. *Device This field is displayed only when CSR Generation = HSM. Select a configured device from the dropdown list. *Key Handler Name This field is displayed only when CSR Generation = HSM. The field is auto-populated on selecting the device. *Key Size and Algorithm Select the CA key size and algorithm from the dropdown list. Configure CA Artifacts Path Length Constraint This is an optional parameter in an issuing CA certificate; it defines the number of sub CA chain created under that specific issuing CA certificate holding the path constraint value. This field can have any of these values: 0, 1, 2, 3, or none.
Note: Fields marked with red asterisk (*) symbol are mandatory. -
Click Save.
A window with the summary of values entered appears.
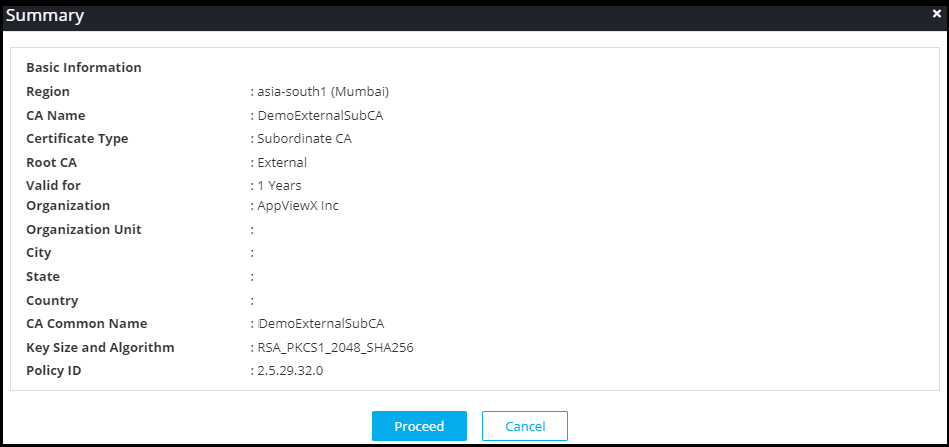
-
Click Proceed to trigger the approval flow.
The newly created CA appears in the table with the status as Create - Approval Pending. If you want to abort the action, then click Abort.
An email from AppViewX is sent to all the active custodians for approving the CA.
-
Click the here hyperlink in the email to be redirected to the AppViewX
login page.
On successfully logging in, the approval request is displayed with the Approve and Reject buttons.
-
Enter the comments and click Approve.
A confirmation popup window appears if you want to submit the request.
- Click OK. Once the approval count reaches the minimum approval as set by the quorum number, the custodian is approved.
-
Click the
 (Refresh) icon.
-
Click Activate. Until the signed certificate is uploaded, the status of
the external subordinate CA remains as Pending Signed Certificate.
The Certificate Authority Activation window appears.
- Click Download CSR.
-
Once the CSR is downloaded, sign with valid root CA and click Upload.
Note: Copy and paste or upload the complete certificate chain, ordered from leaf to root, starting with the subordinate certificate authority being activated.Once the external subordinate CA is activated, the status changes to Active. Click Resubmit if the action fails for any reason.
-
[Optional] Click the Audit Log against the CA to view the audit log
details. You can also download the audit log by clicking the Download
button on the Audit Log view page. The audit log is exported in the .xls
format.
Note: Once the audit log is fully loaded, the Loading button will turn to View. Refresh the page to see the View button.
- [Optional] Click the Approval Status column value link to check the update on approvals.