Configuring MS Intune
To perform mobile device certificate enrollments for MS Intune managed devices using the (SCEP based) MS Intune protocol on AppViewX, the admin or a privileged user needs to first set up the MS Intune server agent using the AppViewX portal. Upon successful set up of the MS Intune server agent through the portal, a URL will be generated. Clients can then use this URL to send enrollment requests to AppViewX via MS Intune.
The detailed steps for setting up the MS Intune server agent are listed below:
- Log in to AppViewX application with admin or privileged user credentials.
- Click the menu button located in the upper left corner of the screen.
The left navigation pane appears.
- Navigate to CERT+ > ADMINISTRATION > Auto Enrollment > MS INTUNE.
- Select Add or Configure Now.
- Configure the Agent Details
details as follows:
Field Name Description Validation * Name Unique name to identify the Agent setting. No special characters other than ‘.’, ‘-’,’_’ are allowed. Name should not start with special characters. * Host IP address of the AppViewX intune plugin.
Invalid IP address(example: xxx.xxx.xxx.xxx) * Port HTTP gateway port of the AppViewX intune plugin node. Port will accept only numerical values between 0 to 65535. 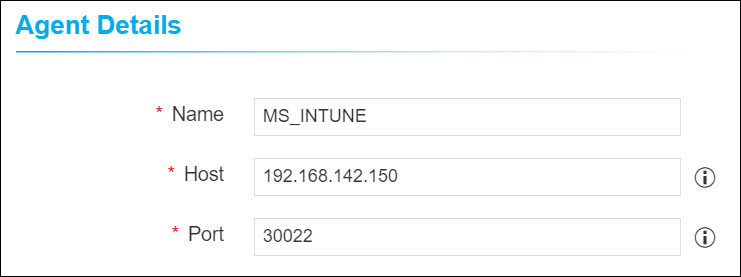
-
Configure the Intune Details as below:
Field Name Description * Client ID Client ID of the Intune Account - this value should have been captured during Intune App Registration. * Tenant ID Tenant ID is the domain name in your account ID. For example, if your account id is [email protected] then the tenant Id is test.onmicrosoft.com. * Client Secret Client Secret for the Intune Account - this value should have been captured during Intune App Registration. 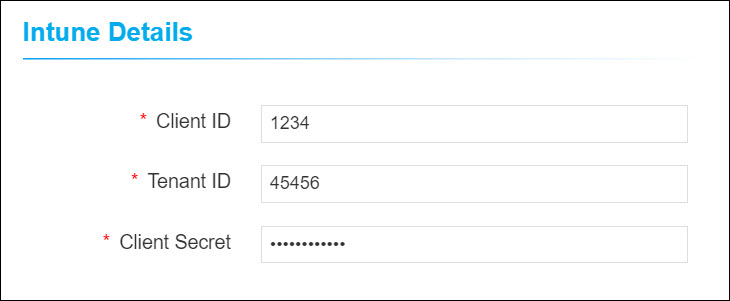
-
Configure the CA Accounts as follows:
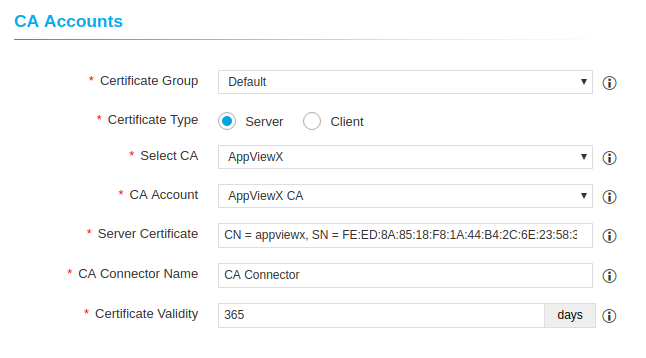
Field Name Description Validation * Certificate Group Select a specific group under which certificate needs to be enrolled. NA * Certificate Type Select a specific certificate type (Server / Client) to be enrolled.
NA * Select CA Select a specific CA from which the certificate needs to be enrolled.
Note:.-
If the selected CA is Ejbca, a separate section displaying Vendor Specific Details is displayed after the CA Accounts section.
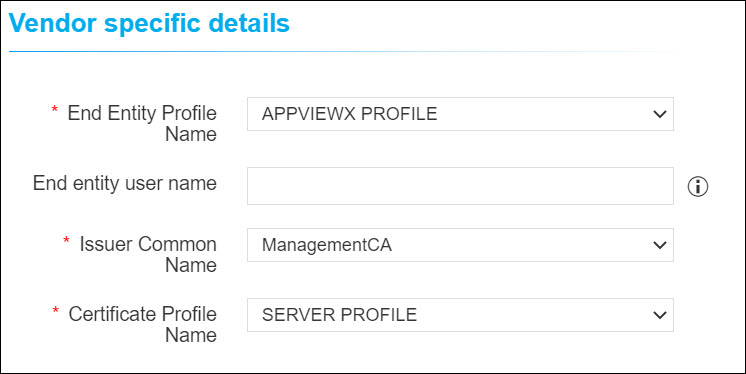
Under the Vendor Specific Details section, select/enter the required details. -
If the selected CA is Microsoft Enterprise, a separate section displaying Vendor Specific Details is displayed after the CA Accounts section.
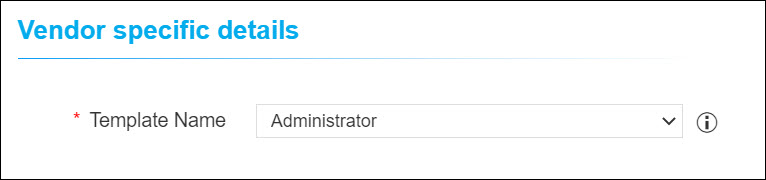
Under the Vendor Specific Details section: Select the required Template Name.
NA * CA Account Select a specific CA Account from the selected CA which is to be used for certificate creation operations. NA * Server Certificate Type 3 or more letters of the certificate keywords after which a list of server certificates issued from the above selected CA account will be displayed, one certificate can be selected for further communications with SCEP client machine. NA * CA Connector Name Name of the CA connector after certificate is being enrolled. NA * Certificate Validity Validity of the certificate to be enrolled. Certificate validity accepts only numerical values -
-
Configure the Advanced Settings as follows:
Field Name Description * Retry Count Specify a retry count upto which the agent will retry for the certificate to be fetched.
* Retry Frequency Specify a retry frequency upto which the agent will wait for each retry count. * Certificate Poll Type Select a specific type to poll the issued certificate from agent to subsystem certificate plugin. - Click Save.