Scan URL
The certificate public key is retrieved or stored during the handshake to the URL.
To discover a certificate via URL,
- Log in to AppViewX application with valid credentials.
-
Click the menu button located in the upper left corner of the screen.
The left navigation pane appears.
-
Click CERT+.
The CERT+ left navigation pane appears.
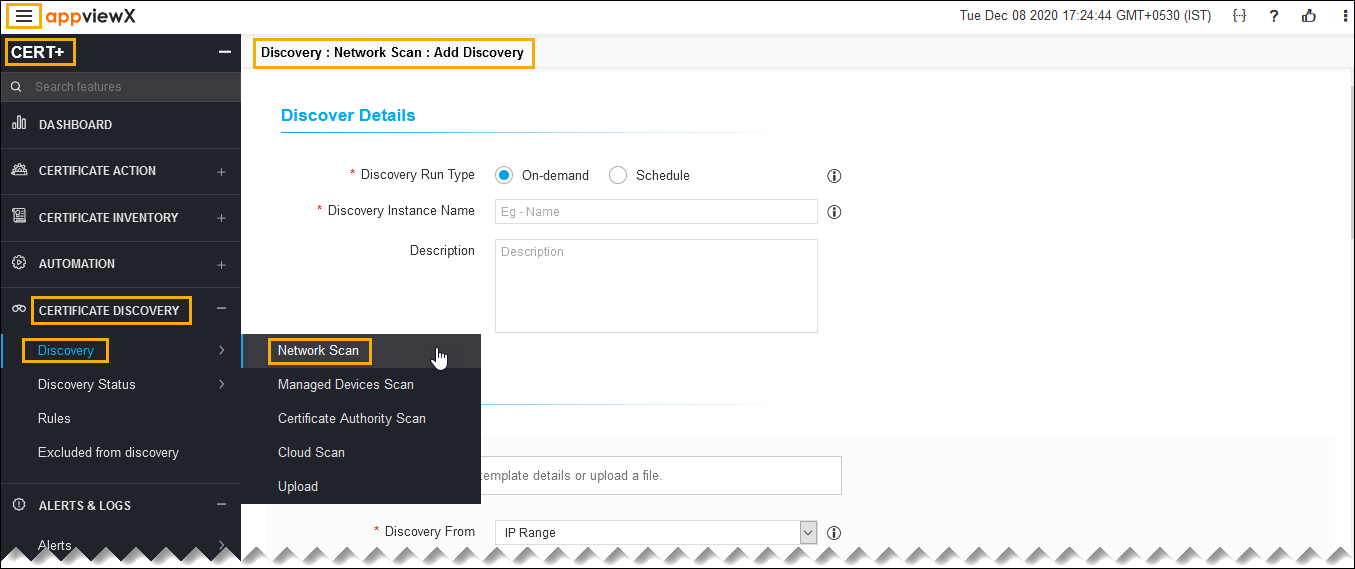
- Expand CERTIFICATE DISCOVERY.
-
Click Discovery, and then select Network
Scan.
The Add Discovery page appears.
-
In the Discover Details section, select/enter the
details as follows.
The following table describes the options available in the Discover Details section:
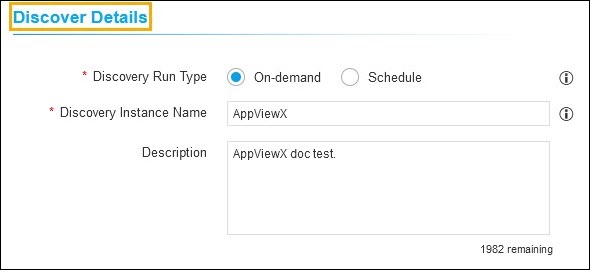
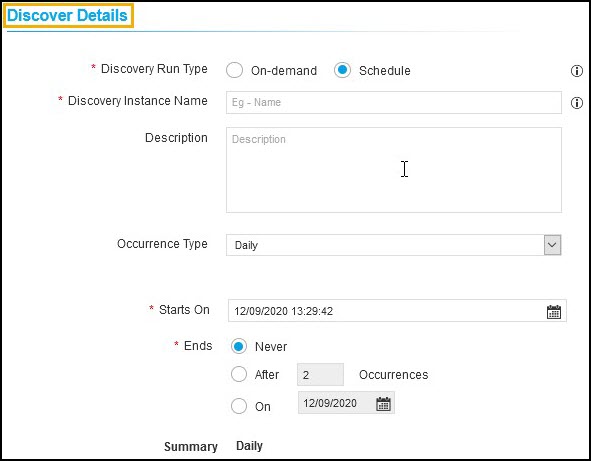
Field Description *Discovery Run Type Click the check box to select the desired discovery run type. The possible types are:
- On-demand - The user can trigger a discovery manually whenever he/she wants.
- Schedule -By scheduling the discovery, the user can automate the process for a defined time/ frequency.
If you select Scheduled discovery fill the below details.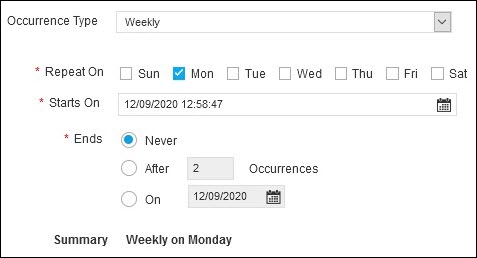
Field Description Occurrence Type Select the type of occurrence from the dropdown list.
The possible occurrences are:
- Daily
- Weekly
- Monthly
- Yearly.
*Repeat On Select a day in the week to schedule the weekly discovery.
Note:-
Repeat on is visible only when the Occurence type is selected as Weekly.
-
If Occurence type is weekly, select a day in the week to schedule the weekly discovery.
*Starts On Select the date to start the scheduled discovery. *Ends Select the desired last discovery.
- Never - Continues to discover the certificate.
- After - Stops the discovery process after a number of occurrences entered in the field.
- On - Stops the discovery process for the selected period from the calendar.
Note: AppViewX will trigger the discovery certificates process for that instance.Discovery Instance Name Enter the name of the discovery instance. Description Enter the required details in this field.
Note: You can enter a maximum of 2000 words in the field.Note: The asterisk (*) symbol indicates a mandatory field. -
In the Discover By section, select/enter the details as
follows.
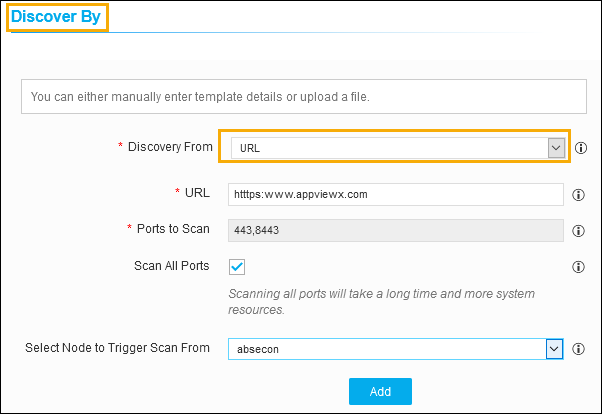
The following table describes the options available in the Discover By section:Field Description *Discovery From Select the IP Range to discover a certificate from the dropdown list.
The possible options are:
- IP Range
- Subnet.
*URL Enter the valid URL to discover the associated certificate.
*Ports to Scan Enter the port number that ranges from 0 to 65535.
Note: You can set down port range with a hyphen (For example, 444-666,888-999,922,44).*Select All Ports If HTTPS enabled ports are larger in number or unknown.
Select Node to Trigger Scan From Select the CLM node from where the discovery node is performed. Select a File You can upload file to update the details.
Note: Allowed formats are <.xlsx>, <.xls>, or <.csv> file.Note: The asterisk (*) symbol indicates a mandatory field. -
Click Add.
The popup message appears as Network details added.
-
(or) you can fill all the details for Discover By section by uploading network
details via an excel sheet. To update network details via excel sheet,

- Click the Download Sample Template link, to download a sample file.
- Fill all the necessary details in the excel sheet.
- Click the Browse button.
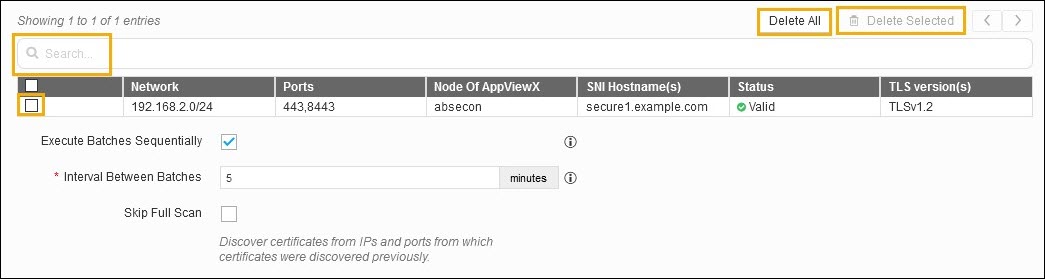
- Added network details are listed.
-
You use the search field to select the networks from the list.
- Use Delete All, if you want to delete all the network details.
-
Select desired check box, and then click Delete Selected
to delete specific networks.
-
Select the Execute Batches Sequentially checkbox if
required.
- If enabled, Based on the minutes value provided in Interval Between Batches field AppViewX will give the duration gap between each batch execution.
- If disabled, Scanning Intensity can be decided. An increase in scanning intensity will increase the scanning speed and network load. Maximum connections from a discovery engine will be chosen based on the Scanning Intensity.
- Select the Skip Full Scan check box if required. If enabled, Certificates will be discovered from IPs and ports from which certificates were discovered previously.
-
In the Device discovery option, select the required
discovery from the dropdown list.

-
In the Discovery Rules section, select the Associate
Rule from the dropdown list.
Note: Set of filters created as a rule in the Rules menu. The selection of rules will apply respective filters on discovered certificates.
-
In the After Discover section, select/enter the details
as follows.
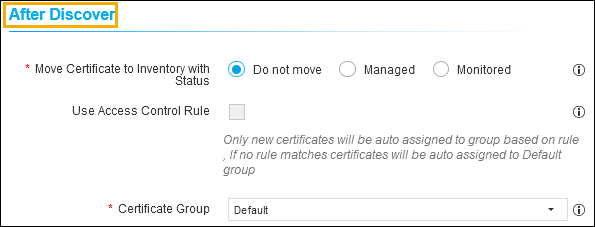
The following table describes the options available in the After Discover section:Field Description *Move Certificate to Inventory with Status Click the check box to select the desired move certificate to inventory with status. The possible options are:
- Do not move - New discovered certificates and associated objects will not be moved to inventory.
- Managed - New discovered certificates and associated objects will be moved to inventory with status Managed.
-
Monitored - New discovered certificates and associated objects will be moved to inventory with status Monitored.
Note: If the discovered certificates already exist in the inventory, the certificate status will not be changed.
Use Access Control Rule Select the check box.
Note: If this checkbox is enabled, the certificate group will be associated automatically by the rule in access control.*Certificate Group Select the certificate group from the dropdown list. Discovered certificates will be associated with this provided group.
Note: If the discovered certificates already exist in the inventory, its certificate group will not be changed.Note: The asterisk (*) symbol indicates a mandatory field. - Click Discover or Schedule to perform an On-Demand or Schedule certificate discovery respectively.
- Click Reset to reset the form and re-loads the page.