Creating a VIP with Incident Ticket
Note: Before designing the workflow, ensure that you have
configured an instance to integrate with the ITSM vendor. For more information,
refer to the section on ITSM Vendor
Configuration
To create a VIP with Incident ticket:
- Design a new workflow.
-
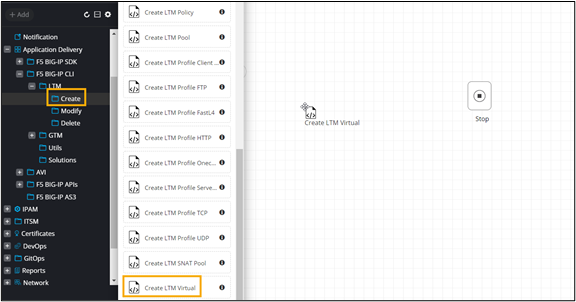
From the navigation pane on the left, click
 next to Application Delivery.
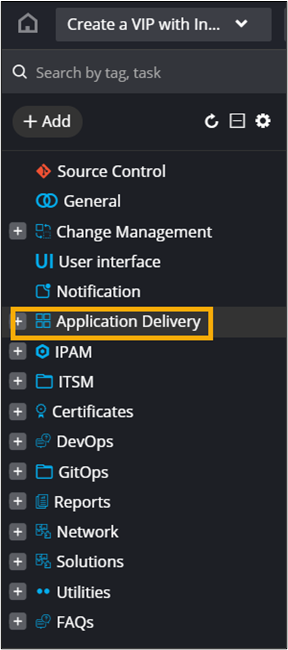
-
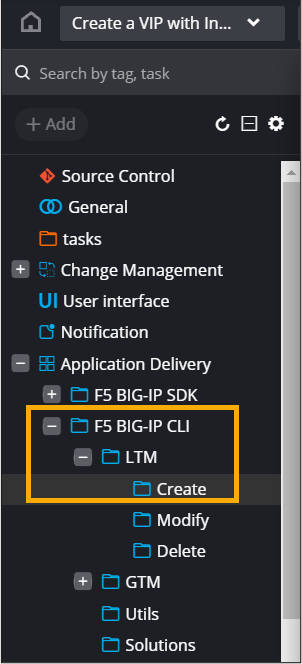
Under Application Delivery, select F5 BIG-IP
CLI Commands > LTM >
Virtual.
-
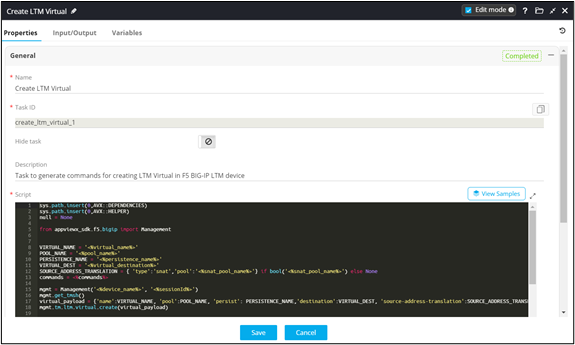
To create a virtual LTM server, drag and drop the prebuilt Create
LTM Virtual task.
The Create LTM Virtual window shows the Input variables required for this task in the Citizen mode.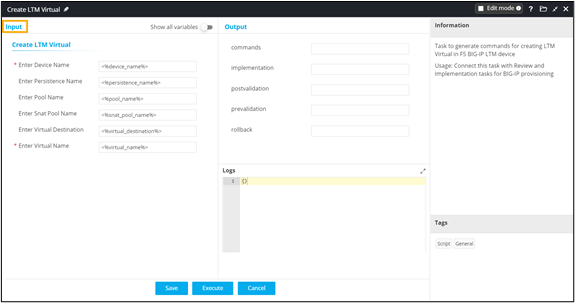
-
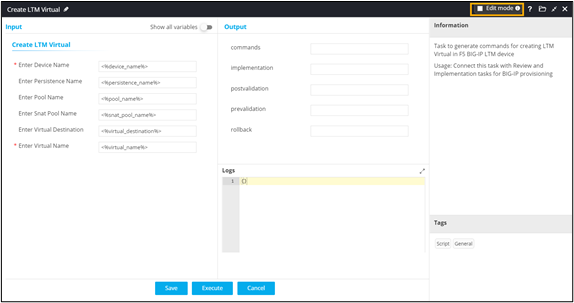
To view or edit the task configurations, in the Create LTM
Virtual window, select the Edit mode
checkbox.
- Click Save.
-
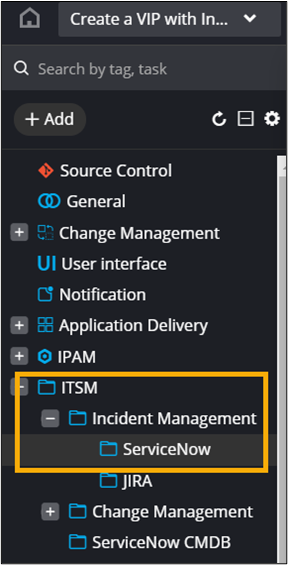
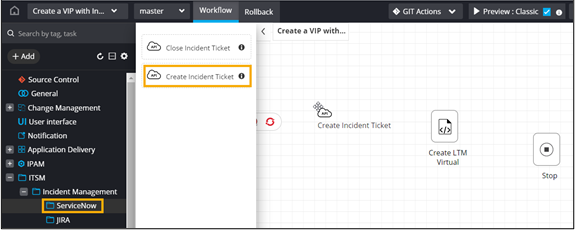
From the navigation pane on the left, click
next to ITSM.
-
Under ITSM, select Incident
Management > ServiceNow.
-
Drag and drop the Create Incident Ticket task.
-
In the ServiceNow - Create Incident Ticket window, enter
the Input variables required to create the Incident
ticket.
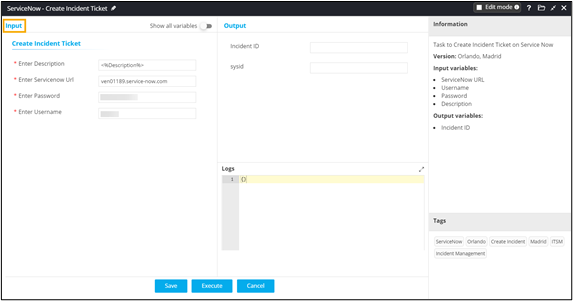
- Click Save.
-
From the User Interface section, drag and drop a
Review task.
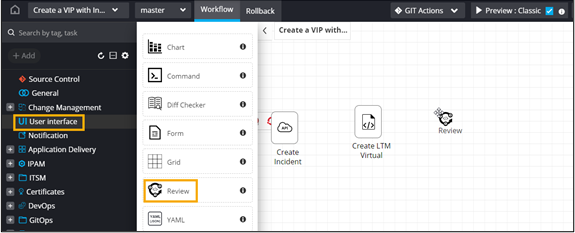
- Click Save.
-
From the General section, drag and drop the
Prevalidation task.
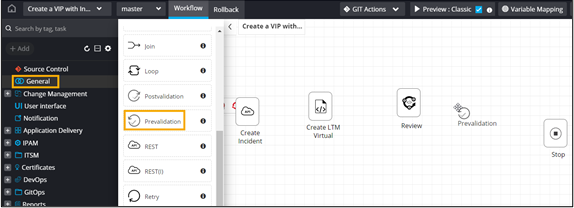
- Click Save.
- From the General section, drag and drop the Implementation task.
- Click Save.
- From the General section, drag and drop the Postvalidation task.
- Click Save.
-
To create an auto-generated form, click Form above the
Start task.
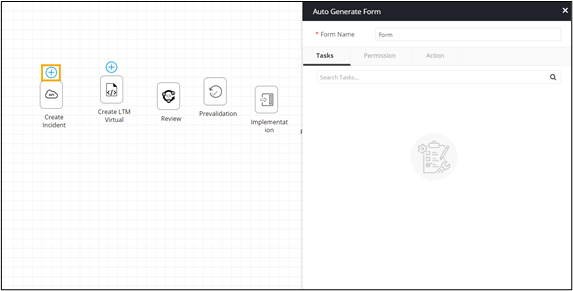
-
To auto-fill the variables, click
 above the Create Incident task.
-
Select the relevant form fields.

-
Click above the Create LTM Virtual
task.
- Select the relevant form fields. Creating a VIP with Incident Ticket
- Click Create.
-
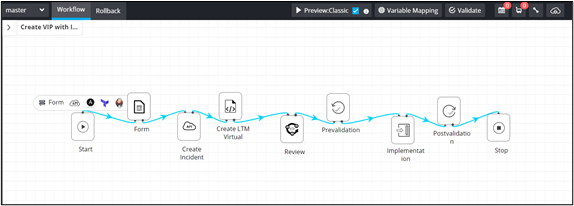
Connect the workflow tasks.
-
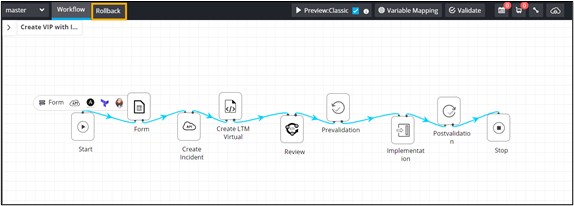
To add a rollback workflow, click Rollback.
-
From the General section, drag and drop the
Rollback task.
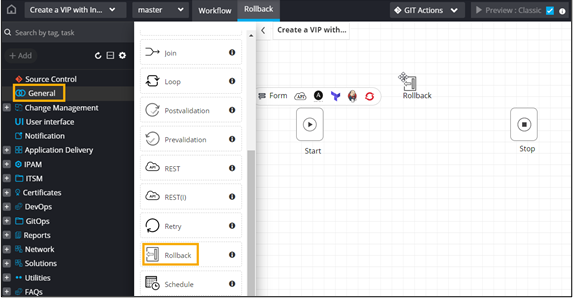
- Click Save.
-
Connect the rollback workflow tasks.
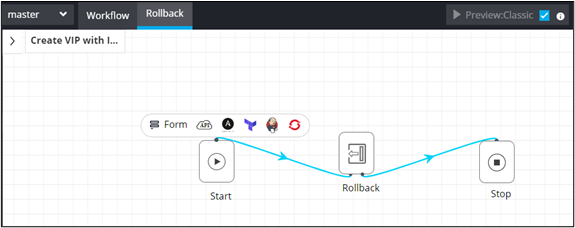
Note: No values are passed in the Review, Prevalidaton, Implementation, Postvalidation, and Rollback tasks, since these tasks are already mapped to the Create LTM Virtual task as output . - Enable the workflow.
-
From the upper left corner of the screen, click
 .
.
- From the menu displayed, select Request.
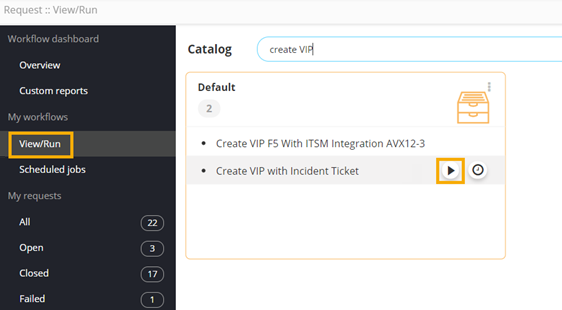
- On the Request:: Overview page, from the navigation pane on the left, click View/Run.
-
To trigger the workflow, on the Request :: View/Run
page, search for the workflow and click
 .
. 
-
Enter the input details in the form.
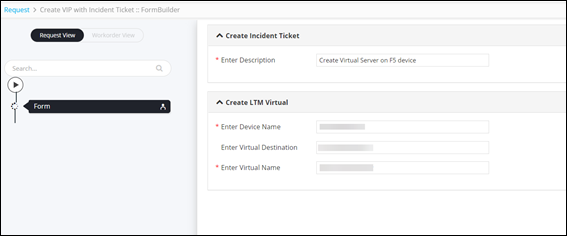
-
Click Next.
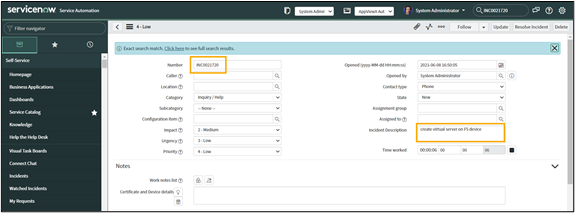
Incident Ticket is created on ServiceNow.
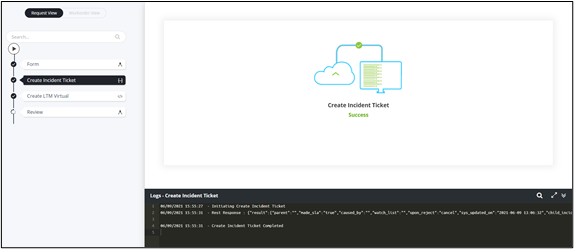
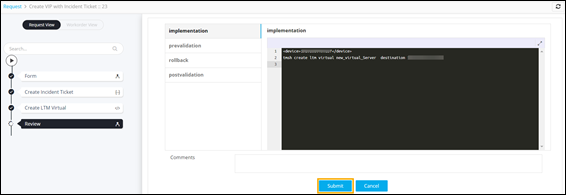
-
At the Review stage, to execute the implementation,
prevalidation, rollback, and postvalidation commands, click
Submit.
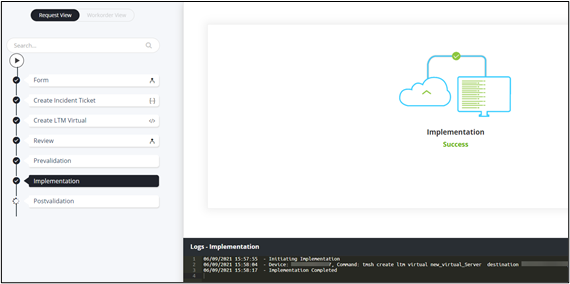
- Command to create a virtual server executed at the
Implementation stage.
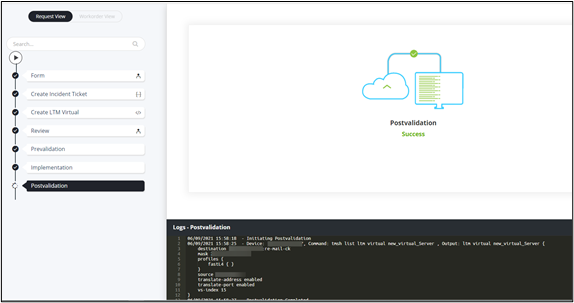
- Postvalidation command displaying the
configuration of the new virtual server that was created.
- Incident Ticket created on ServiceNow.
- Command to create a virtual server executed at the
Implementation stage.
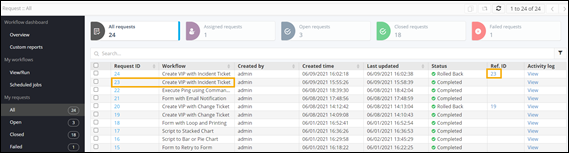
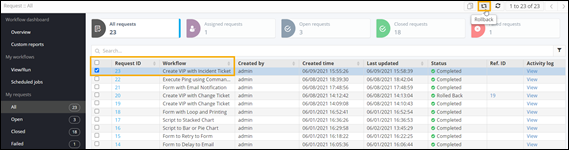
- To execute the rollback workflow, on the Request :: Overview page, from the navigation pane on the left, click All.
- On the Request :: All page, select the checkbox next to the workflow Request ID.
-
From the upper right corner of the screen, click
 .
.
Rollback request to delete the virtual server that was created, executed successfully.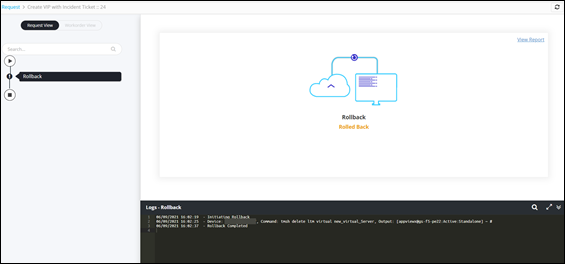
-
To view the request ID of the rollback workflow, on the Request ::
Overall page, click All.
Rollback workflow request displays the Ref. ID of the workflow for which rollback was initiated.