Adding a New AWS Device
- Login to AppViewX.
-
From the top left corner of the screen, click
 .
.
-
From the menu displayed, select Inventory > Devices.
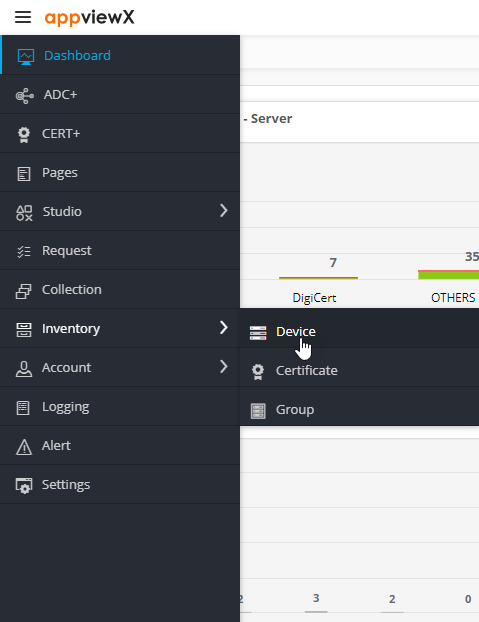 The Device :: ADC page is displayed.
 -
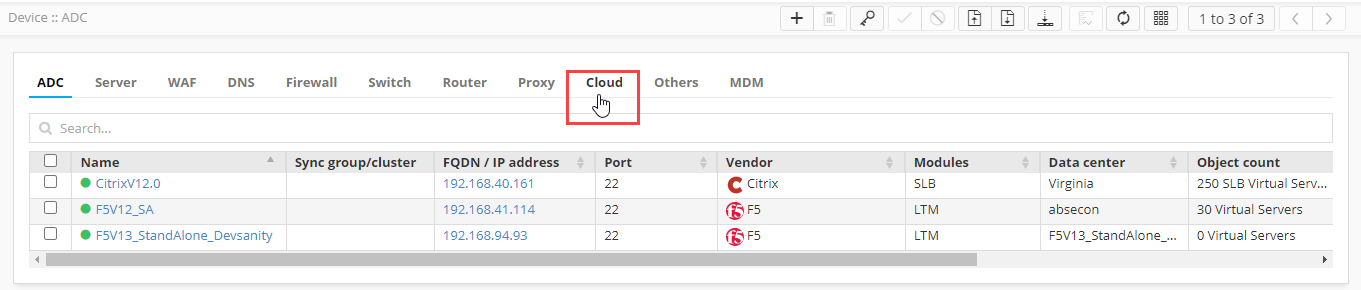
To navigate to the cloud device inventory, click
Cloud.
-
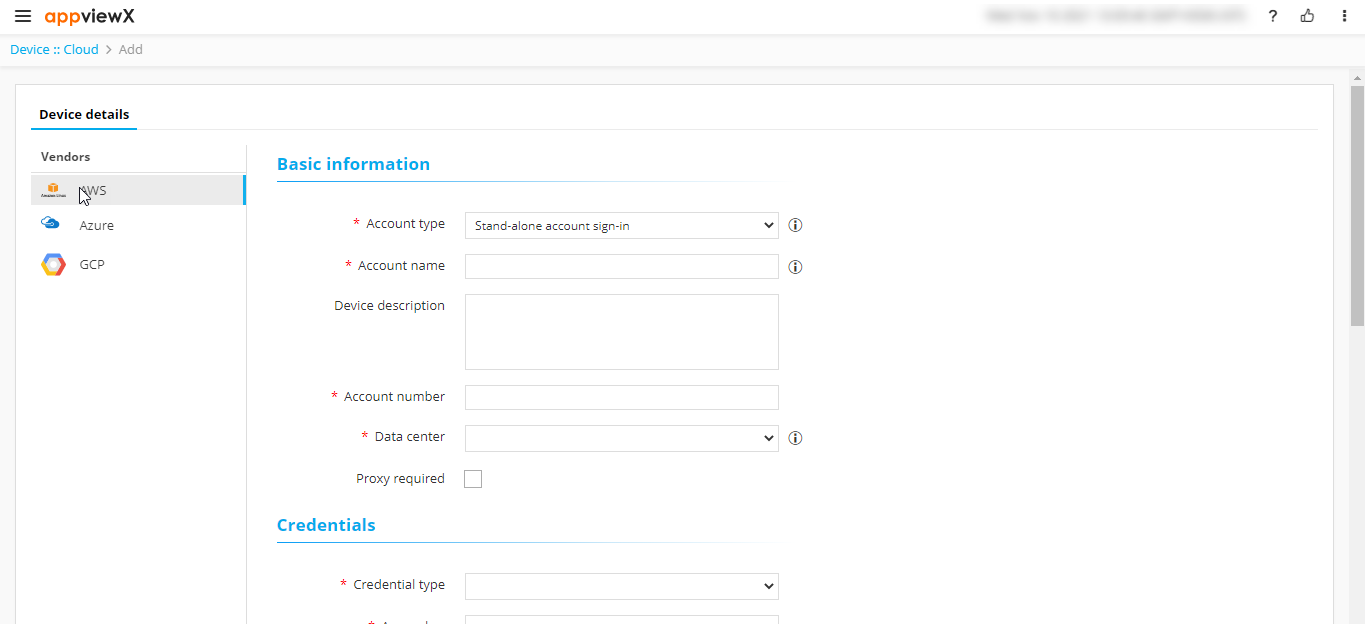
On the Device :: Cloud > Add page, from the list of Vendors,
select AWS.
-
Enter/Select the following Basic information:
Field Description Account type* From the dropdown list, from the following options, select the customer’s AWS account type:
- Stand-alone account sign-in: The user account and the resources are available in the same account.
- Cross account sign-in: Resources are
available across multiple accounts and users are
given role-based access.Note: Currently, for version 21.1, we do not include support for the cross account sign-in.
Account name* Enter the customer’s unique AWS account name.
Constraints:
- A duplicate account name should not exist in the cloud inventory.
- The account name should include only alphanumeric and period (.) characters.
Device description Enter a description of the device to be added. Account number* Enter the customer’s AWS account number. Data center* From the dropdown list, select the data center through which communication with the Certificate Authority will be established. Proxy required To use a proxy server for communication, select this checkbox. -
Enter/Select the following Credentials-related information:
Field Description Credential type* From the dropdown list, from the following options, select the credential type:
- Manual Entry: Manually enter the access and secret key for the customer’s AWS account)
- Credential List: CyberArk: Automatically retrieve the customer’s AWS key details from CyberArk
Access key* Enter the access key for the customer’s AWS account.
Note: This field is displayed only when Credential type is set to Manual Entry.:Secret key* Enter the secret key for the customer’s AWS account.
Note: This field is displayed only when Credential type is set to Manual Entry.Credential name* If the customer’s AWS credentials are stored in CyberArk, from the dropdown list, select the CyberArk credential name.
Note: This field is displayed only when Credential type is set to Credential List - CyberArk. -
Enter/Select the following details for the Amazon Cloud Service
Settings:
Field Description Services* According to the type of the new cloud device being added, select the corresponding Amazon Cloud Service for the device. Default region* Based on the customer’s requirement, select the default region in which the customer’s AWS cloud account is deployed. AppViewX will use this region to communicate with the other (geographically farther) regions. Service region* Service regions are regions that are supported by the selected service.
From the dropdown list, select the service regions that should be scanned for certificates.
Note: To be able to fetch and select from the available regions, ensure that the credentials have been provided in the Credentials section.Cert sync Select from one of the following options:
- Managed: AppViewX will connect with the customer’s AWS account and discover certificates. These certificates will be added to the inventory. Users with the relevant permissions can then perform the required certificate-related actions.
- Monitored: AppViewX will connect with the customer’s AWS account and discover certificates. These certificates will be added to the inventory where the users will be allowed to only view the certificates.
- Ignored: AppViewX will connect with the customer’s AWS account but certificate discovery will be disabled.
- Click Add.