Configuring Custom CA
To configure the custom CA,
- Log in to AppViewX application with valid credentials.
- Click the menu button located in the upper left corner of the screen.
The left navigation pane appears.
-
Click CERT+.
The CERT+ left navigation pane appears.
- Expand ADMINISTRATION.
-
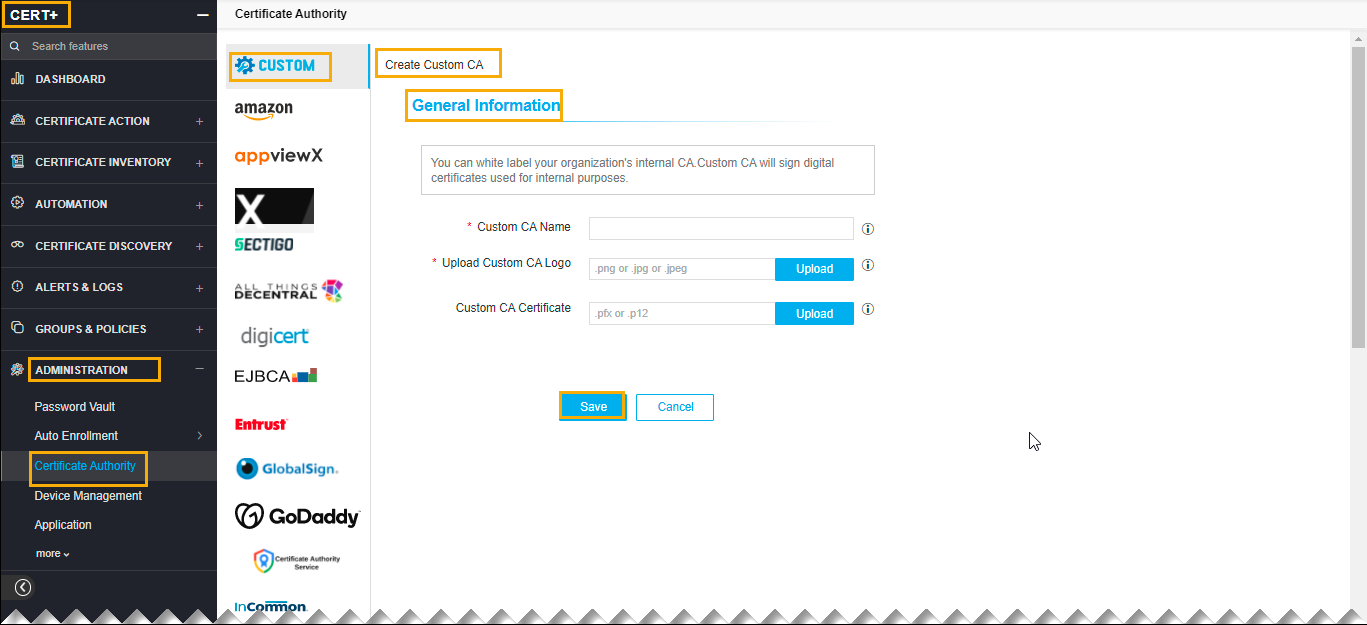
Click Certificate Authority, and then select
Custom.
The Certificate Authority home page appears.
-
Update the following details in the General Information section
as described in the table:
Name Description *Custom CA Name A unique name to identify the CA name.
Note: No special characters allowed.*Upload Custom CA Logo Upload a logo for the custom CA. This logo will appear in the product representing the custom CA.
Custom CA Certificate Upload a certificate for the custom CA. This certificate will become the root certificate.
Note: The <.pfx> and <.p12> are certificate types are supported.Note: The asterisk (*) symbol indicates a mandatory field.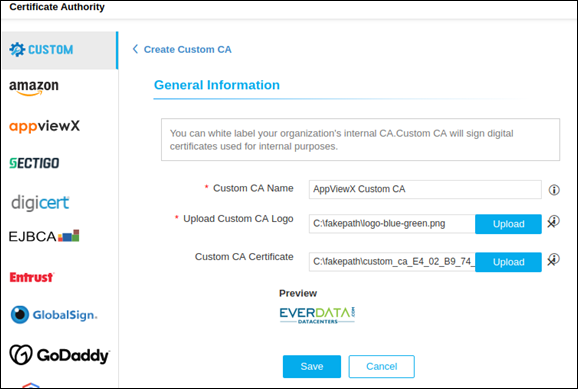
-
Once the logo and certificate are uploaded, the entered CA will appear in the CA list
with the logo presented.
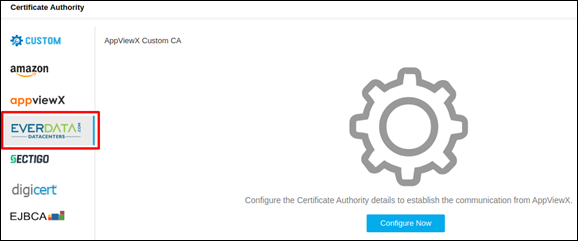
- Once the logo is added, users can click Configure Now to input the CA details.
-
Update the following details in the General Information section
as described in the table:
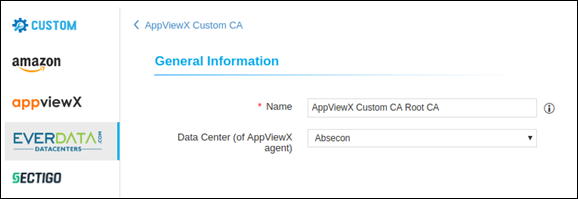
Name Description *Name Client authentication certificate for API communication.
Data Center (AppViewX's CA agent) Select the data center through which the CA communication needs to happen.
Note: The asterisk (*) symbol indicates a mandatory field. -
Update the following details in the ROOT CSR
parameters section as described in the table:
Name Description Common Name The common name of the root certificate.
Note:- Use Asterisk (*) for the host part of the FQDN to enforce the domain. For example, *.domain.com will only allow users to request certificates with domain domain.com.
-
Allowed Special Characters: Asterisk (*), Hyphen (-), Period (.)
Algorithm Type of the root certificate.
Hash Function The hash function for the root certificate.
Organization Unit Name of the Organisation unit.
Key Length Key length for the root certificate.
Organization Organization attribute for the root certificate.
Locality Locality attribute for the root certificate.
State or Province State attribute for the root certificate.
Country Country attribute for the root certificate.
Email Address Email address for the root certificate.
Note: The asterisk (*) symbol indicates a mandatory field. -
Update the following details in the Validity section as
described in the table.

Name Description *Start Date Start date of the certificate issuance.
*End Date End date of the certificate issuance.
Note: The asterisk (*) symbol indicates a mandatory field. -
Click Save.
Once the setting is saved, the user will be directed to the root certificate submission holistic view as below.
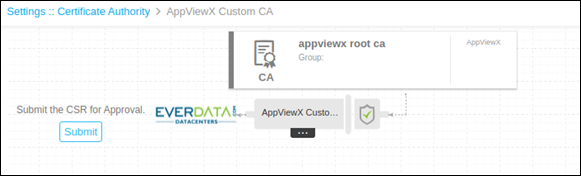
- Users can submit and fetch the root certificate.
-
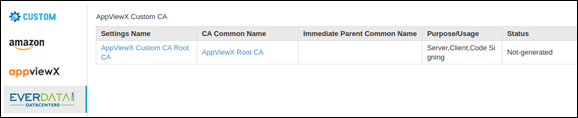
On the CA setting page user can see the status of the created setting as shown
below.