Generating Manual CSR for Server Certificate
To generate a manual CSR for the server certificate,
- Log in to AppViewX application with valid credentials.
- Click the menu button located in the upper left corner of the screen.
The left navigation pane appears.
-
Click CERT+.
The CERT+ left navigation pane appears.
- Expand CERTIFICATE ACTION.
-
Select Generate CSR, and then
Server.
The Generate CSR:Server page appears.
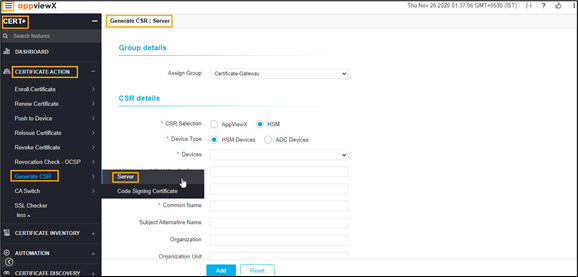
- In the Group details section, select the Assign Group from the dropdown list that you want to assign a CSR to the desired group of certificates.
-
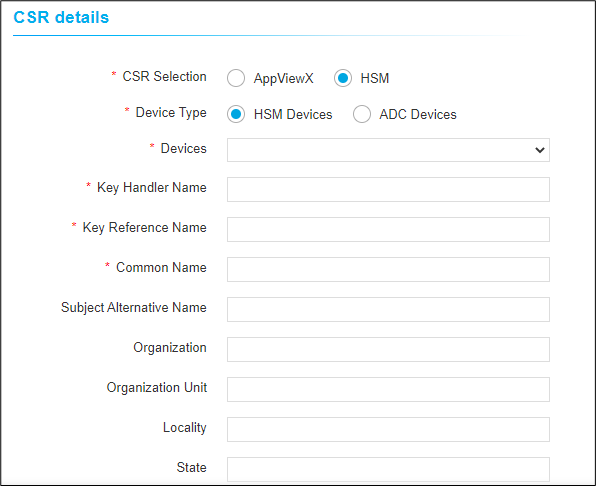
In the CSR details section, select/enter the details as follows:
 The following table describes the options available in the CSR Parameters section:
Option Description *CSR Selection Select the key generation of CSR as required. The possible selections are:
- AppViewX
- HSM.
*Device Type Select the type of device as required:
Options are:
- HSM Devices
- ADC Devices.
*Device Select the device from the dropdown list. *Key Handler Name Enter the name of the key handler. *Key Reference Name Enter the name of the key reference. *Common Name Name that is to be present in the certificate.
Note: No special characters allowed except en dash (_) and hyphen (-).Subject Alternative Name Enter the alternative subject name. For example, DNS or IP address.
Note:-
Multiple values must be separated by a comma.
-
The cumulative count SANs appears in the certificate property window from the holistic view.
*Organization The Organization name that to be present in the certificate. This field will be auto-filled and editable based on the configuration in the selected group’s policy. Organization Unit The Organization Unit name that to be present in the certificate. This field will be auto-filled and editable based on the configuration in the selected group’s policy. Locality The Locality name that to be present in the certificate. This field will be auto-filled and editable based on the configuration in the selected group’s policy. State The State name that to be present in the certificate. This field will be auto-filled and editable based on the configuration in the selected group’s policy. *Country The Country name that is to be present in the certificate. This field will be auto-filled and editable based on configuration. It must be a two-letter country code (for example, US, and so on). Email Address The email contact details of the person responsible for maintaining the certificate. Enter the valid e-mail address. *Validity Enter the number in this field and select the entered validity list to be in Days, Months, and Years from the dropdown lists. Challenge Password The challenge password for the certificate. Enter if it is applicable. Password must contain at least one alphabet (uppercase and lowercase), one number, and one special character. Confirm Password The password to confirm the Challenge Password entered and match with the Challenge Password. *Hash Function The Hash function with which the CSR has to be signed. For Microsoft Enterprise CA, the targeted CA decides the hash function while issuing the certificate. This field will be auto-filled and editable based on the configuration in the selected group’s policy. *Key Type The key type is used while creating a private and public key pair. This field will be auto-filled and editable based on the configuration in the selected group’s policy. *Bit Length The bit length is used while creating a private and public key pair. This field will be auto-filled and editable based on the configuration in the selected group’s policy. Note: The asterisk (*) symbol indicates a mandatory field. -
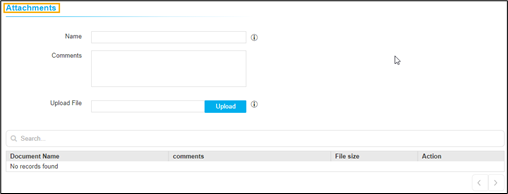
In the Attachments section, select/enter the details as
follows:
 The following table describes the options available in the attachments section:
Field Description Name Enter the alternate name for the document to be uploaded. Comments Enter the comments in this field.
Note: You can enter a maximum of 2000 words in the field.Upload File Click the Upload button to select the file. Note: Maintains if there are any additional documents to be maintained in AppViewX. These documents will not be submitted to CA. It is a non-mandatory section. - You can use the Search option to find the attachments from the attachment list.
- Click Add to generate the CSR and add it to the intended group.