Integrating the Fortanix HSM with the AppViewX
- Login to the AppViewX server on which the AppViewX Cloud Connector is installed.
- From the command line interface, navigate to the properties folder. Path: {CC_INSTALLATION_PATH}/deps/properties
-
Open the hsm file using the following command:
vi hsm -
Uncomment the following lines:
export FORTANIX_PKCS11_CONFIG_PATH= /appviewx/dependencies/hsm/fortanix/pkcs11.conf echo "FORTANIX Config Path : $FORTANIX_PKCS11_CONFIG_PATH" - Login to the AppViewX UI using valid credentials.
-
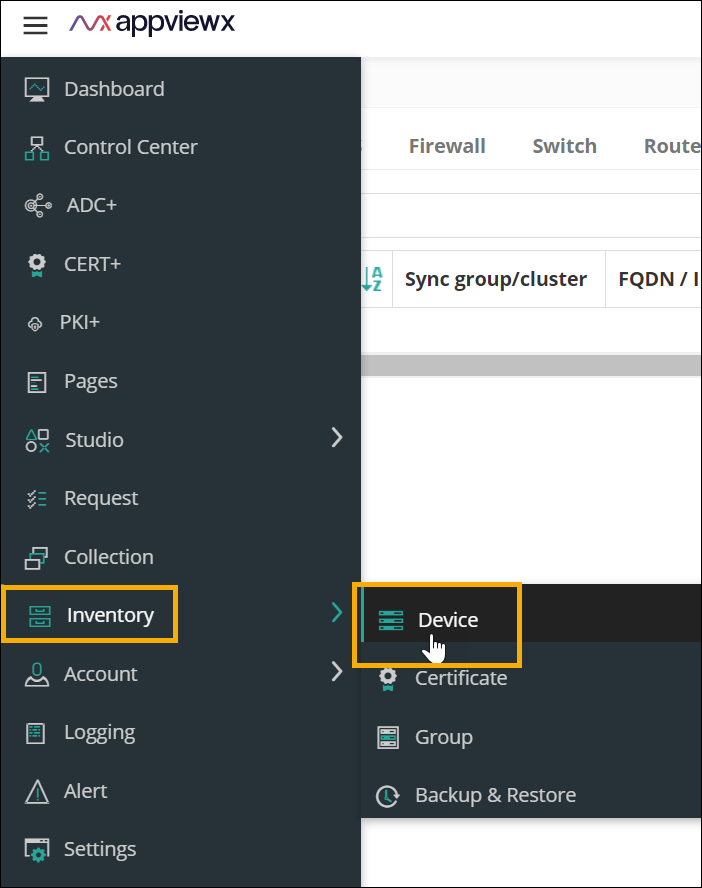
From the top left corner of the screen, click

-
From the menu displayed, select Inventory >
Device.
 The Device :: ADC page is displayed.
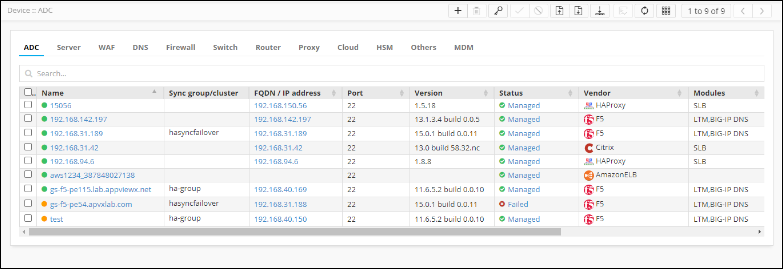
-
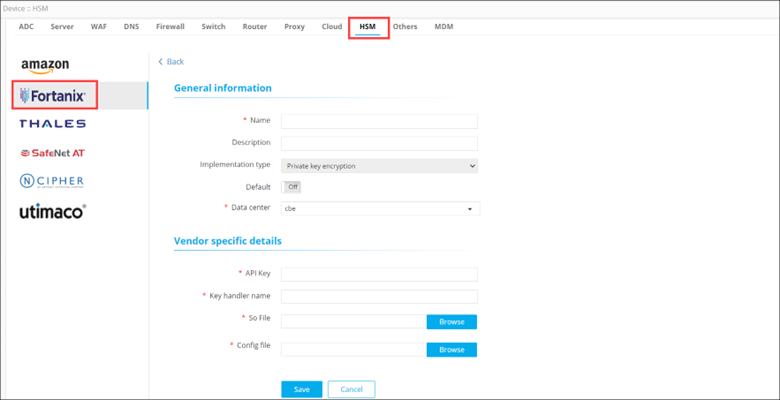
Under the HSM tab, from the navigation pane on the left, select
Fortanix.
-
Click Configure now.
The Device :: HSM page is updated to display the fields required to integrate Thales-DPoD with the AppViewX SaaS.
-
In the General Information section, enter/select the following
details:
Field Description *Name Enter a name for this integration. Description Enter a description for this integration. Implementation type Select an implementation type from the options available in the dropdown menu. Default Turn on the toggle to make this the default setting. *Data center Select the required data center from the list of applicable values in the dropdown menu. All * marked fields are mandatory. -
In the Vendor specific details section, enter/select the following
details:
Field Description *API Key Enter the API key. *Key handler name A reference name to create a Master Encryption key in HSM. This enables us to pick the right MEK for crypto operations over KEK. *So file The SO file is used to facilitate the communication between the HSM and AppViewX. To upload the .so file: - Click Browse.
- Navigate to the location of the .so file.
- Select the .so file and click Open.
*Config file The Config file is used to facilitate the communication between the HSM and AppViewX. To upload the .conf file: - Click Browse.
- Navigate to the location of the .conf file.
- Select the .conf file and click Open.
All * marked fields are mandatory. - Click Save.
-
Scroll to the end of this page to view the table that will be populated with
all the details of this HSM. If the HSM has been configured correctly, the
Status for the HSM will be set to Available (after checking the
encryption and decryption logic). If the Status is Not Available:
- Check the installation path for the HSM.
- Ensure that all required permissions have been enabled.
- If the implementation type is CSR Generation, refer to the Cert+ User Guide for steps on how to generate a CSR.