Dashboard Actions
This section elaborates on dashboard actions and their corresponding functionalities.
Sharing a Dashboard
To share a dashboard:
- Go to Menu > ADC+ > TRAFFIC MANAGEMENT > Dashboards.
- If you have more than one dashboard, in the dashboard table, click the name of the one you want to share.
-
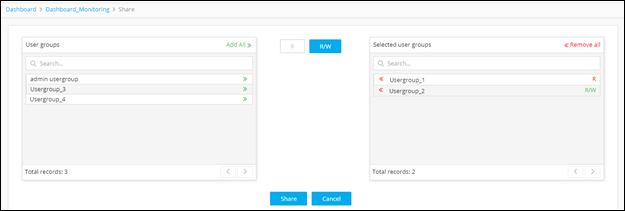
When the dashboard opens, click the
 (Share) button in the Command bar at the top of the screen. The
Share screen appears.
(Share) button in the Command bar at the top of the screen. The
Share screen appears.
-
Begin the assignment process by clicking the
 (Read-Only) button. Each role you assign
next will have read-only permissions within the dashboard.
(Read-Only) button. Each role you assign
next will have read-only permissions within the dashboard.
-
In the Roles field, click the
 (Assign
item) icon beside each role you want to share the dashboard with on
a read-only basis.
(Assign
item) icon beside each role you want to share the dashboard with on
a read-only basis.
-
Click the
 (Read-Write) button. Each role you assign next will have
read/write permissions within the dashboard.
(Read-Write) button. Each role you assign next will have
read/write permissions within the dashboard.
-
In the Roles field, click the (Assign
item) icon beside each role you want to share the dashboard with on
a read/write basis.
-
Click the Share button to finish.
Delete a Dashboard
- Go to Menu > ADC+ > TRAFFIC MANAGEMENT > Dashboards.
- If you have more than one dashboard, in the dashboard list, click the name of the one you want to delete.
-
When the dashboard opens, click the
 (Delete)
button in the Command bar at the top of the screen. A screen pops up,
warning you that deleting a dashboard also deletes all widgets on the
dashboard.
(Delete)
button in the Command bar at the top of the screen. A screen pops up,
warning you that deleting a dashboard also deletes all widgets on the
dashboard.
- Click Yes to continue.
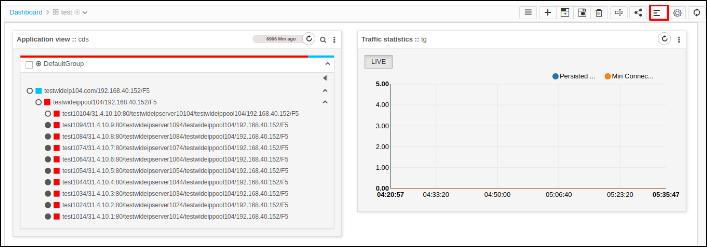
Save a Widget
- Log in to the AppViewX application with valid credentials.
- Click the menu button.
- Select Menu > ADC+ > TRAFFIC MANAGEMENT > Dashboards.
- Go to any user defined dashboard.
- Users can change the order of the widgets by drag and drop.
-
Click Save Widgets.
Rename a Dashboard
- Go to Menu > ADC+ > TRAFFIC MANAGEMENT > Dashboards.
- If you have more than one dashboard, in the dashboard list, click the name of the one you want to rename.
-
When the dashboard opens, click the
 (Rename dashboard) button in the Command bar at the top of the
screen.
(Rename dashboard) button in the Command bar at the top of the
screen.
- On the Rename dashboard screen that pops up, enter a new name for the dashboard.
- Click Update to finish.
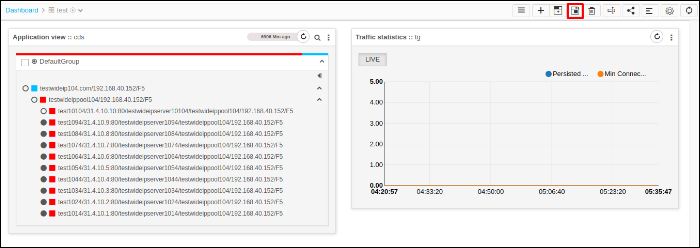
Align Widget
- Log in to the AppViewX application with valid credentials.
- Click the menu button.
-
Select Menu > ADC+ > TRAFFIC MANAGEMENT >
Dashboards.
Consider the widget in the dashboard is misplaced.
-
To align dashboards in their place click the Align icon.
Settings
- Log in to the AppViewX application with valid credentials.
- Click the menu button.
- Select Menu > ADC+ > TRAFFIC MANAGEMENT > Dashboards.
- Click the Settings icon.
-
Users can change the setting by clicking the corresponding slider.
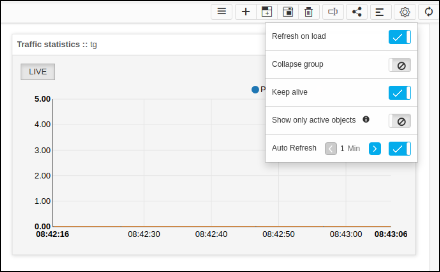
- Refresh on load - If this setting is enabled, each time the dashboard loads, it will trigger the refresh call automatically to load the latest data.
- Collapse group - If this setting is enabled, all the groups inside the widgets on the dashboard will display in collapsed format by default.
- Keep alive - If this setting is enabled, the auto session expiry function will be disabled. Using this user can monitor the objects without session timeout interruptions.
- Show only active - If this setting is enabled, the objects of an active device alone be displayed from the configured objects. It is applicable only for Application view widget.
- Auto refresh - If this setting is enabled, dashboard refresh call will be triggered automatically in the given interval. Users can configure the auto refresh interval.