Server Certificate Enrollment
Server certificate enrollment refers to the process of creating a digital ID for an application/web server hosted in the network. It starts with the generation of a key pair (private and public key) and CSR, and ten submitting the CSR to the required CA to procure a certificate. CERT+ supports the generation of keypair on the device, HSM, AppViewX. Users can also upload the CSR for enrolling for a digital certificate.
To enroll a server certificate:
-
From the CERT+ main menu, under CERTIFICATE ACTION, select
Enroll Certificate >
Server
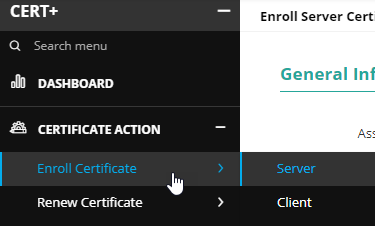 The Enroll Server Certificate page is displayed.
 - In the General Information section, from the dropdown list, select the required Assign Group.
-
Enter/Select the CA Details.
Table 1. Field descriptions for the CA Details section Options Description *Certificate Authority Note: Depending on the CA selected, the rest of the fields will be displayed.From the dropdown list, select the required certificate authority (CA).Note: For enrolling certificates with policies using Google CA, consider the following points:Certificate Enrollment - Strict Policy-
The Common Name will not be pre-filled from the policy.
-
The following validation will be seen based on strict policy guidelines.
-
If the Common Name’s domain name is not present in the Allowed Domain Name list, an error validation will be shown upon saving the policy details.
-
Certificate Enrollment - Suggestive Policy-
The Common Name will not be pre-filled from the policy
-
The following validation will be seen based on strict policy guidelines.
-
If the Common Name’s domain name is not present in the Allowed Domain Name list, the non-compliant policy will be created.
-
If the Common Name’s domain name is present in the Blocked Domain Name list, an error validation will be shown upon saving the policy details.
-
Note: For Certificate Authority = EJBCA, an additional set of fields, Vendor specific details is displayed after the CA Details section. Instructions on specifying the vendor specific details are covered in step 4.*Renew Automatically Note: Changing the group inherited renew period overwrites the renewal period for this certificate.Select the toggle button to On or Off.
- When the toggle is enabled, the Start Renewing option will be enabled.
- Enter the number of days to renew the certificate automatically.
*CA Account From the dropdown list, select the CA account to which the certificate enrollment request will be submitted. Certificate Type From the dropdown list, select the required certificate type. *Division Note: This field is applicable only for Digicert CA.From the dropdown list, select the division with which the certificate willl be enrolled.Certificate Profile Note: This field is applicable only for AppViewX CA and Google CA.From the dropdown list, select the profile with which the certificate must enroll.
*Issuer Location Note: This field is applicable only for Google CA.From the dropdown list, select the issuer location associated with the CA account.
*Issuer Name Note: This field is applicable only for Google CA.From the dropdown list, select the issuer name for issuing the certificate.
*Connector Name Enter the friendly name for the CA connector. On saving this form, the name entered here will be displayed in the holistic view.
Description Note: You can enter a maximum of 2000 characters in this field.Enter the description in this field.
*CSR Generation Note: This field is applicable for all CAs except Amazon.From the following options, select the required method for generating the CSR:
- AppViewX: Private key and CSR will be created in AppViewX based on CSR parameters given.
- Upload CSR: You can upload a
file that contains the CSR details. This source file
will be used to populate the CSR parameters, which
will then be submitted to the CA.
- Under CSR Generation, select Upload
CSR.
The Please paste your CSR field is displayed.
- From the Please paste your CSR field, select Browse.
- Navigate to the location of your CSR file, and click Open.
- Click Upload.
- Under CSR Generation, select Upload
CSR.
- HSM: Note: This option is disabled when Certificate Authority = Google.To generate the private key and the CSR, based on the CSR parameters given, in an HSM device:
- Under CSR Generation, select HSM.
-
Fields for gathering your HSM-related inputs are displayed.
Table 2. To generate the private key and the CSR, enter/select the following details: Field Description *Device Type From the dropdown list, from the following options, select the type of device on which the private key and the CSR will be generated: - HSM Devices
- ADC Devices
*Vendors Note: This field is applicable only when Device Type = ADC Devices.*Devices From the dropdown list, select the required HSM/ADC device. Note: This field is populated based on the Device Type and Vendors selected.*Key Handler Name Note: This field is applicable only when Device Type = HSM Devices.Enter the key handler name.*Key Reference Name Note: This field is applicable only when Device Type = ADC Devices.Enter the key reference name.
- End Point: Note: This option is disabled when Certificate Authority = Google.
Table 3. To generate the private key and the CSR in the selected end point device, enter/select the following inputs: Field Description Category From the following options, select the ADC device category: - ADC
- Server
- Firewall
Vendor From the dropdown list, select the vendor of the end point device. Note: This field is populated based on the Category selected.*Devices This field lists the end point devices present in your environment that belong to the above selected Category and Vendor. From the dropdown list, select the end point device on which you want to generate the private key and the CSR.
Tenant Note: This field is applicable only when Category = ADC.Enter the tenant ID.CSR Location Note: This field is applicable only when Category = Server.Partition Note: This field is applicable only when Category = Firewall.*CSR File Name Enter the name of the file that contains the CSR parameters. Note: Since the extension is already included in the field, ensure that you enter the file name without the file extension.*Key File Name Enter the name of the file that contains the private key details. Note: Since the extension is already included in the field, ensure that you enter the file name without the file extension.
-
-
For the EJBCA certificate authority, enter/select the vendor
details.
Note: This section is displayed for only the following CAs:
Table 4. Field descriptions for the Vendor Specific Details section Field Description * End Entity Profile Name From the dropdown list, select the end entity profile name. End entity user name Enter the name of the end user entity.
* Issuer Common Name From the dropdown list, select the issuer common name. *Certificate Profile Name From the dropdown list, select the certificate profile name. Procedures Note: This field is applicable only when Certificate Authority = Nexus CA.From the dropdown list, select the required procedure.In addition to the default procedure, the dropdown list displayes only the procedures mapped to the server.
-
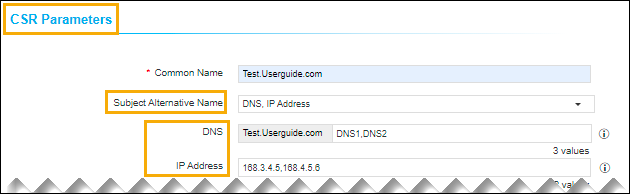
For the certificate being enrolled, enter the CSR Parameters.
Table 5. Field descriptions for the CSR Parameters Field Description Replace PSE File The Replace PSE File checkbox enables users to generate the CSR or private key in the Server. This checkbox is displayed only in the case described below: -
Select the CSR Generation radio button as Endpoint.
-
Select Category as Server, Vendor as ABAP or Web Dispatcher The Profiles dropdown is the only other field displayed below it and is populated with a list of .pse file names.
-
Select the required Profile from the dropdown. Based on the values selected, the fields in the CSR Parameters section are auto-populated.
The Replace PSE File checkbox is disabled by default and the SAN details fields in CSR Parameters section are also disabled. Selecting the checkbox will make the SAN details enabled and allow for values to be updated.
*Common Name Enter the certificate's common name. The common name is one of the key values of Certificate Signing Request (CSR) to be present in the certificate. For example, <appviewx>.
Note: No special characters allowed except en dash (_) and hyphen (-).Subject Alternative Name Enter/From the dropdown list, select the Subject Alternative Name for the certificate being enrolled. You can see the count of subject alternative names (SAN) available for a certificate in the CSR parameter section, inventory grid, and CA connector page.
 Note:
Note:- Multiple values must be separated by a comma.
-
The cumulative count SANs is displayed in the certificate property pop-up window from the holistic view.
*Organization The organization name is one of the CSR parameters to be present in the certificate. This field will be auto-filled and editable based on the configuration in the selected group’s policy. Organization Unit Organization Unit name is one of the CSR parameters to be present in the certificate. This field will be auto-filled and editable based on the configuration in the selected group’s policy. Locality The locality name is one of the CSR parameters to be present in the certificate. This field will be auto-filled and editable based on the configuration in the selected group’s policy.
State The state name is one of the CSR parameters to be present in the certificate. This field will be auto-filled and editable based on the configuration in the selected group’s policy. Country Country name is one of the CSR parameters to be present in the certificate. This field will be auto-filled and editable based on configuration. It must be a 2-letter country code (for example, US, and so on). Email Address Enter a valid email address of the person responsible for maintaining the certificate. *Validity To specify the validity of the certificate being enrolled: - From the first dropdown list, select the number of days/months/years.
- From the second dropdown list, select the unit of
the duration from the following values:
Days/Months/Year.For example, if the validity of the certificate is 2 months:
- From the first dropdown list, select 2.
- From the second dropdown list, select Months.
Challenge Password Challenge password is one of the CSR parameters to be present in the certificate. Password must contain at least one alphabet (uppercase and lowercase), one number, and one special character. Confirm Password Reenter the password entered in the Challenge Password field. *Hash Function The Hash function with which the CSR has to be signed. Any information specific to any CA or vendor has to be covered in the Note section. This field will be auto-filled and editable based on the configuration in the selected group’s policy. Note: For Certificate Authority = HydrantID, irrespective of the hash function selected, by default, the CA returns a certificate with SHA256. Therefore, admins must restrict users from creating a certificate with a hash function other than SHA256. To accomplish this, create policy with a single hash value (SHA256).*Key Type The key type is used while creating a private and public key pair. This field will be auto-filled and editable based on the configuration in the selected group’s policy. *Bit Length The bit length is used while creating a private and public key pair. This field will be auto-filled and editable based on the configuration in the selected group’s policy. -
-
In the Attachments section, upload any additional documents that are
relevant to the enrollment of the certificate (for example, approval
emails).
Table 6. Field descriptions for the Attachments section Field Description Name Enter a name for the document. This need not be the actual name of the document; it can be an alternate name that will be used for reference only. Comments Enter any details relevant to the document being attached. Note: A maximum of 2000 characters can be entered in this field.Upload File To upload an attachment: - Click Upload.
- Navigate to the location of the document to be uploaded.
- Select the document to be document and click
Open.
The selected document is uploaded and listed in the table displayed below these fields in the Attachments section.
Tip: If you've uploaded multiple attachments, use the Search field to find the required one.
-
In the Certificate Attributes section, in the
testAttributelabelTest field, enter organization-specific values that
need to be mentioned along with the CSR.
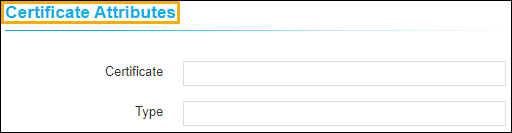 These values will not be a part of the certificate but will be available in the AppViewX inventory. For example, cost center.Note: This additional information can be used to filter certificate details in the inventory.
 -
Enter the relevant details in the Generic Fields. These are default
fields for maintaining the IP address and device information, if required.
Table 7. Field descriptions for the Generic Fields Field Description Device Name Enter the name of the device. Application IP Address Enter the IP address of the application. -
In the Vendor-Specific Details section, enter the
CA-specific details. Some of the CAs will expect additional details other than
CSR parameters for their operational purposes.
- By default, the Certificate ID is auto-populated based on the value entered in the Common Name field (in the CSR Parameters section).
- The Certificate ID can be modified by the user.
- If the user edits the Certificate ID, any change to the Common Name will not reflect in the Certificate ID.
- If the user deletes the Certificate ID, the value of the Certificate ID field is set to the Common Name suffixed with the timestamp.
-
Click Add.
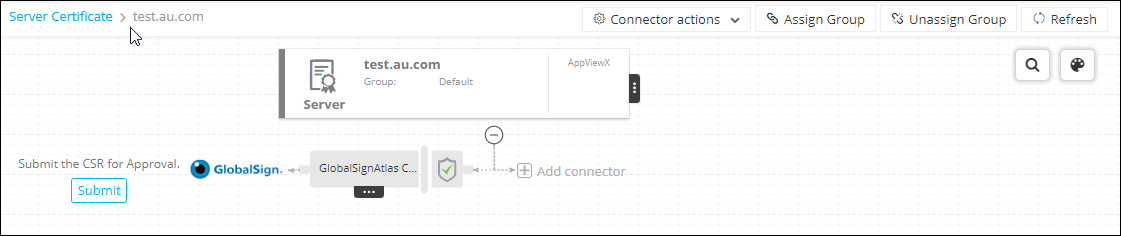
Once the details are added, you will be redirected to a page where the CSR and CA details are added as a connector. This page is called the holistic view and from here, any action on the certificate can be performed including provisioning the certificate to a server.
-
On the holistic view, click the Submit button to trigger
the request.
The submit action is triggered and the Submit dialog box is displayed.
-
Enter your comments in the text field and click Yes.
If the approval required option is enabled in the CA policy, the request is moved to the Approve and Implementation stages.
-
Click Approve to proceed.
.jpg) The Approve dialog box is displayed.
The Approve dialog box is displayed.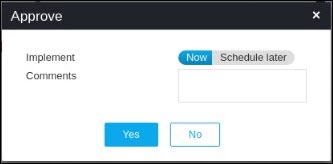
-
Enter your comments in the text field.
Note: If the workflow request has to be approved automatically in the future, click the Schedule later button .
-
Click Yes.
Once the approval process is complete, the Implement option is displayed in the holistic view.
-
Click Implement.
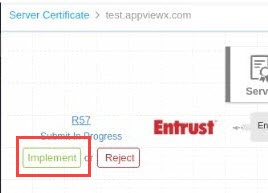 The Implement dialog box is displayed.
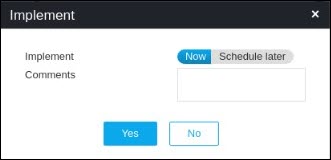
-
Enter your comments in the text field.
If the workflow request has to be implemented automatically in the future, click Schedule later .
-
Click Yes.
CSR Submission to CA is in progress.
-
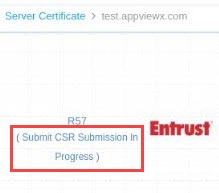
Once the CSR submission is successful, the request state will be changed to Submit certificate - retrieval in progress state.If the enrollment request is compliant with conditions defined and auto-approval enabled in the targeted CA, the certificate will be fetched in a few seconds.
If auto-approval disabled in the targeted CA, you will have to be logged into the CA and approve the request.
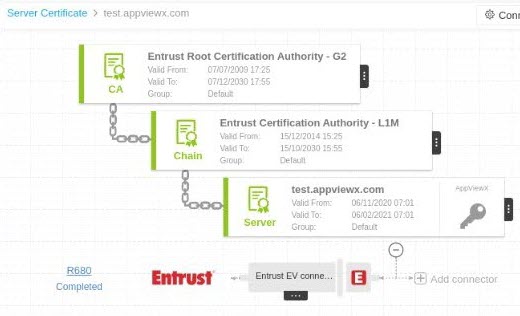
Once the certificate is issued successfully, the certificate will be retrieved into AppViewX.
Enrolling Certificates for GlobalSign Atlas CA
Prerequisites:
- Users should have read and write access to the account.
- User should have configured the CA account in AppViewX.
- Policy Creation and Certificate Profile is created according to the customer’s use case.
- Purpose/usage is mapped according to the extended key usage/validation policy
-
From the CERT+ main menu, under CERTIFICATE ACTION, select
Enroll Certificate >
Server
The Enroll Server Certificate page is displayed.
- In the General Information section, from the Assign Group dropdown list, select the group specific to the GlobalSign Atlas account (example: Default).
-
Enter/Select the CA Details
Table 8. Field descriptions for the CA Details section Field Name Description *Certificate Authority Select only the GlobalSignAtlas created in the CA setting page.
NOTE: The fields below are pre-populated based on the selection of the CA.
*API Credential Friendly Name Enter the API Credentials Friendly name (which is the CA Account name that will be used for the CA Policy and Enrollment) Certificate Profile Select from Server or Client. It is the Purpose/usage as mapped in the Certificate Authority. *Connector Name The connector name is populated by default and can be edited to distinguish from other connectors. *CSR Generation Select from the following option to enable the private key:
-
Appviewx – The private key will be generated by Appviewx
-
Upload CSR – Users can upload the private key. Selecting this value displays the Upload button to attach the certificate.
-
-
Enter/Select the CSR Parameters.
Table 9. Field descriptions for the CSR Parameters section Field Name Description *Common Name Enter the fully qualified domain name (FQDN) or common name that exactly matches the web browser. This value is pre-populated as configured in the policy.
NOTE: The only special characters allowed are asterisk (*), hyphen (-), and period (.).
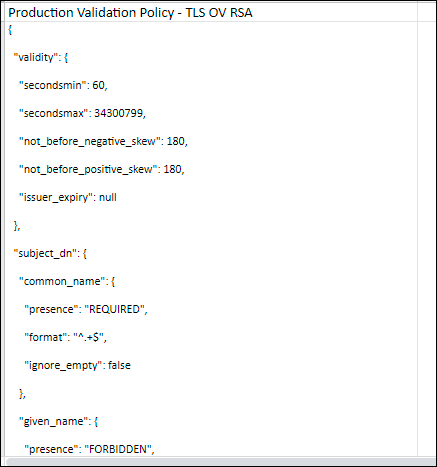
*Subject Alternative Name This field value is fetched from the validation policy of GlobalSign Atlas. The SAN consists of values DNS, Email, IP Address, and URL ( as supported by the validation policy.)
Selecting these values displays the respective fields.
-
The DNS field takes the value of the common name and other values can be added, but separated by comma.
-
The email address field takes multiple comma-separated email ids.
-
The IP Address field takes multiple comma-separated IP address values.
-
The URL field takes values set in the Allowed URI Subject Alternative Name in GlobalSign Atlas.
NOTE: the number of values for each of the above fields is set in the validation policy.
*Validity Validity value is pre-populated to a default value, the total number of days is specified in the GlobalSign Atlas validation policy.
NOTE: It currently supports value in either days or months.
*Hash Function The three dropdowns will only have values each, based on the validation policy. Select the appropriate values from the dropdown. *Key Type *Bit Length -
-
The Generic Fields section contains additional certificate
parameters that are specified in the validation policy. The fields may vary
depending on the validation policy and the field properties are as based on
the status specified in the policy (mentioned below).
-
If Status is “Static” for the CSR param,
Fields are displayed on the UI with values given in validation policy (read-only)
CSR parameters are not send to the CA
-
If Status is “Optional” for the CSR param
Fields are displayed on UI as optional field with the values given in validation policy (editable)
CSR parameters are sent to the CA
-
If Status is “Required” for the CSR param
Fields are displayed on the UI as mandatory field with the values given in validation policy (editable)
CSR parameters are sent to the CA
-
If Status is “Forbidden” for the CSR param
Fields are not displayed on the UI
CSR parameters are not sent to the CA
-
-
Click the Add button.
The CSR request page is displayed in the holistic view.
-
Click Submit.
The Submit dialog box is displayed.
-
Enter your comments in the text field and click
Yes.
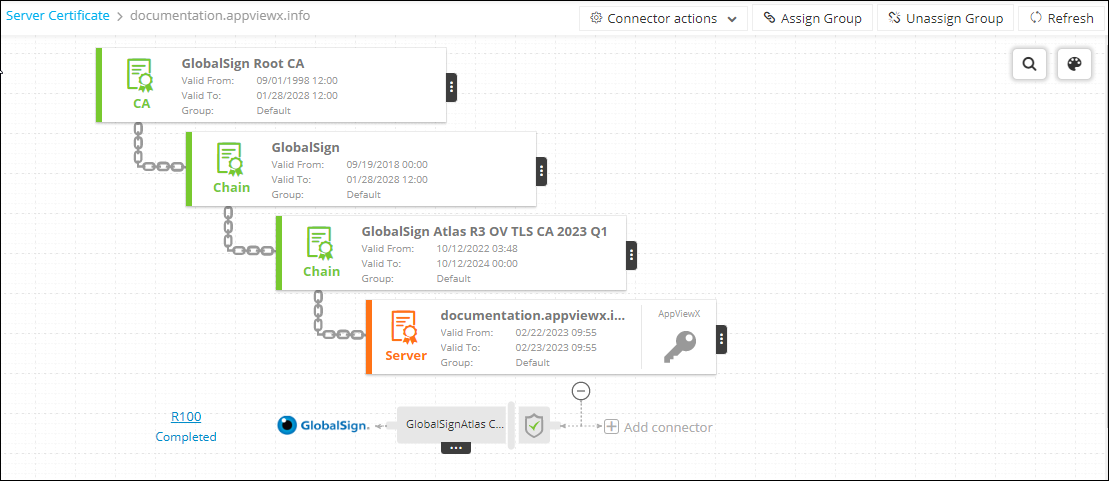
If auto-approved then the certificate is displayed as shown below
- For manual approvals, click Approve and Implement on the certificate page to complete the approval process.
- (Optional step) If the page load takes time, click Refresh from the top-right corner of the screen.
-
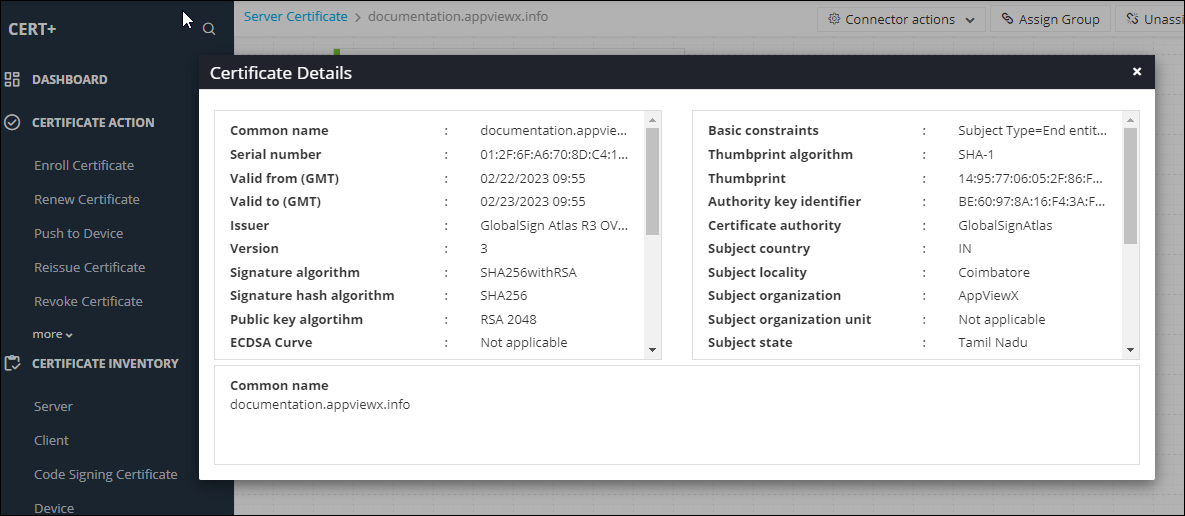
To view the certificate details, click on the Appviewx generated
certificate (Server).
 Once the certificate is received, a green dot is visible next to the common name of the certificate on the certificate list page. The green dot indicates that the certificate is valid. If the certificate request is generated but not approved the grey dot is visible next to the common name.
Enroll Cert for HashiCorp Vault CA
-
From the CERT+ main menu, under CERTIFICATE ACTION, select
Enroll Certificate >
Server
The Enroll Server Certificate page is displayed.
- In the General Information section, from the Assign Group dropdown list, select the group specific to Hashicorp Vault account (example: Default).
-
Enter/Select the CA Details.
Table 10. Field descriptions for the CA Details section Field Name Description *Certificate Authority Select only the Hashicorp Vault CA created in the CA setting page.
NOTE: The fields below are pre-populated based on the selection of the CA.
*Renew Automatically Select the toggle value to renew the certificate automatically.
NOTE: Changing the group inherited renewal period will overwrite the renewal period for this certificate.
The value is OFF by default.
*Regenerate Automatically Select the toggle value to regenerate the certificate automatically.
The value is OFF by default.
*CA Account Select the CA Account from the dropdown (This dropdown displayed the CA accounts created for open-source and enterprise accounts) *Namespace Select the desired namescape (single-select) from the list of namescape associated with the CA.
NOTE: For open-source accounts the namespace will be represented as a root (backslash “/”) and the dropdown will be non editable.
*Secret Engines Select any of the available secret engines mapped to either the APP ROLE or AWS. *Roles Select any of the available roles that are mapped to the secret engine. (Roles are mapped in the Hashicorp vault and fetched based on the selected values). *Connector Name The connector name is populated by default and can be edited to distinguish from other connectors. Description Enter a text description of 2000 characters. *CSR Generation Select from the following option to enable the private key:
- Appviewx – The private key will generate by Appviewx
- Upload CSR – Users can upload the private key. Selecting this value displays the Upload button to attach the certificate.
NOTE: The HSM and Endpoints are not currently supported for CSR generation.
-
Enter/Select the CSR Parameters.
Table 11. Field descriptions for the CSR parameters section Field Name Description *Common Name Enter the fully qualified domain name (FQDN) or common name that exactly matches the web browser. This value is pre-populated as configured in the policy.
NOTE: The only special characters allowed are asterisk (*), hyphen (-), and period (.).
*Subject Alternative Name The SAN consists of values DNS, Email, IP Address, and URL. These are enabled in the role in the Hashicorp.
Selecting the three values displays the respective fields.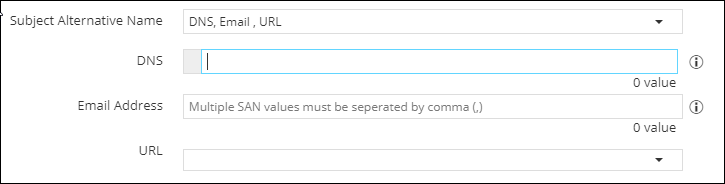
The DNS field takes the value of the common name and other values can be added, but separated by comma.
The email address field takes multiple comma-separated email ids.
The URL is a dropdown field with pre-populated values set in the Allowed URI Subject Alternative Name in Hashicorp Vault.
*Validity (in days) Validity value is pre-populated from the Roles configured in the Hashicorp Vault.
NOTE: Validity cannot be greater than the configured Max TTL value.
Challenge Password Not to be used for Hashicorp Vault Confirm Password Not to be used for Hashicorp Vault *Hash Function These three dropdowns will only have a single value each, based on the Role selected in the CA Details section. *Key Type *Bit Length -
Click Add.
The CSR request page is displayed in the holistic view.
-
Click Submit.
The Submit dialog box is displayed.
-
Enter your comments in the text field and click
Yes.
The CSR is sent for approval to Hashicorp Vault, and the certificate is displayed
 .
. - (Optional step) If the page load takes time, click the Refresh button from the top-right corner of the screen.
-
To view the certificate details, click on the certificate icons
respectively.
Once the certificate is received, a green dot is visible next to the common name of the certificate in the certificate list page. The green dot indicates that the certificate is valid. If the certificate request is generated but not approved the grey dot is visible next to common name.
