Configuring Signing Policy
-
Go to
 (Menu) > SIGN+ > GROUPS & POLICIES > Signing Policy.
The Signing Policy page is displayed.
(Menu) > SIGN+ > GROUPS & POLICIES > Signing Policy.
The Signing Policy page is displayed. - From the top-right corner of the page, click Create.
-
Enter/select the Policy details.
Table 1. Field description for the Policy Details section Field name Description *Policy Name Provide a unique name for the signing policy. No special characters other than ‘.’, ‘-’,’_’ are allowed. The name should not start with special characters. *Hash Function Select the hash function you want to configure for code signing: [Dropdown Options - SHA-256] Timestamping Choose a trusted timestamping authority from the dropdown list: [Dropdown Options - GlobalSign, Symantec (now part of DigiCert), Entrust SwissSign, Comodo CA (now Sectigo), DigiCert, IdenTrust, QuoVadis Global, GlobalSign Advanced, Other ]. If you choose Other, kindly provide the timestamping URL.
*Signing Type Choose between Hash Based or File Based signing File Types Note: This field is displayed when the Signing Type is set as File Based.Select one or more file types that should be signed using the signing policy. Supported file types include PS1, EXE, CAT, MSI, JS, JAR, APK, among others.Restriction Type Select None or between IP-based restriction or IP range-based restriction. List of IP's Note: This field is displayed when the Restriction Type is set as IP.If you selected IP-based restriction, enter a list of valid individual IP addresses at subnet or system level.Start IP *End IP
Note: This field is displayed when the Restriction Type is set as IP Range.If you selected IP range-based restriction, enter the start and end IP addresses for the required range.Note: The asterisk (*) symbol indicates a mandatory field. -
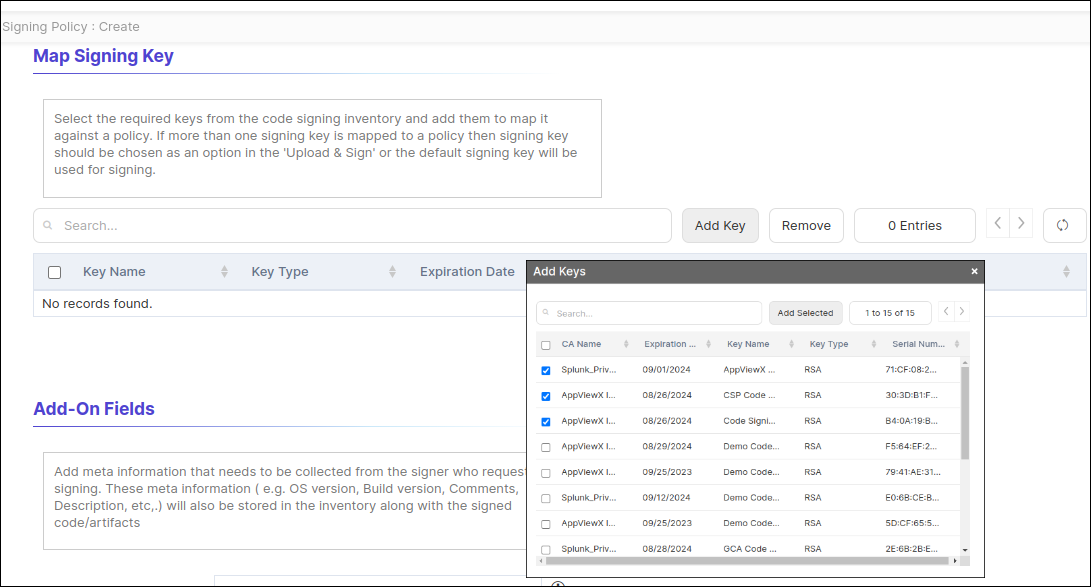
In the Map Signing Key section, select the required keys from the code
signing inventory and add them to map them against a policy as shown in the
below images. If more than one signing key is mapped to a policy then the
signing key should be chosen as an option in the Upload & Sign or the
default signing key will be used for signing. Click the Add Key button to
add the keys.
-
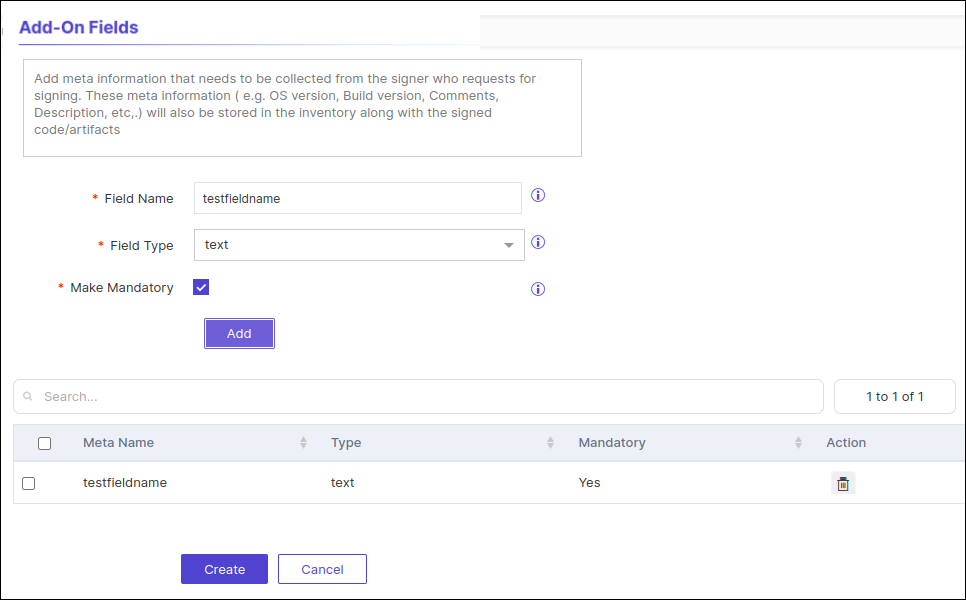
In the Add-On Fields section, add meta information that needs to be
collected from the signer who requests for signing. This meta information ( e.g.
OS version, build version, comments, description, etc,.) will also be stored in
the inventory along with the signed code/artifacts. Enter values in the Field
Name and Field Type fields and select the Make Mandatory
checkbox as required.
-
Click Add.
The Add-On Fields will be added in the meta information table.
-
Click Create.
The signing policy is created in the inventory.