Configuring Let’s Encrypt CA
-
Go to
 (Menu) > SIGN+ > ADMINISTRATION > Certificate Authority.
-
From the displayed CA, select Let's Encrypt.
The Let's Encrypt home page is displayed.
-
Click the Configure Now or +Add icon from the middle or top-right of the
page respectively.
The Let's Encrypt configuration page is displayed.
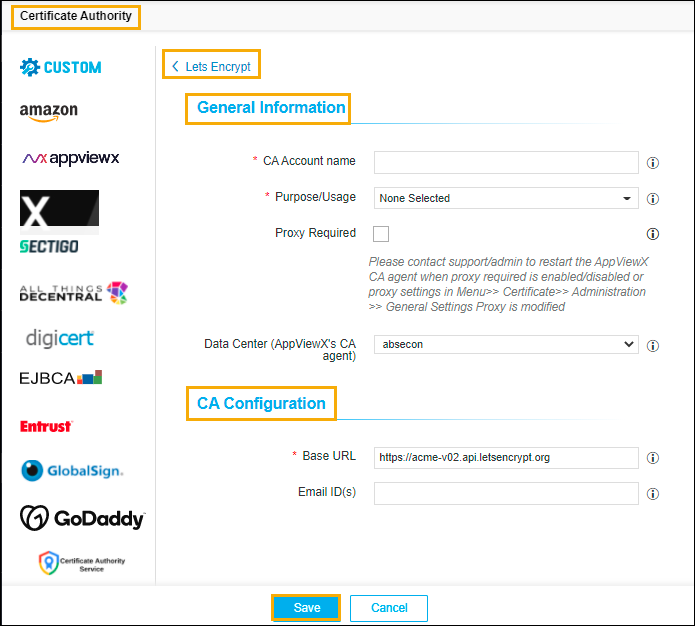
- Update the following details in the General Information section
as described in the table:
Table 1. General Information - Field Description Table Fields Description *Name A unique name to identify the CA setting. Note: No special characters other than ‘.’, ‘-’,’_’ are allowed. The name must not start with special characters.*Purpose/Usage The certificate types will be managed by these settings. For now, Let’s Encrypt is having only one purpose Server. Proxy Required Enable this field if the CA communication needs to happen via Proxy. The proxy details configured in general settings will be used for communication. Data Center (AppViewX's CA agent) Select the data center through which the CA communication needs to happen. Note: The asterisk (*) symbol indicates a mandatory field. - Update the following details in the CA Configuration section as
described in the table. These fields are necessary for invoking the Let’s Encrypt CA APIs
for Certificate Management.
Table 2. CA Configuration - Field Description Table Fields Description *Base URL Let’s Encrypt certificate enrolment URL either staging or production based on the requirement. *Email ID(s) Enter email ID(s) in this field to receive notifications from Let's Encrypt. Multiple email ID must be separated by comma (,). Note: The asterisk (*) symbol indicates a mandatory field. - Click Save.