Configuring Auto-Removal of Expired Certificates
Configuring Expired Certificates
-
Go to
 (Menu) > CERT+ >
ADMINISTRATION > Expired
Certificates.
The Expired Certificates screen is displayed.
(Menu) > CERT+ >
ADMINISTRATION > Expired
Certificates.
The Expired Certificates screen is displayed. -
Enter the information required as per the table given below. Each of the fields used
for configuration of expired certificates.
Table 1. Field Description for Expired Certificates Page Name Description *Do you want to delete the expired certificate after its expiry? Option to enable/disable auto removal of expired certificates after expiry. *Number of days after expiry Specify no. of days, once enabled, expired certificates will be automatically deleted after configured no. of days from expiry. - Only numbers allowed
- Enter expiry days (Expiry days can not be empty)
- Expiry days cannot exceed three characters.
*: Mandatory fields - Click Save.
- Click Reset to revert to the previously saved settings.
Fetch Expired Certificates in the Inventory
-
Go to
(Menu) > CERT+ > CERTIFICATE
INVENTORY > select Server or
Client or Code Signing.
- To get a list of all the certificates present in the selected inventory, click the List tab on the top-right corner of the page.
- Click on the Filter Summary icon then select Expired to get a list of all the expired certificates present in the inventory.
Configuring Renew/Regenerate History
Configuring History of Certificates
-
Go to
(Menu) > CERT+ >
ADMINISTRATION > History of
Certificates.
The History of Certificates page is displayed.
-
Enter the field information as per the table below.
Table 2. Field Description for History of Certificates Name Description *Do you want to maintain the history of the certificate after its renew/reissue/regeneration? Option to select if the user wants to maintain the history of the certificates after it’s renewed/reissue/regeneration or not. *: Mandatory fields - Click Save.
- Click Reset to revert to the previously saved settings.
Checking History of Renewed/Regenerated Certificates
History of certificates, if enabled, can be checked on the Certificate Topology page by following these steps:
-
Go to
(Menu) > CERT+ >
CERTIFICATE INVENTORY > select Server
or Client or Code Signing.
- Click on the List tab on the top-right corner to view the certificates list page.
- On the certificate list view page, click on the Common Name of the certificate for which to check the history that has been successfully renewed/regenerated.
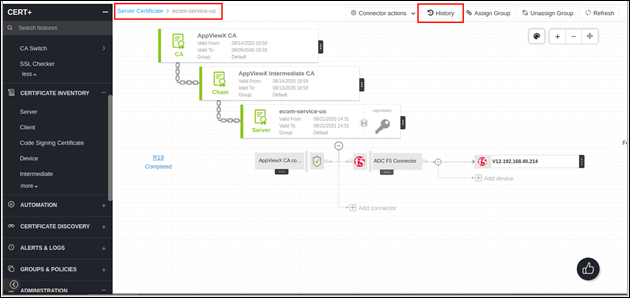
-
To check the History of certificate, click on the History
icon on the certificate topology page. (If the certificate renewal/regeneration was
successful, the History icon will be present).
-
Click on the History to view the history of the certificate in the pop-up window.
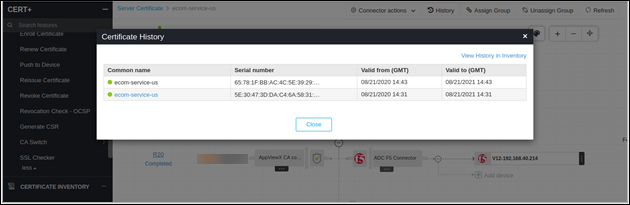
-
The respective query for this will be automatically framed and search results will
be shown.
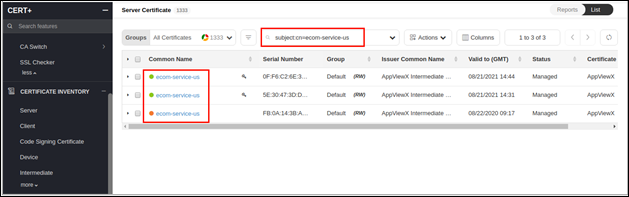 After successful renewal/regeneration, the new certificate is available in the Certificate Inventory. The parent certificate used for renewal/regeneration will be available in the inventory based on the below configuration. If the History of Certificates is selected as Yes, parent certificates will be available along with renewed/regenerated certificates but if selected otherwise, the parent certificate from which the certificate was renewed/regenerated will be deleted from inventory and no history will be maintained for the child certificate. By default, the history will be maintained.