Integrating Microsoft Office
Download Microsoft Office
Download and install MS Office for windows from Download Microsoft Office 365 for
Windows and Mac.
Sign Office Files with MS Office Using AppViewX CSP
Prerequisites:
- Execute the AppViewX SIGN+ installer to set up the prerequisites for using AppViewX CSP.
- Ensure that Microsoft Office Desktop version is installed.
Sign MS Office files
- Open the document to be signed in Microsoft Word, Excel, or PowerPoint.
- Click on File in the selected application.
-
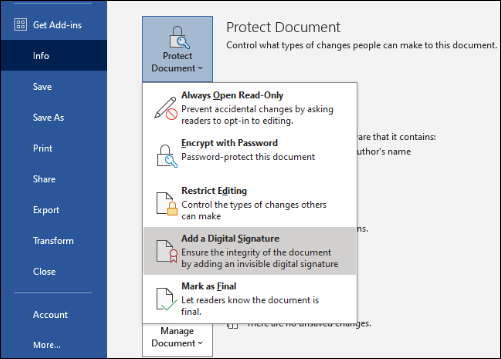
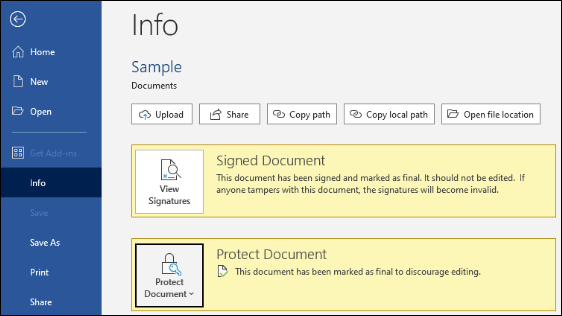
On the File tab, click Info and then
- Microsoft WordClick Protect Document -> Add a Digital Signature.
- Microsoft Excel
Click Protect Workbook -> Add a Digital Signature.
- Microsoft PowerPoint
Click Protect Presentation -> Add a Digital Signature.
- Microsoft Word
-
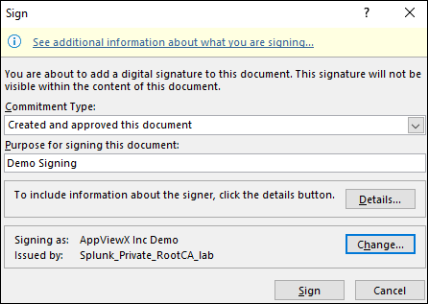
In the Sign window, select the commitment type
that best represents the signer’s role from the Commitment
Type drop-down list.
- None
- Created and approved this document
- Approved this document
- Created this document
-
In the Purpose for signing this document box,
enter the reason for signing.
- To provide signer information, click Details. In the Additional Signing Information window, enter the necessary details and click OK.
- Next, click Change in the Sign window.
-
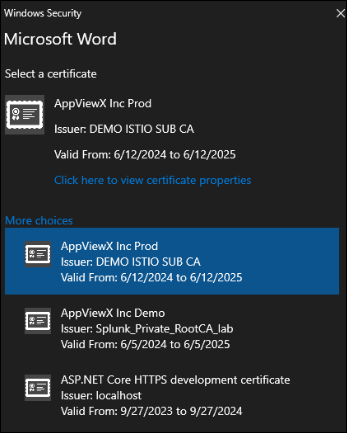
In the Windows Security window, select the signing certificate (that
was selected while downloading the SIGN+ Package) and click
OK.
-
In the Sign window, click Sign.
Note: SHA256 is the default hashing algorithm.
-
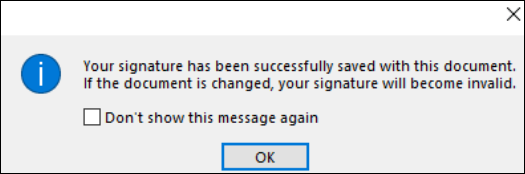
In the Signature Confirmation window, read the message and click
OK.
-
The document is marked as final, and a small ribbon icon appears at the
bottom of the document window, indicating it has been signed. If any
edits are made, the signature will be removed and must be
resigned.

-
To view signer information, click File -> Info -> View
Signatures.
Troubleshoot Signing Errors
Error Encountered While Signing
MS Office Stopped responding.
Problem:
This error message occurs due to various reasons like error while establishing connection to the server, authentication error and other validation messages.
Solution:
For more information on the error
message, refer to AppViewX_CSP_<Day>.log file in
C:\Users\<username>\AppData\Local\Temp
path.