Trial Journey
AppViewX offers its customers a free trial of PKI for its SaaS customers. The trial period is valid for 30 days. Explained below is how to get started on the trial journey:
- Upon signing up for the free PKI trial, you will receive an email with the subject
line, Welcome to AppViewX Trial!, at your registered email address.
This email contains your username. Use this username to log into the AppViewX application. This is followed by another email with a Certificates Insights Report that provides valuable insights into the certificates discovered from Certificate Authority, along with detailed analysis on certificate management, security posture, and compliance status.
- Click Login Now in the email to be redirected to the AppViewX application.
- Set and confirm the new password to log in.Tip: Click the information icon for guidelines on creating a new password.
The password is successfully saved to your Google Password Manager for future reference. An email that your password was changed successfully is sent to your inbox. An email follows with details of all the certificates expiring in the next 30 days.
- On logging in, select the I accept the terms and conditions check box on the
Terms of Service page to continue.The Welcome to AVX ONE Certificate Lifecycle Management window pops up.
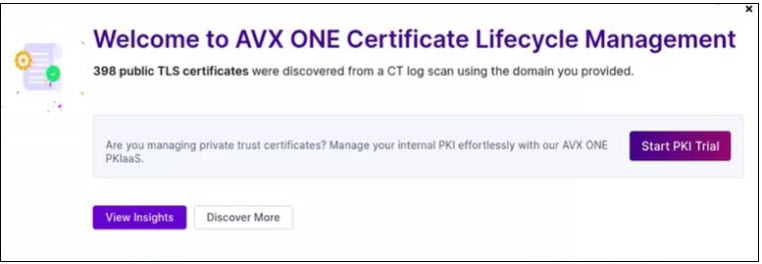
- Click Start PKI Trial to get started.
Alternatively, you can access the PKI trial by any of the following ways:
- Go to
 (Menu) icon > All Products. Click
Try it free from Modernize & Simplify PKI.
(Menu) icon > All Products. Click
Try it free from Modernize & Simplify PKI.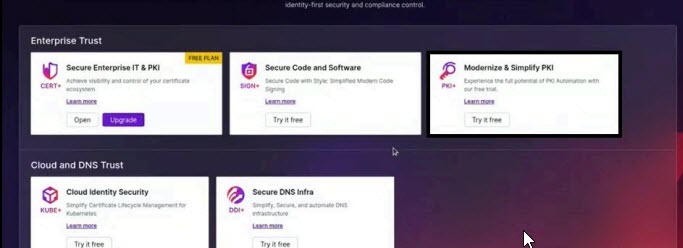
-OR-
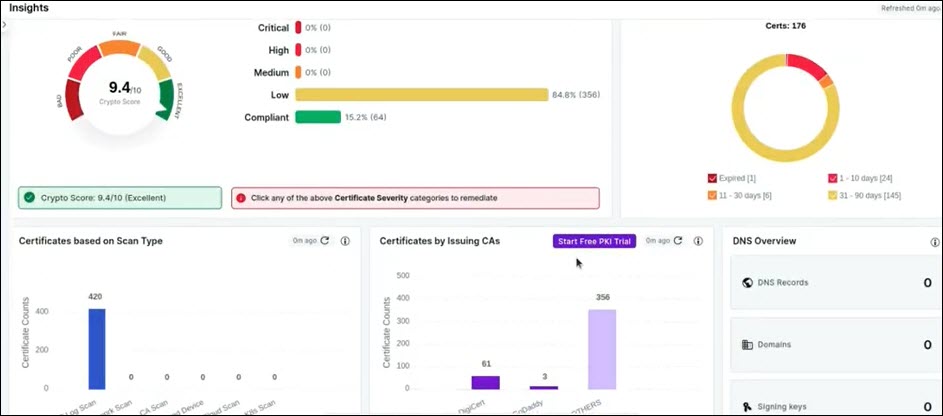
- From the Insights > Summary page, scroll down to Certificates by
Issuing CAs and click Start Free PKI Trial.
-OR-
- Click Start PKI Trial on top of the page. On clicking this button,
the button name changes to Manage PKI.

A message, Unboxing your free trial...exciting things are coming! appears. A Welcome to PKI+ page is displayed listing the functionalities included in your free trial.
- Go to
- Click Continue.The Get Started with PKI+ page appears.
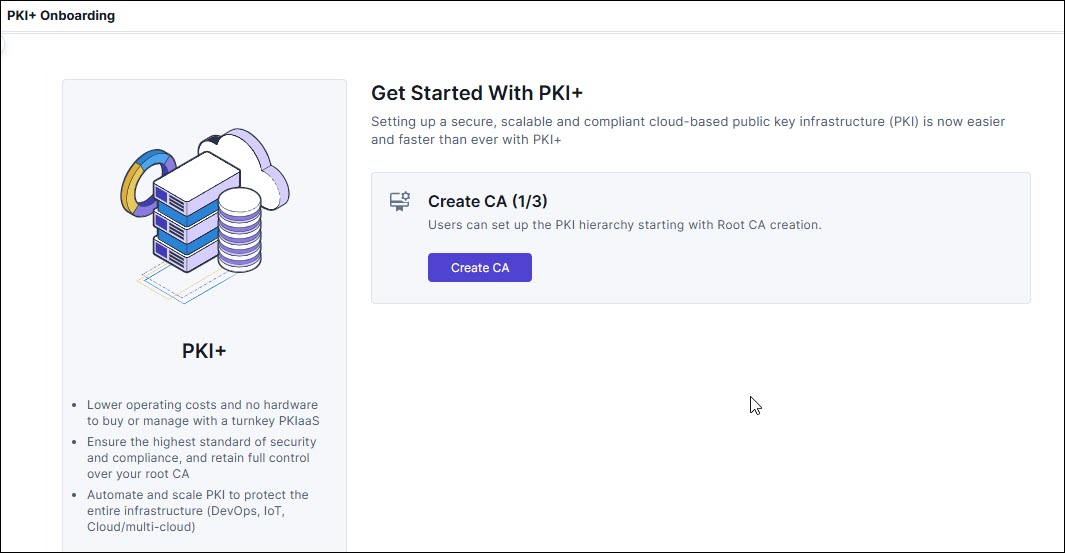
- Click Create CA to create a PKI hierarchy by creating the root certificate
authority.The Create Root CA page appears.
- Enter the fields as described in the table.
Table 1. Field Description for Create Root CA page Field Description Select CA Type *CA Name By default, the CA name is populated. You can edit this and provide a name with no special characters expect hyphen (-) and undescore (_). *Valid for By default, the validity is set to 10 years. Configure CA Subject DN Details *CA Common Name Enter the root CA subject name. *Organization Enter the organization name owning the CA. Organization Unit Enter the business unit for CA operations. City Enter the city name. State Enter the state name. Country Enter the country of the organization. Configure CA Key Size and Algorithm CSR Generation You can only select AppViewX. *Key Size and Algorithm Select the CA key size and algorithm from the dropdown list. Configure CA Artifacts Path Length Constraint This is an optional parameter in an issuing CA certificate; it defines the number of sub CA chains created under that specific issuing CA certificate holding the path constraint value. By default, the value is None. This field can have any of these values: 0, 1, 2, 3, or none. For example, if it is set to 2, it means that only two intermediate CAs are allowed between the end-entity certificate and this CA certificate. None indicates unlimited.
Custodian Settings Custodian By default, the freemium customer (logged in user) is added as the custodian. Custodians are responsible for approving any action performed in PKI. Custodians are the individuals responsible for issuance of root and intermediate certificates. They approve or reject certificate requests, manage the lifecycle of certificates, and ensure auditability and compliance. To add more custodians, click Manage. To add a custodian, see Custodian Management.
Note:- Quorum value is set to 50%, which means that if the custodian group has two members, then only one custodian is needed to approve any CLM action.
- Quorum value is an editable field and can contain values ranging from 20 through 100. You can edit this per your organizational need.
- Newly added custodians appear in the Custodian text box with an increment, for example, if one custodian is added, then the text box displays the default custodian +1.
Note: Fields marked with red asterisk (*) symbol are mandatory. - Click Create. A window with the summary of values entered appears.
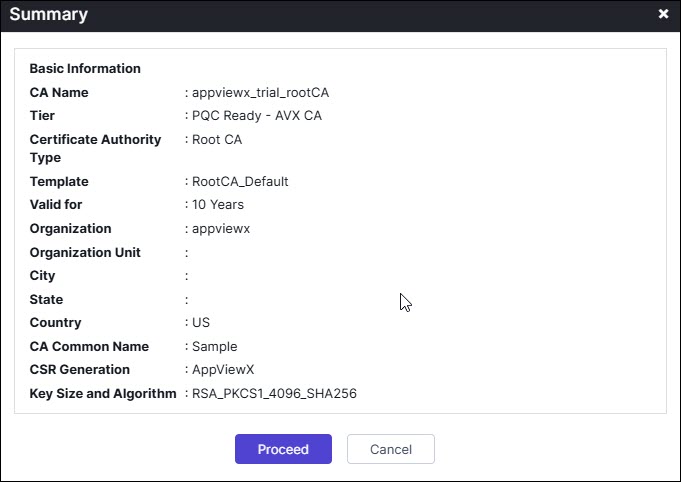
- Click Proceed.A message, PKIaaS CA configuration added successfully, appears on the top of the page while another message appears, CA Creation in Progress.
 The custodian must approve the
subordinate CA creation request via the link sent to their email
address. Note: The approval link in the email is valid for 48 hours.
The custodian must approve the
subordinate CA creation request via the link sent to their email
address. Note: The approval link in the email is valid for 48 hours.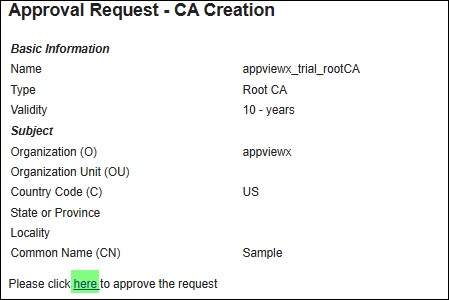
Table 2. Action Status Description and Required Action Action Status Status Description Required Action Email Verification - Pending Inactive The custodian's email verification is pending approval and is not active. Note: If you want to abort the action, click Abort. Any workflow that is triggered and is in progress is killed from the Request page prior to triggering any further actions.Click the here hyperlink to be redirected to the AppViewX login page and the Requests page. Click Approve by adding your comments. Click OK to confirm. Create - Approval Pending Inactive The custodian has been added but is awaiting approval from active custodians. Active custodians must click the here hyperlink in the email to be redirected to the AppViewX login page. Create - Approved Active The custodian has been approved and added successfully. - Email Verification - Rejected Inactive The custodian has been rejected. On rejecting a request, a confirmation popup window appears if the requester wants to submit the request. Click OK to resubmit. - Click Manage PKI to return to the PKIaaS Management page.On approval, a message, CA Creation in Progress, appears and then changes to CA Successfully Created! while the Approval Status changes to Create-Approved.
 Note: You can create a maximum of two root CAs with your trial license.
- Enter the fields as described in the table.
- Click Create subordinate CA. The Create Subordinate CA page
appears.
- Enter the fields as described in the table.
Table 3. Field Description for Create Subordinate CA page Field Description Select CA Type *CA Name By default, the CA name is populated. You can edit this and provide a name with no special characters expect hyphen (-) and undescore (_). *Issuer Name By default, the issuer name is populated. You can edit this. *Template By default, SubCA_Default is selected. *Valid for By default, the validity is set to 5 years. Configure CA Subject DN Details *CA Common Name Enter the subordinate CA subject name. *Organization Enter the organization name owning the CA. Organization Unit Enter the business unit for CA operations. City Enter the city name. State Enter the state name. Country Enter the country of the organization. Configure CA Key Size and Algorithm CSR Generation You can only select AppViewX. *Key Size and Algorithm Select the CA key size and algorithm from the dropdown list. Configure CA Artifacts Path Length Constraint This is an optional parameter in an issuing CA certificate; it defines the number of sub CA chains created under that specific issuing CA certificate holding the path constraint value. By default, the value is None. This field can have any of these values: 0, 1, 2, 3, or none. For example, if it is set to 2, it means that only two intermediate CAs are allowed between the end-entity certificate and this CA certificate. None indicates unlimited.
Custodian Settings Custodian By default, the freemium customer (logged in user) is added as the custodian. He/she will get the approval links via email for all the actions performed in the PKI hierarchy creation. Note: Fields marked with red asterisk (*) symbol are mandatory. - Click Create.
A window with the summary of values entered appears.
- Click Proceed.A message, PKIaaS CA configuration added successfully, appears on top of the page while another message appears, Subordinate CA Creation in Progress.
 The custodian must approve the subordinate CA creation request via the link sent to their email address.Note: The approval link in the email is valid only for 48 hours.
Table 4. Action Status Description and Required Action Action Status Status Description Required Action Email Verification - Pending Awaiting Approval The custodian's email verification is pending approval and is not active. Note: If you want to abort the action, click Abort. Any workflow that is triggered and is in progress is killed from the Request page prior to triggering any further actions.Click the here hyperlink to be redirected to the AppViewX login page and the Requests page. Click Approve by adding your comments. Click OK to confirm. Create - Approval Pending Awaiting Approval The custodian has been added but is awaiting approval from active custodians. Active custodians must click the here hyperlink in the email to be redirected to the AppViewX login page. Create - Approved Active The custodian has been approved and added successfully. - Email Verification - Rejected Inactive The custodian has been rejected. On rejecting a request, a confirmation popup window appears if the requester wants to submit the request. Click OK to resubmit. - Click Manage PKI to return to the PKIaaS Management page.On approval, a message, Subordinate CA Creation in Progress, appears. Wait until it changes to Subordinate CA Successfully Created!

- Enter the fields as described in the table.
- Click Issue Certificate.
You will be redirected to the Enroll Server Certificate page. Follow the steps as described in the Adding/Enrolling Certificate to enroll your certificate.