Create NginxPlus LB Server
This workflow enables you to create HTTP or TCP load balancing server in existing or new source configuration.
To run this workflow:- Go to Menu > ADC+ > AUTOMATION > Workflow Catalog > View/Run
- Click the Nginx Plus category on the View/Run Workflows page.
-
On the popup window, hover the mouse over the Create F5
LTM VIP workflow.
The Run and Schedule buttons are displayed.
-
Click
 .
The Request > Create F5 LTM VIP :: FormBuilder page is displayed.
.
The Request > Create F5 LTM VIP :: FormBuilder page is displayed. -
Enter or select the field information in the Device and Load balancing
type section.
Table 1. Device and Load balancing type Section - Field and Description Table Field Description *Data Center Displays the list of datacenters of the devices, which are created in the Device Inventory. Select the datacenter of a device from the drop-down option for which this request is to be created. For the devices which are added without a datacenter in the Device Inventory, select the datacenter as None. *Device Name Displays the list of devices associated with the selected datacenter. If the datacenter is selected as None, the devices that are created without datacenter details are listed. Select the desired device from the drop-down option. *Source Config Option Select this option to choose an existing or new source config. *Nginx Source Path Enter the path of the existing source config. *Load Balancing Type Select the load balancing type:
- HTTP
- TCP
*Load Balancing Method Select a load balancing method from the dropdown list. Server Name Enter the server name, if the Load Balancing Type is selected as HTTP/ -
Enter or select the field information in the LB server and UpStream
section.
Table 2. LB server and UpStream Section - Field and Description Table Field Description *LB server IP Enter the IP address of the Load balancing (LB) server. *LB server Port Enter the port of the Load balancing (LB) server. *Upstream Server Enter the upstream server name. Health Check Select a health check option: -
Active (default)
-
Passive
*Upstream Server IP and Port Enter the upstream server IP address and port no. It must be in the format of <IP Address>:<port no.>. *Weight The weight of the topology record. Enter the weight in the numerals. *Server Status Select a server status from the dropdown list. Server Type Select a server type from the dropdown list: -
Normal (default)
-
Backup
Fail Timeout Enter the timeout value in seconds. Max Fail Enter the maximum allowed failures. Slow Start Enter the slow start value. Upstream Server Grid click the Add  button to add the server and
upstream details to the Upstream Server Grid.
button to add the server and
upstream details to the Upstream Server Grid. -
-
Enter or select the field information in the Persistence section.
Table 3. Persistence Section - Field and Description Table Field Description Sticky Cookie Persistence By default, this option is disabled. When enabled Sticky cookie persistence helps to reconnect the server with the client to the same resource as previous requests. -
Enter or select the field information in the SSL section.
Table 4. SSL Section - Filed and Description Table Field Description *Do you want to add SSL Select any of the following options to enable SSL certificates. -
No (default) - The only Client will have an SSL Certificate
-
Yes - Both Client and Servers will have SSL certificates
-
-
Click the Submit button.
The Confirmation popup opens.Note:
- If you want to save this form to edit it later, click the Save Draft button, and then click Ok in the Confirmation popup window. The form will be saved as Open request under Request > My Request.
- If you want to cancel this form, click the Cancel button.
-
Click Ok to submit the form.
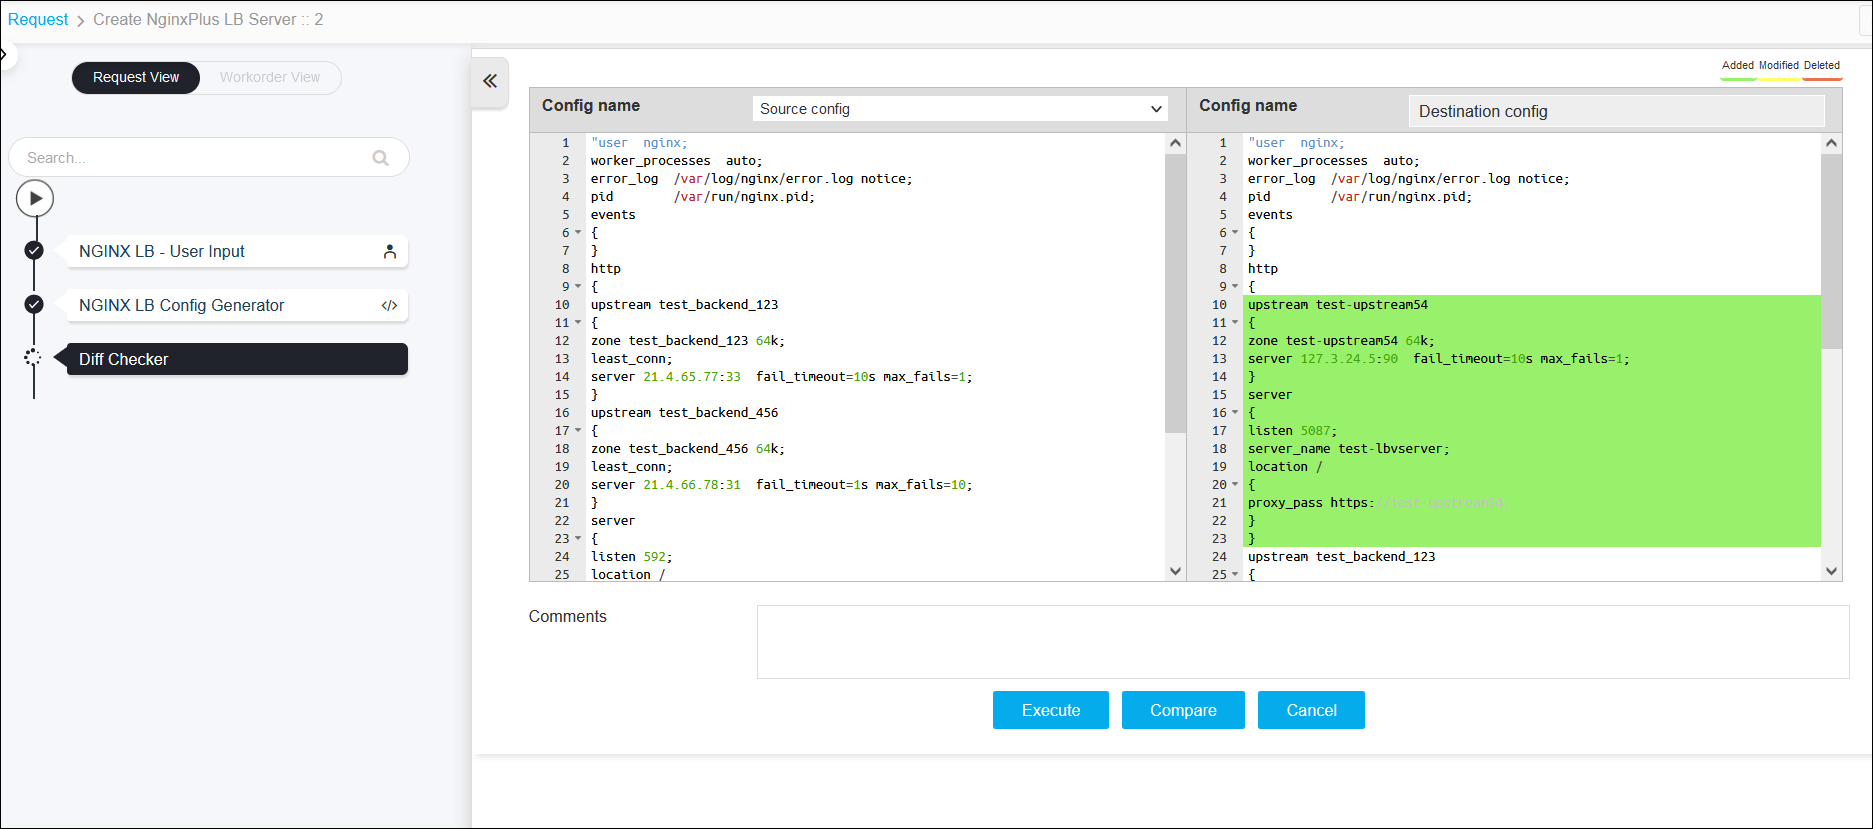
The validation starts automatically and reaches the Diff Checker stage.
-
Compare the updates and click the Execute button.
 The validation starts automatically and reaches the Backup Master Config stage.
 -
Click the Submit button.
The validation starts automatically and reaches the NGINX Config Check stage.
-
Click the Execute button.
The validation starts automatically and reaches the NGINX Config Check Reload stage.
-
Click the Execute button.
The validation starts automatically and reaches the NGINX Config Check Reload stage.
-
Click the Execute button.
The validation starts automatically and reaches the Remove Backup of Master Config stage.
-
Click the Submit button.
The Confirmation popup opens.Note: To stop running the workflow creation, click Cancel.
-
Click Ok to continue the workflow creation.
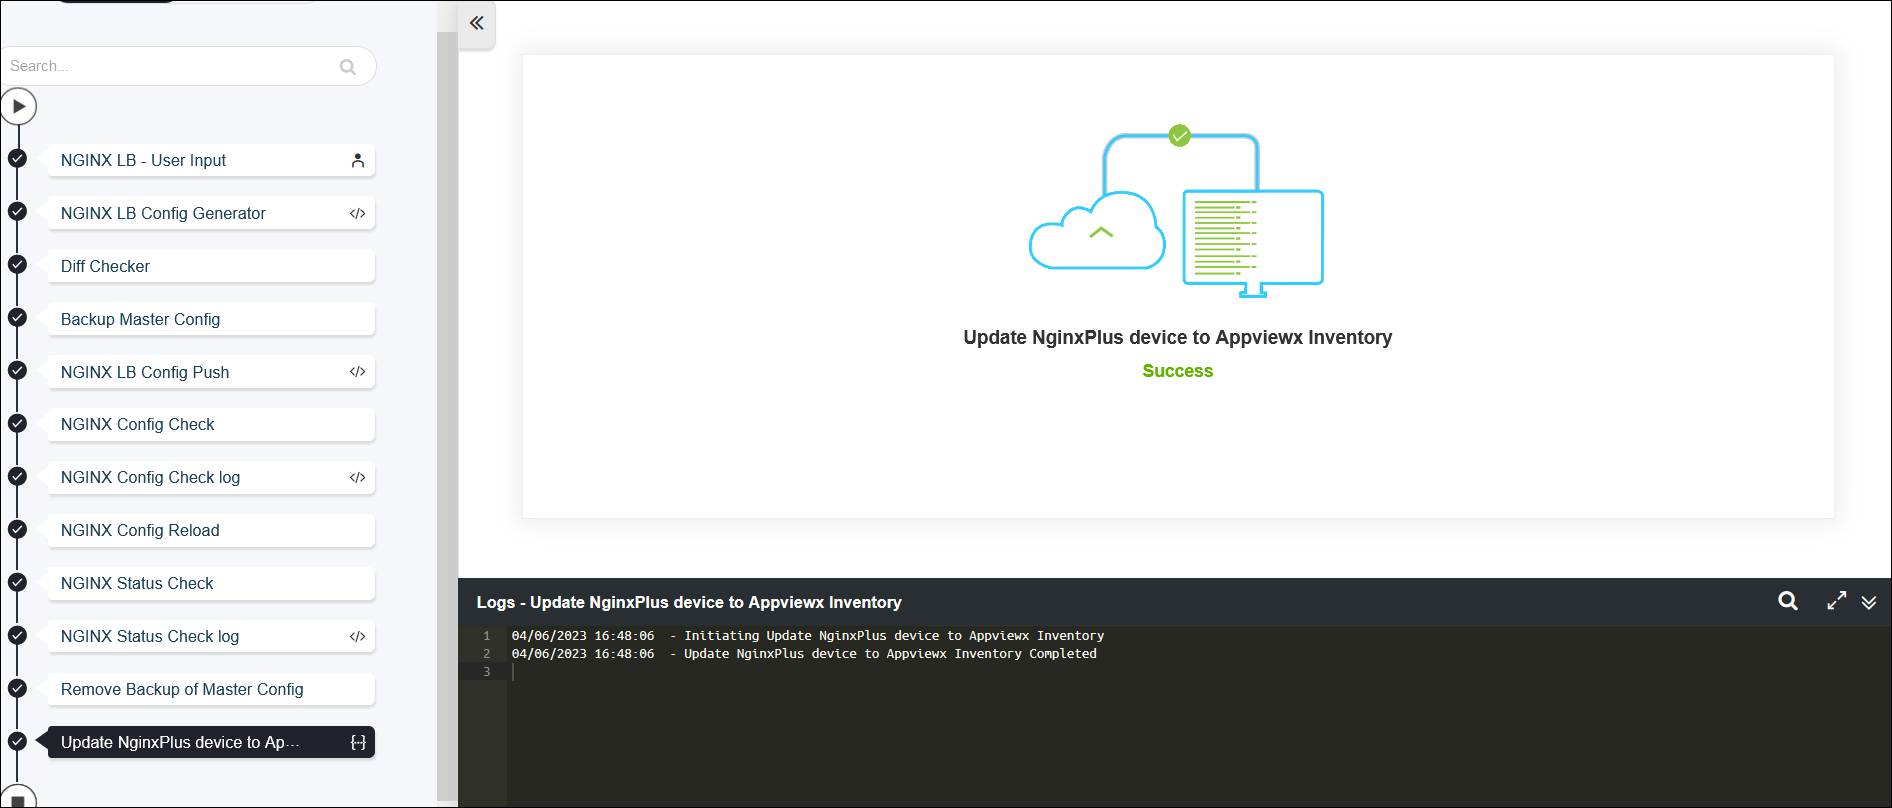
It takes a while to complete the request.
-
The workflow is completed.
 Note: The stages of the request are shown in the left side of the screen. To view a particular stage of the request, click the respective stage.