Templates
- This module is available starting from the Thames HF2 (2024.0.2.0) release for those using AppViewX PKIaaS Native CA for PKI initialization.
- For versions prior to Thames FP1 HF3, enable Templates function by going
to
 (Menu) icon > Platform > Role. Search for the created
administrator role and click the link. Switch to the Authorized functions
tab, and select the Templates check box in the PKI module.
(Menu) icon > Platform > Role. Search for the created
administrator role and click the link. Switch to the Authorized functions
tab, and select the Templates check box in the PKI module.
You can either use any of the existing templates or create a customized template to specify certificate parameters.
Using Existing Templates
- Basic EFS: Used for enabling file encryption and decryption in Windows environments. It allows users to securely encrypt their files with a public key infrastructure (PKI) certificate, ensuring that only authorized users can access the encrypted files.
- Code Signing: Used to issue certificates that digitally sign software applications or scripts, ensuring their authenticity and integrity. This helps users verify that the code has not been tampered with and that it originates from a trusted source, providing assurance and security in software distribution.
- DomainController: Used to secure domain controllers in Active Directory environments. It enables secure LDAP (LDAPS) communication and authenticates domain controllers, ensuring trusted interactions within the domain.
- EFS recovery Agent: Used to issue certificates to designated recovery agents who can decrypt encrypted files within the Encrypting File System (EFS). This template ensures that if a user loses access to their encryption keys, the recovery agent can restore access to encrypted data
- Enrollment Agent: Used to issue certificates to individuals or devices authorized to request and enroll certificates on behalf of other users. This template enables trusted entities, such as administrators, to assist in the certificate enrollment process, typically for users or devices that cannot directly request certificates themselves.
- IPSec: Used to issue certificates that enable secure communication over IP networks by supporting IPSec protocols. These certificates authenticate and encrypt data between devices, ensuring secure, encrypted communication for network traffic, such as virtual private networks (VPNs).
- Kerberos Authentication: Used to support the Kerberos authentication protocol in a networked environment. It allows for secure identity verification by issuing certificates that can be used by clients and servers to prove their identity within a Kerberos-secured domain.
- OCSP Signing: Used to issue certificates for Online Certificate Status Protocol (OCSP) responders, which are responsible for providing real-time status checks of digital certificates. This template ensures the authenticity and integrity of the OCSP responses, allowing clients to verify whether a certificate is revoked or valid.
- RootCA_Default: Used for the issuance of certificates to a Root Certificate Authority (CA) in a public key infrastructure. This template defines the settings and policies for the Root CA’s certificate, which serves as the foundation of trust for all other certificates issued within the PKI hierarchy.
- Router: Used to issue certificates to network routers, enabling secure communication and authentication between routers in a network. These certificates help ensure that data transmitted across the network is encrypted and that the routers are trusted entities within the infrastructure.
- Smart Card Logon: Used to issue certificates that enable secure authentication via smart cards. This template allows users to log into a system by using a smart card, ensuring strong, two-factor authentication for enhanced security in accessing networks and applications.
- SubCA_Default: Used to issue certificates for subordinate Certificate Authorities (CAs) within a PKI hierarchy. This template defines the settings and policies for subordinate CAs, enabling them to issue certificates while maintaining the trust chain established by the Root CA.
- User: Used for generating and managing user certificates. It specifies the type of certificate, key usage, and other policies that should be applied to users, streamlining the certificate issuance process and ensuring consistency across users within an organization.
- WebServer: Used to secure web servers with SSL/TLS, ensuring encrypted communication, trust, and identity verification for web traffic, typically supporting HTTPS.
- Workstation Authentication: Used to issue certificates for computers or workstations, enabling secure authentication when they connect to a network. These certificates help verify the identity of the workstation, ensuring secure communication and access control within an organization's infrastructure.
- Go to (Menu) icon > PKI+ >
Templates.
The Templates page is displayed with pre-existing templates to choose from.
- Select a template that best suits your needs and click the
 (Copy) icon in the Action column to create a copy of the
selected template.
(Copy) icon in the Action column to create a copy of the
selected template.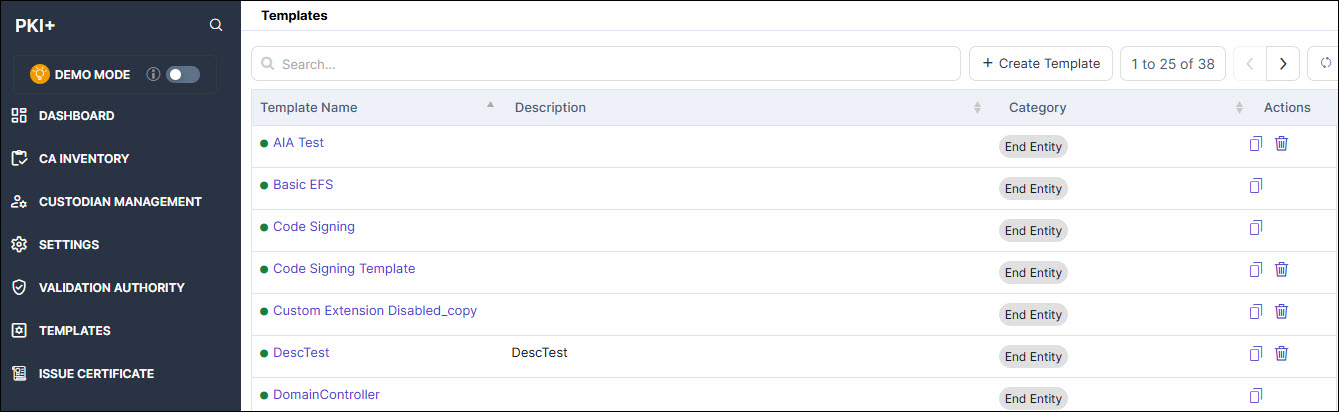
A copy of the selected template is displayed.
- Edit the fields and click Save.Note:
- The Key Usage and Extended Key Usage fields are optional. If left empty for a End Entity template, a confirmation popup is displayed. Click Confirm to proceed or Cancel to return and update the settings.
- The Key Usage field is optional. If cRLSign or keyCertSign is not selected for a Root CA or Subordinate CA template, a confirmation popup is displayed. Click Confirm to proceed or Cancel to return and update the settings.
The newly created template appears on the home page of Templates with a green dot beside it to indicate it is active.
- You can only delete the templates that you created. To delete a
template, click the Delete icon against the selected template.
Once deleted, the template will appear on the last page of the Templates
page with a red dot beside it as shown.
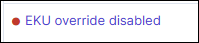
Deleted templates cannot be used for creating CAs or issuing certificates.
You can create a copy of the deleted template.
- All changes or errors related to templates are logged and can be viewed under Platform > Observe & Explore > Logs.
Creating Custom Templates
You can create custom templates for short-lived and long-lived certificates using the AppViewX PKIaaS Native CA offering a wide range of benefits, including enhanced security, consistency, scalability, and ease of use. By aligning the certificate issuance process with your organization’s specific requirements, you can optimize the management of digital certificates and strengthen your overall PKI environment. Custom templates help ensure compliance, reduce errors, and streamline the certificate lifecycle, making the process more efficient and secure for your organization. You can either use any of the existing templates or create a customized template to specify certificate parameters.
- Click + Create Template on the top right corner of the screen.
The Templates page is displayed.
- Enter the following information:
Table 1. Field Description of Templates Section Field Description General *Template Name Provide a name for easy reference. Note: This field can no longer be edited once a certificate is issued using this template.Description Provide particulars on template creation as to who created it, when it was created, and why it was created. Category Select any of the options: - Root CA
- Sub CA
- End Entity (default value)
Note: This field can no longer be edited once a certificate is issued using this template.Validity Offset This is the value provided to adjust the start date of certificate validity. By default, it is -10 minutes from the current time. Maximum is 24 hours. Override Validity This field is available only on selection of End Entity category. By default, this option is selected to use the validity from the enrollment request. On unselecting this option, you can see: - Duration: Use this option to set the validity duration (hours, days, months, years) for the certificates issued through this template. By default, the value is 1 month.
- Valid Until: Use this option to set a pre-defined validity end date for the certificates issued through this template.
noRevAvail This field is available only on selection of End Entity category. It is enabled automatically for short-lived certificates when the Override Validity duration is set in hours or days. On selecting this option, no revocation information (CRL and OCSP) is published for the certificates. This is typically used for short-lived and long-lived certificates as outlined in RFC 9608. The extension can be enabled to achieve the IoT use cases. The CA validity restrictions related to the certificate expiration and revocation are also relaxed, allowing the certificate to be issued even if the validity period is longer than the typical CA restrictions.
Note: This field can no longer be edited once a certificate is issued using this template.Override Subject Details in the CSR By default, this check box is selected. Unselect the check box to consider the subject details from the CSR. Override SAN details in the CSR By default, this check box is selected. Unselect the check box to consider the SAN details from the CSR. Basic Constraint Details Override Unselect the check box to consider the extension provided in the CSR. Critical Select this option to indicate the information in an extension is important. Key Usages Override Unselect the check box to consider the extension provided in the CSR. Critical Select this option to indicate the information in an extension is important. Basekey Usage Select a value from the dropdown list that defines the functional purpose of the certificate. Note: This field can no longer be edited once a certificate is issued using this template.Extended Key Usages Override Unselect the check box to consider the extension provided in the CSR. Critical Select this option to indicate the information in an extension is important. Extended Key Usage Select a value from the dropdown list that defines the application usage of the certificate. Note: This field can no longer be edited once a certificate is issued using this template.Enable Custom Select this option to provide custom EKU values in the text box below. Multiple entries must be separated by a comma. Custom Extensions Enable Custom Extensions Based on your organization needs, you can add more custom extensions to a certificate using a Base64-encoded ASN.1 that will be included in every certificate issued using this template. Field Description OID OIDs are used to define specific certificate policies in a Certification Practice Statement (CPS). Each policy has a unique OID. An OID (Object Identifier) is a globally unique identifier used to represent specific objects, attributes, or policies in systems like PKI, LDAP, SNMP, and more. It follows a dot-separated numeric format that uniquely identifies each object in a hierarchical structure.
Is Base64 Input Value By default, this check box is not selected. Selecting this check box allows you to input your custom Base64 value in the correct format (Base64 encoded ASN.1 sequence) else it will throw an error message. After you add and validate the custom extension, the system will automatically include it in the certificate when it is issued.
Encoding Type Specifies the format in which the custom extension date is encoded. Select a value from the dropdown list based on your data requirements and usage context. Value Provide the field value. You can give any value for the provided custom OID. Critical Select this option to indicate the information in an extension is important. Override Unselect the check box to consider the extension provided in the CSR. On clicking Add, the data is populated in a table.
Certificate Policy Override Unselect the check box to consider the extension provided in the CSR. Enable Certificate Policy Certificate Policy specifies the policy under which a certificate was issued. On enabling it, the following fields are displayed. Field Description Inherited from CA Select this option to indicate it was inherited from CA. Critical Select this option to indicate the information in an extension is important. Additional Policies Enable this option if you want to create custom policies as CPS URI or User Notice Text. Provide OID, type, and value. Click Add for the data to be populated in a table. Subject Alternative Names Critical Select this option to indicate the information in an extension is important. Field Name Select value as DNSName, IPAddress, Email, or URI. Encoding Type Select a value from the dropdown list. Other Extensions Authority Key ID Sha1 hash of the issuer public key. By default, this is enabled. Disabling this field can cause issues with certificate validation and trust chains. Note: This field can no longer be edited once a certificate is issued using this template.Subject Key ID Sha1 hash of the subject public key. Select hash value as 60 or 160 bit. By default, this is enabled. Disabling this field can cause issues with certificate validation and trust chains. Note: This field can no longer be edited once a certificate is issued using this template.Validation URLs Override By default, this is enabled. Disable it to consider the extension provided in the CSR tempate. Enable CRLDP Enable to add CRLDP to the certificate for status verification. By default, this is enabled only for sub CA and end entity categories in case of the free shipped templates. Disabling this field may impact the ability to check the certificate revocation status.
Note: This field can no longer be edited once a certificate is issued using this template.CA defined CRL Distribution Point This field appears only for sub CA and end entity categories. This is selected when Enable CRLDP is enabled. Note: This field can no longer be edited once a certificate is issued using this template.Custom CRL Distribution Point URI This field appears only when Enable CRLDP is enabled. Provide custom CRL URLs in the text box below. Multiple entries must be separated by a comma. Enable AIA By default, this is enabled for sub CA and end entity categories. Disabling this field may prevent online status checks to confirm the certificate validity. Note: This field can no longer be edited once a certificate is issued using this template.Issuer Certificate download link This field appears enabled only for sub CA and end entity categories. You can disable this option to remove the issuer certificate link from the certificates issued using this link. CA defined OCSP link Enable this for issuer defined OCSP. Note: This field can no longer be edited once a certificate is issued using this template.Custom OCSP URI Enable this for user defined OCSP. Select this option to provide custom OCSP URLs in the text box below. Multiple entries must be separated by a comma. - Click Save.Note:
- The Key Usage and Extended Key Usage fields are optional. If left empty for a End Entity template, a confirmation popup is displayed. Click Confirm to proceed or Cancel to return and update the settings.
- The Key Usage field is optional. If cRLSign or keyCertSign is not selected for a Root CA or Subordinate CA template, a confirmation popup is displayed. Click Confirm to proceed or Cancel to return and update the settings.
The newly created template appears on the home page of Templates with a green dot beside it to indicate it is active.
- You can only delete the templates that you created. To delete a
template, click the Delete icon against the selected template.
Once deleted, the template will appear on the last page of the Templates
page with a red dot beside it as shown.
Deleted templates cannot be used for creating CAs or issuing certificates.
You can create a copy of the deleted template.
- All changes or errors related to templates are logged and can be viewed under Platform > Observe & Explore > Logs.