Configuring Report Settings and Schedule
Configuring Report Settings and Schedule
The running time of the reports to collect the data can be configured per the organization level using Job Scheduler.
To configure the Job Scheduler,
- Log in to AppViewX application with valid credentials.
- Click the menu button located in the upper left corner of the screen.
The left navigation pane appears.
- Click CERT+.
The CERT+ left navigation pane appears.
- Expand ADMINISTRATION and then click more.
-
Click Job Scheduler.
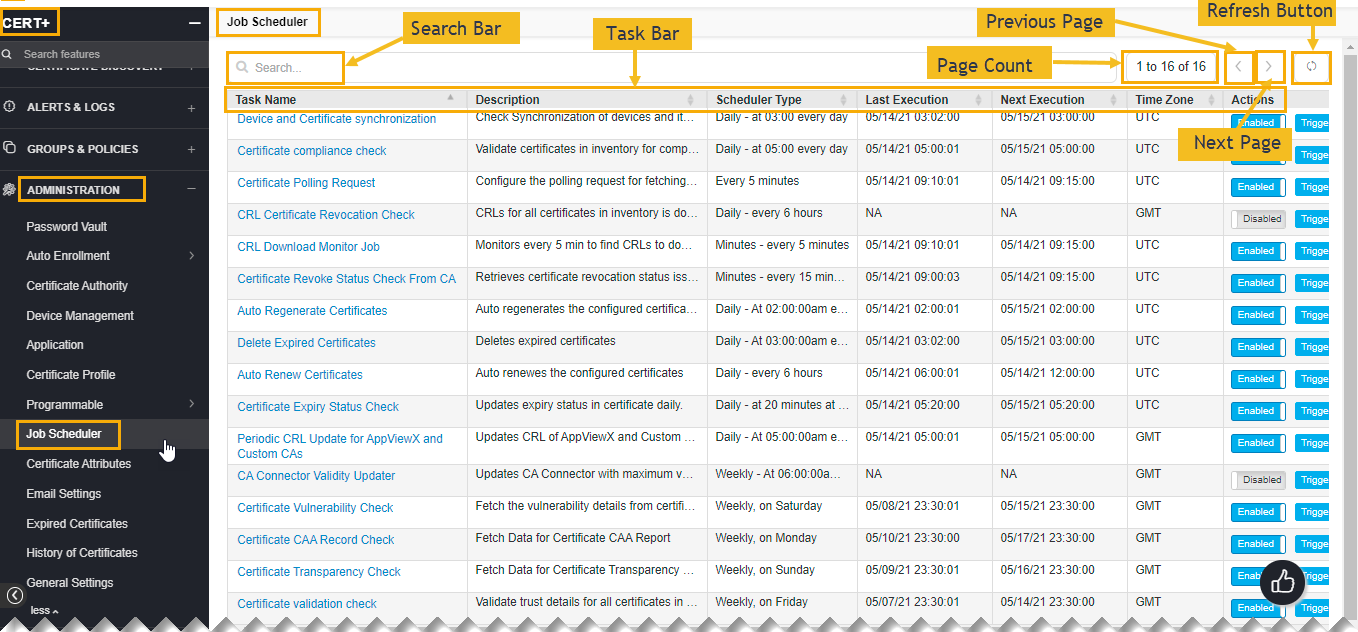
The Job Scheduler home page appears.
-
The following table describes the options available on the Job Scheduler home
page:
Options Description Sear Bar Allows you to search for a job scheduler in the application. Searches for the given keyword in the field and results in the feature that matches the search keyword. Task Bar Displays the number of actions available on the page. Page Count Button Shows the number of pages available in the job scheduler.
Note: Maximum allowed pages are 16.Previous Page Button Allows moving to the previous page on the screen. Next Page Button Allows moving to the next page on the screen. Refresh Button Allows refreshing the job scheduler home page. - Click on the desired task name in the list to modify the configuration of the job running
time.
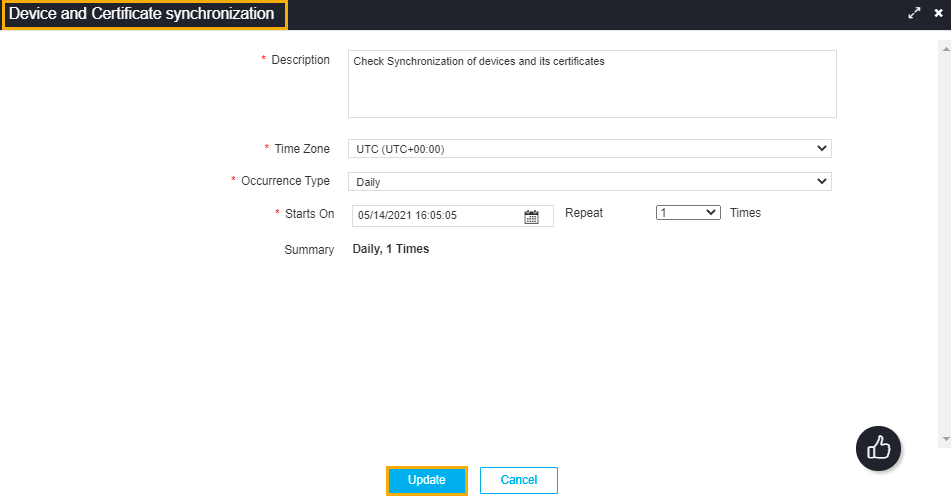 The following table describes the options available on the task page:
Options Description * Description Enter the task description in this field.
Note:You can enter a maximum of 2000 words in the field.
* Time Zone Allows setting the correct time according to your region.
Note:By default, the dropdown list shows time in UTC.
* Occurrence Type Select the type of occurrence from the dropdown list.
The possible occurrences are:
- Daily
- Weekly
- Monthly
- Yearly.
* Start On Set the start date and time. Repeat The number of times the job schedulers to be completed.
Note:You can repeat this activity maximum of Six times.
Summary Displays the occurrence type and frequency of the job scheduler. - After configuring the details, click Update.