Step 4: Configure Windows Auto-Enrollment Proxy
-
If you have created a new PKIaaS CA or made any changes to the existing CA, then go to Certificate Authority > AppViewX PKIaaS > Connection Status and click Check to check that the connectivity to the CA is successful before you configure WAEP.
-
Generate CSV file
To generate CSV file:- Run Windows PowerShell.
-
To extract information of the certificate name, certificate template OID, major version, minor version, and validity from the templates published from the WAEP server, run the command:
Certutil -catemplates -v | select-string distinguishedName,msPKI-Cert-Template-OID,revision,msPKI-Template-Minor-Revision,pKIExpirationPeriod -
Copy the certificate name, certificate template OID, major version, minor version, and validity for Computer_Auto_enrollment template and User_autoenrollment template as shown:
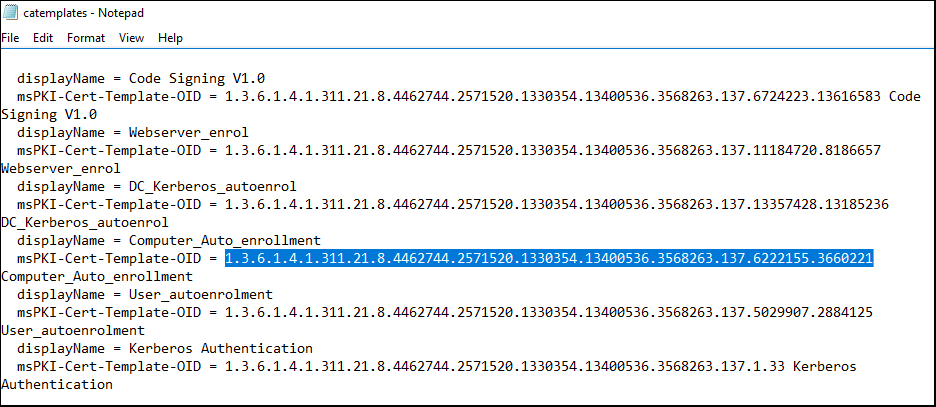 Note: The Computer_Auto_enrollment template is used to enroll devices while the User_autoenrollment template is used to enroll users.
 -
Open a spreadsheet and create three column headings:
-
templateName: In this column, add entries as Computer_Auto_enrollment template and User_autoenrollment.
-
templateOID: In this column, paste the OIDs copied in Step 3 against the respective template.
-
validityInDays: In this column, enter the value as 365 days, which is the default value of the validity period.
-
-
Once done, save the file in .xls, or .xlsx, or csv format.
Sample of the CSV file is as shown: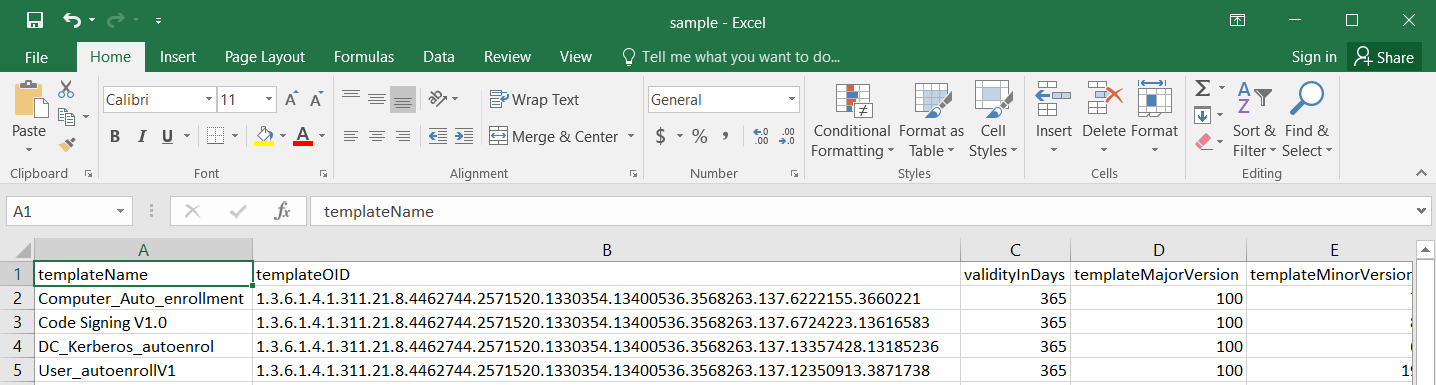
To configure Windows auto-enrollment proxy:
- Log on to the AppViewX application using your credentials.
-
Click the Menu (
 ) icon.
- Click CERT+.
-
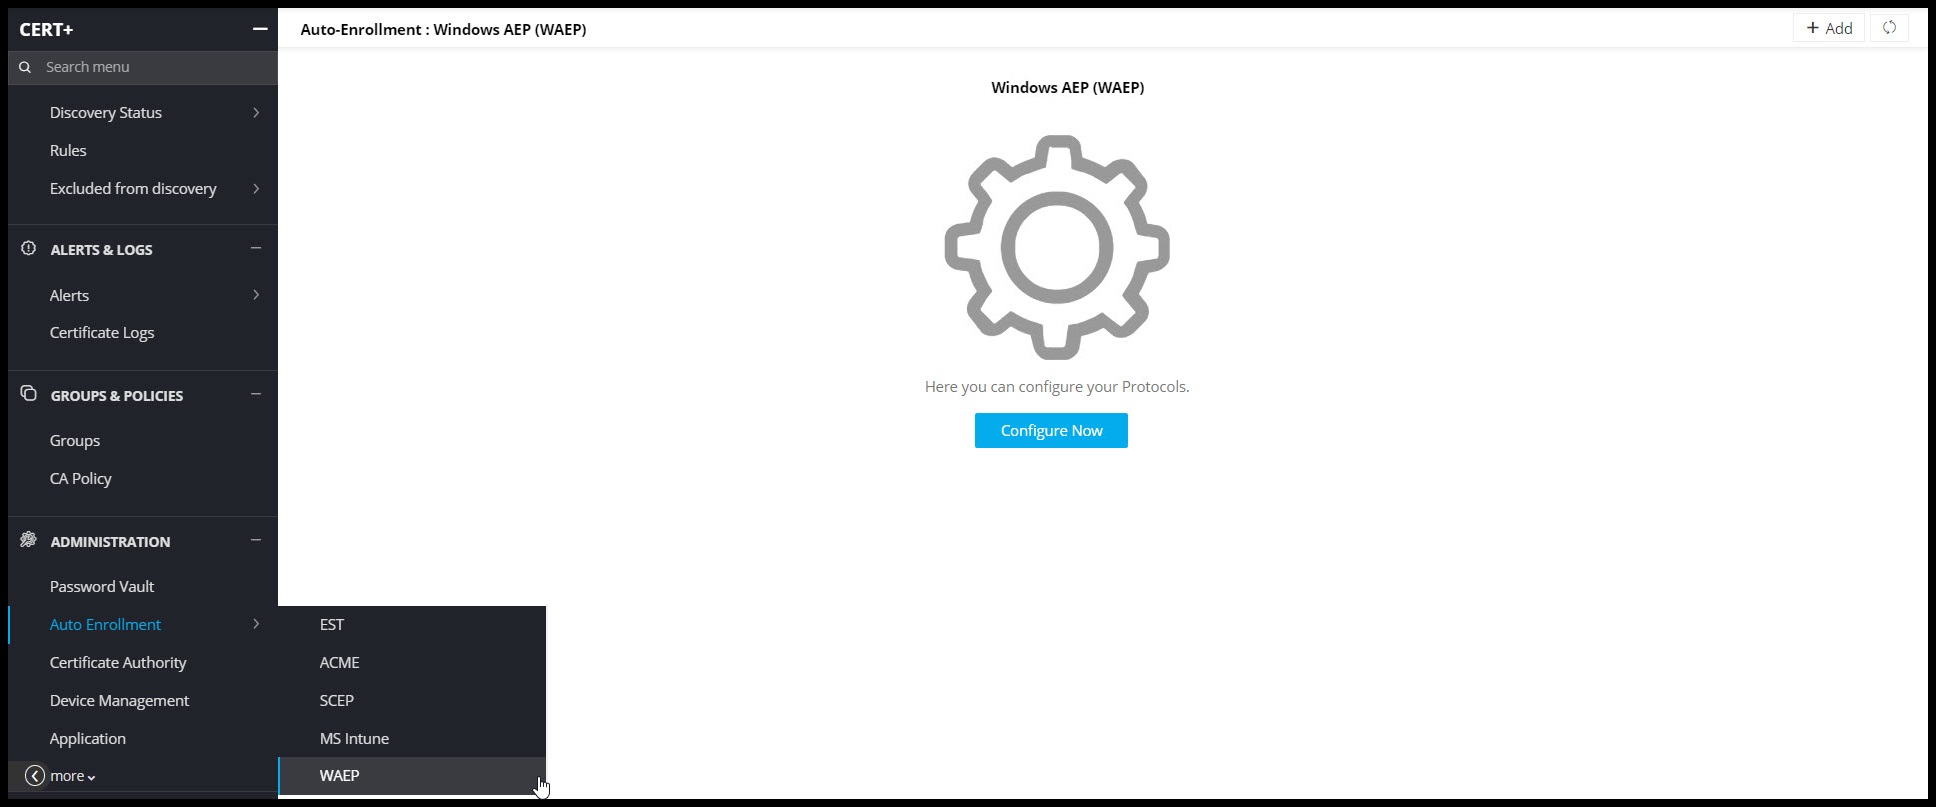
Expand Administration menu and select Auto Enrollment >
WAEP.
The Windows Auto-Enrollment Proxy page is displayed.
-
Click Configure Now.
The configuration page is displayed.
-
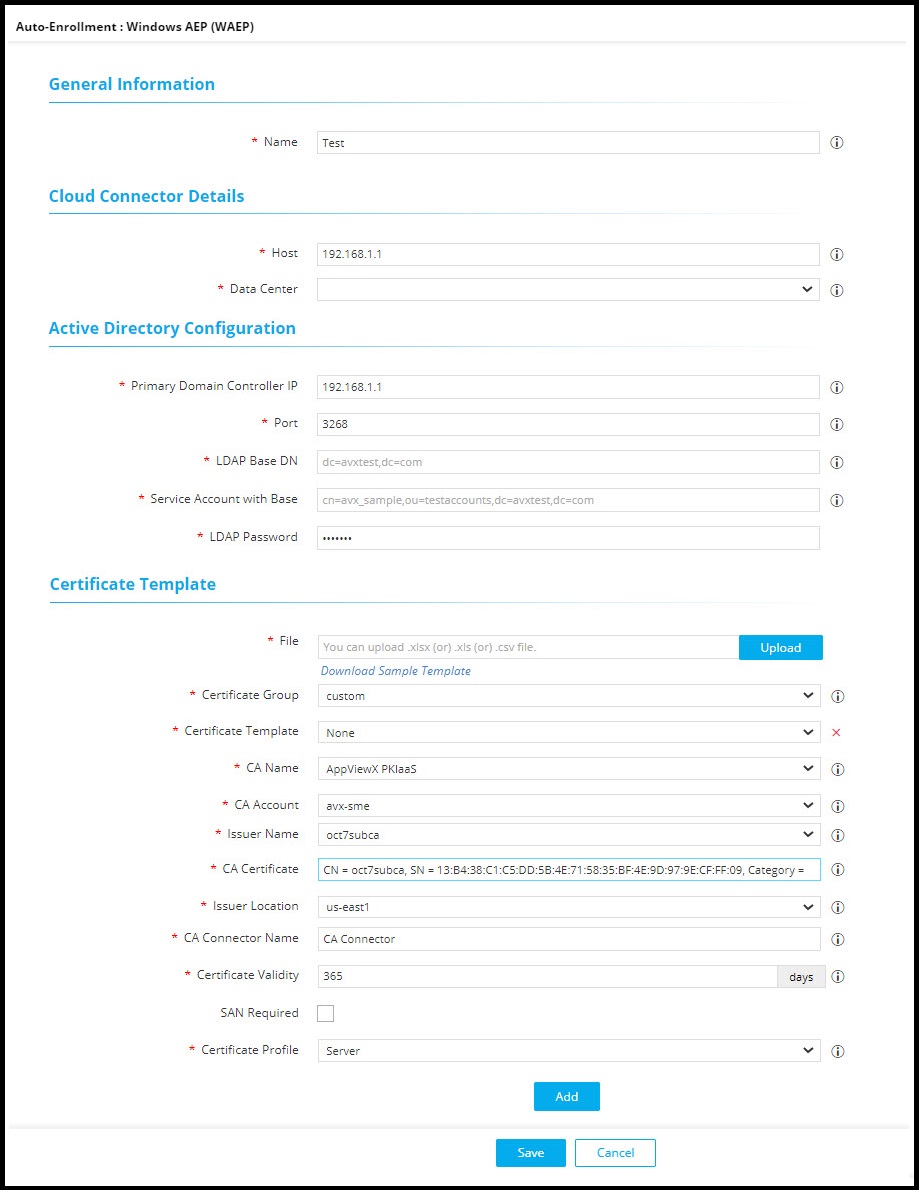
Enter the following fields:
Field Description General Information *Name Provide a unique name for the WAEP setting. Note: Only alphanumeric and the following special characters are allowed: period (.), hyphen (-), and underscore (_). The name cannot begin with a special character.Cloud Connector Details *Host Enter the IP address or the host name of the cloud connector. *Data Center Select the data center used to deploy the cloud connector. Active Directory Configuration *Global Catalog Server IP Enter the IP address of the global catalog server. *Port Port 3268 is the MS default port for global catalog. *LDAP Base DN Provide the base DN of the active directory. For example: dc=avxtest, dc=com *Service Account with Base Provide the service account created for bind. For example: cn=test_service, ou=Kerberos_accounts, dc=avxtest, dc=com *LDAP Password Provide the LDAP password. Certificate Template * File Upload the template file in .xls, or .xlsx, or csv format. You can download a sample template by clicking the Download Sample Template link. *Certificate Group Select a certificate group for managing certificates in the server/client inventory from the available options. For example:
- Certificate Gateway
-
Default
*Certificate Template Select a template from the dropdown list. *CA Name Select a CA for WAEP to communicate for certificate enrollment. *CA Account Select a CA account for WAEP to communicate for certificate enrollment.
This dropdown list is populated with valid values only when the CA account is added to the CA settings.*Issuer Name This field appears on selecting Certificate Group as Default. Select the issuer name for the certificate. *CA Certificate Enter and select one issuer certificate from the dropdown. This issuer certificate is used for signing the CSR by the certificate authority.
Only the issuer certificate available in the root or intermediate issuer certificates inventory is shown for the selection*Issuer Location This field appears on selecting Certificate Group as Default. Select the issuer location associated to the CA account. *CA Connector Name Provide a CA connector name. Based on this value, the CA connector name on the holistic view is displayed to all certificates issued through this WAEP.
*Certificate Validity By default, this value is 365 days. This value is applicable for all certificates issued through WAEP. *Subject Alternative Name This field appears only when you select the SAN Required checkbox. Select from the following values:- DNS
- User Principal Name
- Service Principal Name
Note: You can either choose DNS/Email or both, or customized SAN such as User Principal Name/Service Principal Name or both. For example, if you select DNS/Email or both, you cannot select User Principal Name/Service Principal Name and vice versa.Certificate Profile Select the profile configured to set the Key Usage and EKU. Note: This profile must match the Key Usage values and EKU as seen in the actual on-prem Microsoft template.Note: Fields indicated with red asterisk (*) symbol are mandatory. -
Click Add.
The details are populated in the table as shown. Click View to see the details of the uploaded template.
 The WAEP added is displayed on the page as shown.
 Important:
If more than three auto-enrollment requests are issued within an hour, then further auto-enrollment requests are blocked for the day with a log entry, Duplicate Certificate request - Certificate entry with this Common Name, Certificate Template and SAN value has already been issued. The user/device is automatically unblocked after 24hours.
The administrator can manually enable the blocked user/device from the WAEP page by clicking Blocked Users, selecting the checkbox against the user name to unblock, and clicking Unblock.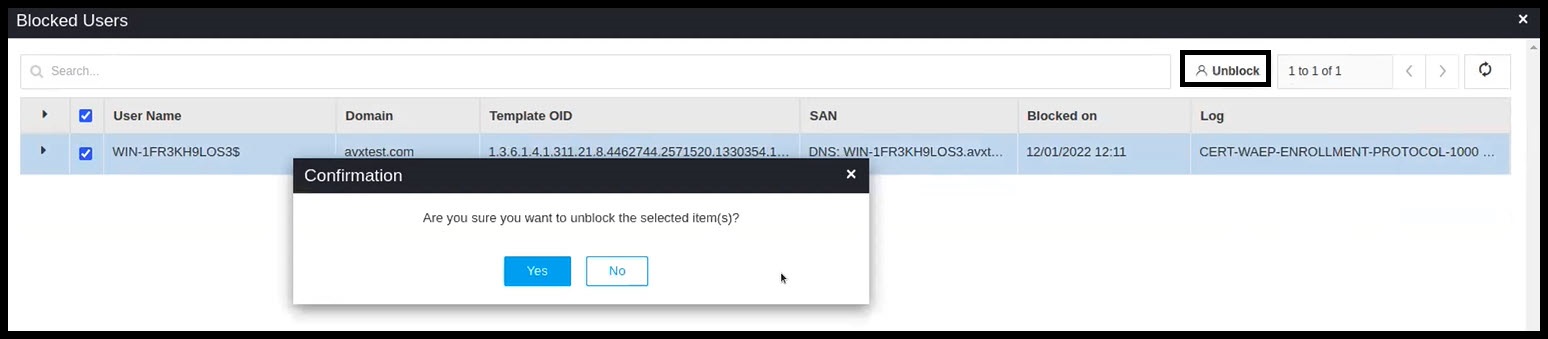
-
Click the Check hyperlink to validate the status of WAEP.
To update details of WAEP, click the hyperlink of WAEP. Make the edits and click Update. To delete WAEP, click the Delete (
 )
icon in the Action column.
)
icon in the Action column.Repeat the procedure for the other template as well.