Revocation Check Routing
-
Revocation check job
-
On demand revocation check
- Click the Menu icon.
-
Click CERT+.
The CERT+ left navigation pane is displayed.
-
Click Administration > Revocation Check >
Routing.
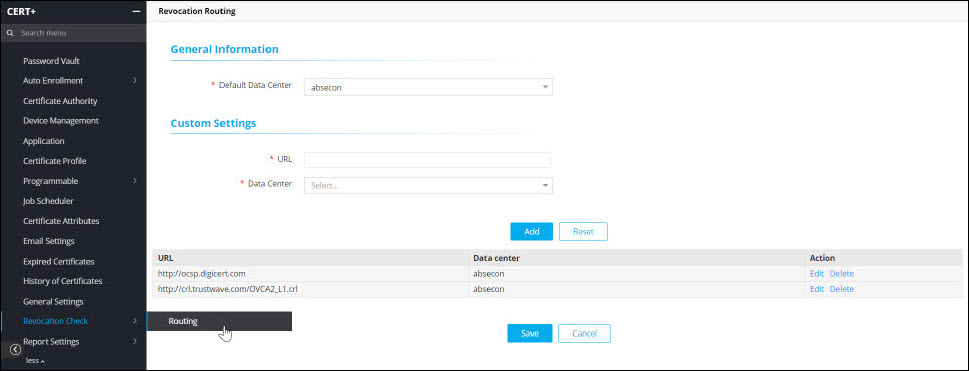
The Revocation Routing page is displayed.
-
Enter the following fields:
Table 1. Revocation Routing Page - Fields Description Field Description General Information *Default Data Center This is the default data center through which all validation requests are routed. Custom Settings *URL Specify the URL for which you want to run the revocation check job or the on-demand revocation check by selecting the certificate from the holistic view.
To run the revocation check job, copy and paste the URL from the CRL distribution points field of the Certificate details window.
To run the on demand revocation check, copy and paste the URL with ocsp extension from the Authority information access field of the Certificate details window.
Note: For on demand revocation checks, if you have configured two URLs with .crl and .ocsp extensions and for any reason the job fails on .ocsp, then the revocation check is triggered on the URL with .crl extension.
If the job is successful and the certificate is revoked, then the certificate is displayed on the Certificate Inventory page with a black icon against it.
If the job failed, then go to Administration > Logging > Certificate and check the log message.
*Data Center Select the data center of the URL from the dropdown list. Selecting this value will overwrite the default data center. Note: Fields marked with red asterisk (*) symbol are mandatory. -
Click Add.
The table is refreshed with the added URL and the data center.
-
Click Save.
A message that certificate revocation check routing is saved successfully is displayed.
The table is refreshed with a row entry of the newly added URL and the data center.