Cloud Scan
To discover certificates from a cloud, the cloud account must be determined under the AppViewX Inventory settings.
To trigger a cloud scan:
-
From the CERT+ menu, under
CERTIFICATE DISCOVERY, select Discovery > Cloud
Scan.
The Discovery : Cloud Scan : Add Discovery page is displayed.
-
In the Discover Details section, select/enter the following details:
Table 1. Field descriptions for the Discover Details section Field Description *Discovery Run Type Click the check box to select the desired discovery run type. The possible types are:
- On-demand - The user can trigger a discovery manually whenever he/she wants.
- Schedule - By scheduling the discovery, the user can automate the process for a defined time/ frequency.
Note: AppViewX will trigger the discovery certificates process for that instance.Discovery Instance Name Enter the name of the discovery instance. Description Enter the required details in this field.
Note: You can enter a maximum of 2000 characters in this field.Note: The following fields are displayed only when Discovery Run Type = Scheduled.Occurrence Type From the dropdown list, from the following options, select an occurrence frequency:- Daily
- Weekly
- Monthly
- Yearly
*Repeat On Note: This field is displayed only when Occurrence Type = Weekly.Select the checkbox corresponding to the day of the week on which you want the discovery occurrence to repeat.*Starts On Click  (Calendar widget) to
select a date to start the scheduled discovery.
(Calendar widget) to
select a date to start the scheduled discovery.*Ends From the following options, select when the scheduled discovery is to end: - Never: Discovery never stops.
- After : Discovery stops after the number of occurrences specified in the text field.
- On: Discovery stops on the date selected
using the calendar widget
 .
.
Summary Displays a summary of the selections made for scheduled discovery - In the Discover By section, enter/select the following details:
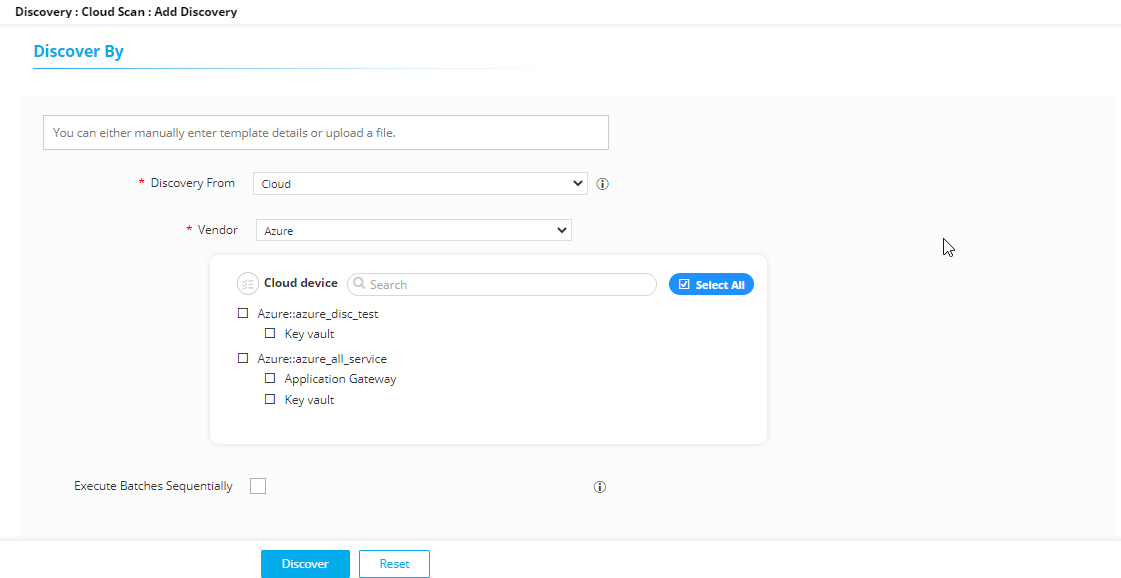
Table 2. Field descriptions for the Discover By section Field Description *Discovery From From the dropdown list, select the source to discover a certificate from. *Vendor From the dropdown list, from the following options, select a vendor: - Azure
For descriptions of and instructions-related to the fields displayed when Azure is selected, refer step 5a.
- AWS
For descriptions of and instructions-related to the fields displayed when AWS is selected, refer step 5a.
-
When Vendor = AWS, enter/select the following
fields:
Table 4. Field Description *Account type From the following options, select the AWS account type: - Stand-alone account sign-in (In a stand-alone account, the user account and the resources are available in the same account.)
- Cross account sign-in (In a cross-account resources are available across multiple accounts and users are given role-based access.)
*Select Account View Note: This field is displayed only when you've selected Account type = Cross account sign-in.From the given options, select one to specify if the discovery will be performed for the master account or for the child accounts.*Select Filter Type Note:From the following options, select one to specify how the discovery results should be filtered:- This field is displayed when Vendor = AWS.
- This field is enabled when:
- Account type = Stand-alone account sign-in
- Account type = Cross account sign-in AND Select Account View = Child Account.
- Account View
- Service View
*Selected Resources To search for a resource: - (Optional) In the Type your search and press Enter field, enter a search keyword to filter the list of resources.
- Select the checkbox corresponding to the required resource.
To add an existing resource to the list:- Click
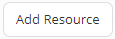 .
. - From the Add Accounts dialog box, select the checkbox corresponding to the required resource(s).
- Click Add Selected.Note: The Add Selected button is enabled after at least one resource is selected.
To delete a resource from the list:- Select the checkbox corresponding to the resource you want to delete.
- From the Action field, click (
 (Delete).
OR
Click .Note: To delete multiple resources at once:
- Select the checkboxes for the resources to be deleted.
- Click .
Execute Batches Sequentially To execute the discovery operation on the specified batches sequentially, select this checkbox. *Interval Between Batches If Execute Batches Sequentially is selected, enter a interval duration (in minutes) in this field. The sequential execution of the batches is spaced according to the interval value entered hee.
- Azure
-
In the Discovery Rules section, from the Associate Rule dropdown
list, select a rule that will be used to filter the discovered
certificates.
A setof filters is combined to create a rule, from the Rules menu. The selection of rules will apply respective filters on discovered certificates.
-
In the After Discover section, enter/select the following details:
Table 5. Field descriptions for the After Discover section Field Description *Move Certificate to Inventory with Status Select from one of the following options: - Do not move: The newly discovered certificates and their objects will not be moved to the inventory.
- Managed: The newly discovered certificates and their objects will be moved to the inventory with the status set to Managed.
- Monitored: The newly discovered certificates and their objects will be moved to the inventory with the status set to Monitored.
Use Access Control Rule To apply the rule configured using Access Control, select this checkbox. Note: If this checkbox is enabled, the certificate group will be associated automatically by the rule in access control.*Certificate Group From rthe dropdown list, select a certificate group to which the discovered certificates will be associated. Based on the group association, a policy will also be applied to these certificates, which will help ascertain compliance or non-compliance.
- Click Discover/Schedule to trigger the on-demand/scheduled discovery, respectively.