Citrix NetScaler Golden Config Compliance
This workflow validates a device against a compliance policy. A Standard Compliance policy "Citrix_Default_Compliance" with Default Parameters and Sample Values has been provided under the Collection. View this policy by navigating menu > Collection. Either you can select the default parameters or add custom commands to perform a compliance check and remediate. If the custom option is chosen, addition of rollback command is mandatory.
To run this workflow:- Go to Menu > ADC+ > AUTOMATION > Workflow Catalog > View/Run
- Click the Citrix NetScaler System category on the View/Run Workflows page.
-
On the popup window, hover the mouse over the Citrix
NetScaler Golden Config Compliance workflow.
The Run and Schedule buttons are displayed.
-
Click
 .
The Request > Citrix NetScaler Golden Config Compliance :: FormBuilder page is displayed.
.
The Request > Citrix NetScaler Golden Config Compliance :: FormBuilder page is displayed. - In the Device Details section, select a device, and then a compliance policy .
-
In the Compliance Parameter table, select or enter the following
details:
Table 1. Compliance Parameter Section - Field and Description Table Field Description *Config/Parameter Type You can select Custom or Default Config/Parameter type. For Custom Compliance policy, the Config/Parameter type is considered as Custom by default even if it is selected as Default. *Config/Parameter Name Enter the config/parameter name. *Value Enter the expected value in the device for the parameter. -
To add a new parameter to the Compliance Parameter Table, click Add (
 ) button After adding the
parameter, you can manage (update/delete) it.
) button After adding the
parameter, you can manage (update/delete) it.
-
Click the Submit button.
The Confirmation popup opens.Note:
- If you want to save this form to edit it later, click the Save Draft button, and then click Ok in the Confirmation popup window. The form will be saved as Open request under Request > All.
- If you want to cancel this form, click the Cancel button.
- Click Ok to submit the form.
- The Compliance Check runs automatically and generates Compliance Grid Report.
-
From the Compliance Grid Report, you get to know if the device parameters are
Compliant or Non-Compliant.
You can download the Compliance Grid Report in the
.csvor.xlsxformat by clicking the Download ( )
button.
)
button.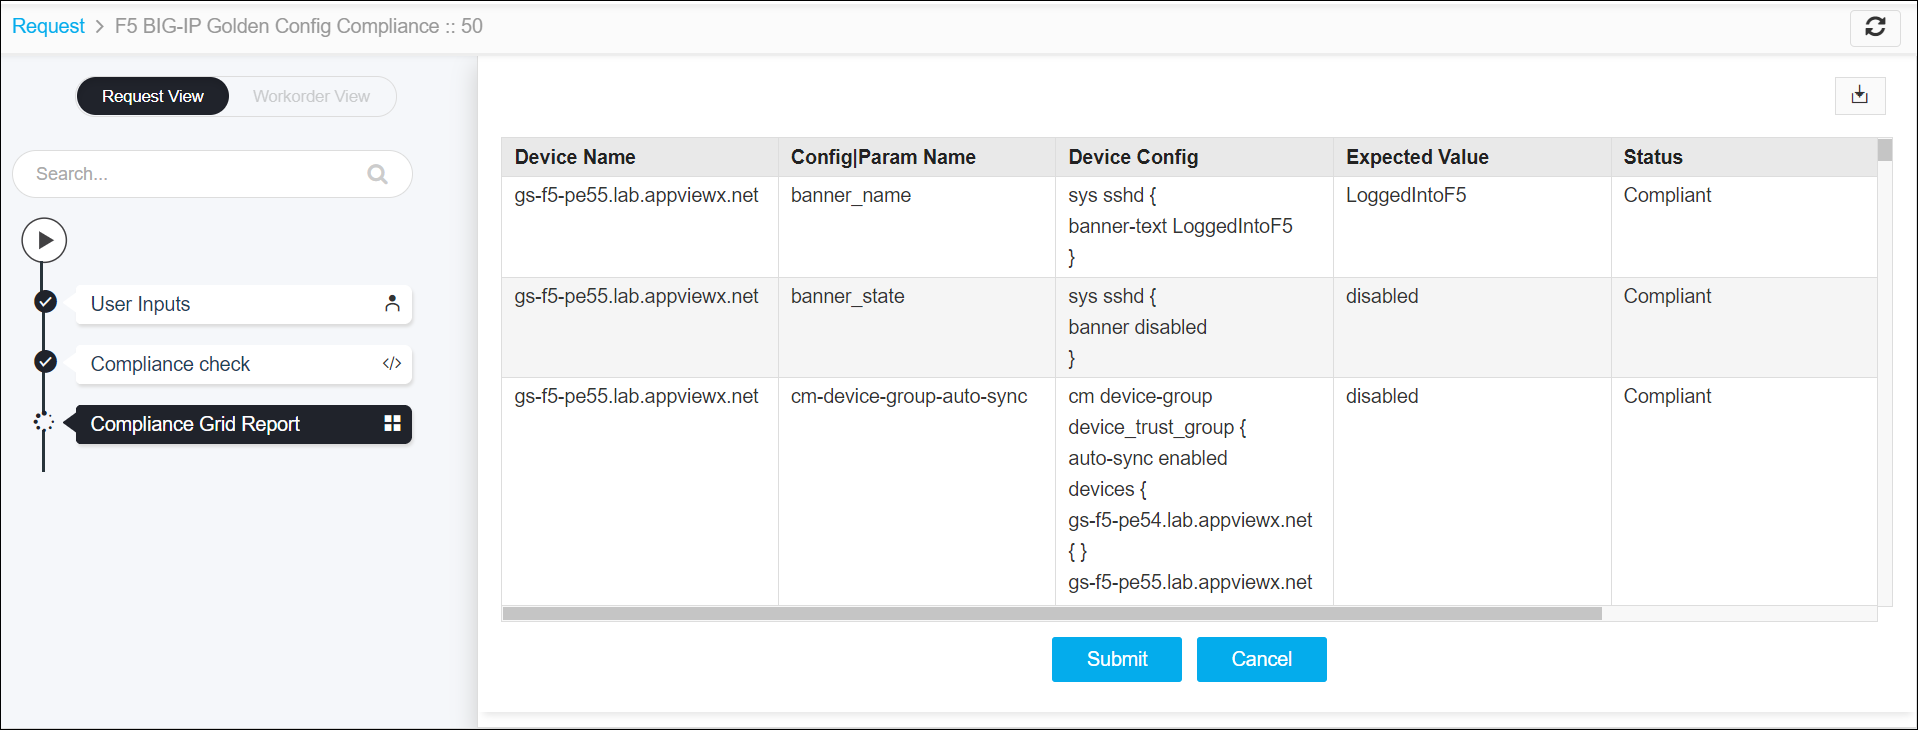 The summary of the Compliance Grid Report are:
- The first column displays the device name.
- The other columns display Config/Parameter names.
- The report has two body rows. They represent the following:
- First Row - the status of the Parameter in the device.
- Second Row - the actual value of the parameter in the device.
-
Click the Submit button, and then click Ok in the confirmation
pop-up.
The Compliance Diff check runs.
- The Compliance Diff check displays the details of non-compliant parameters for each device.
-
The details are:
- Parameter name and the value in the selected policy – shown in the left side of the diff Palate-Golden Config.
- Parameter name and the value in the selected device - shown in the right side of the diff Palate-actual config.
Note: To view the compliance difference for the other devices, select a device from the field value drop-down list in the left and/or right side of the diff Palate.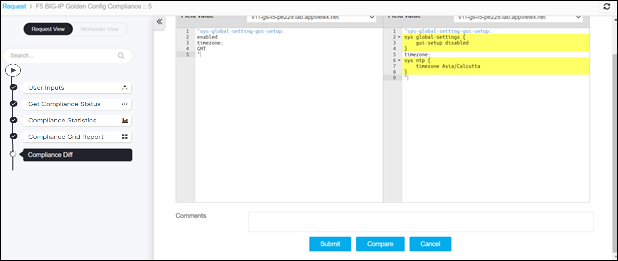
- Click the Submit button, and then click Ok in the confirmation pop-up.
-
The Compliance Policy Create/Update runs automatically:
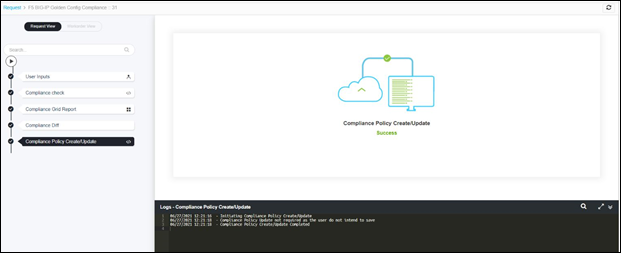 Note: At this phase, the policy is created/updated if you have selected the option Create New Compliance, SaveAs – Yes, Update Policy -Yes in the form input.
 -
Remediation Review: The Page displays a list of the Non-Compliant Parameters.
By default, two options are displayed: No, Yes.
- No – By default this option is selected. When this option is selected and you Submit, the remediation will not be applied to the non-compliant parameters, the workflow ends.
-
Yes – When you select Yes, the remediation table is
displayed for the non-compliant parameters.
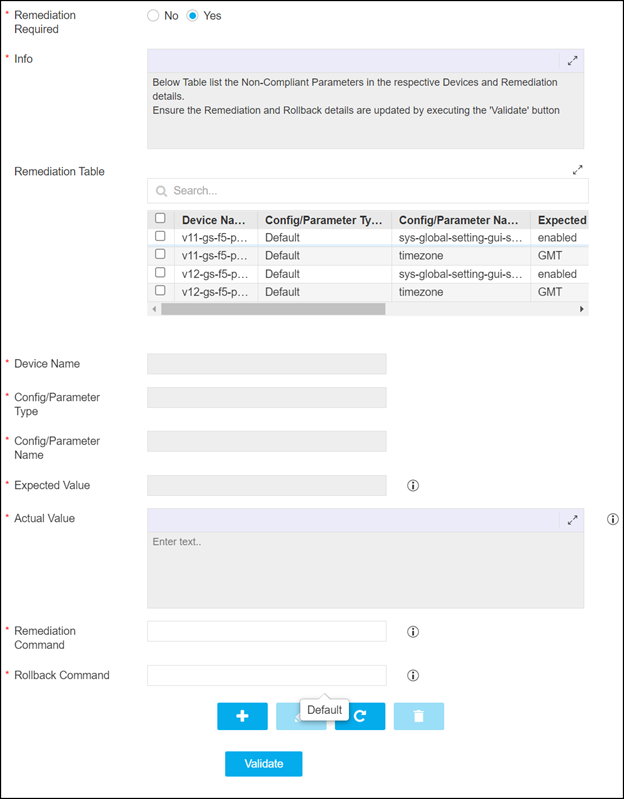
Note:- In case any custom parameter is part of this remediation table, then update the rollback command in the Rollback Command field.
- For default parameters, the remediation or rollback command is not required to be provided.
- If the rollback command is not updated for the custom parameter, you do not get the rollback option in case to revert the device parameter to the older state.
- Once the remediation command and rollback command are updated to the device, click the Update button.
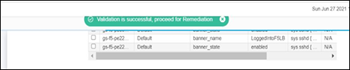
- Validate the remediation and rollback details by clicking the
Validate button until the message Validation is Successful is
seen.
-
Click the Submit button, and then click Ok in the confirmation
pop-up.
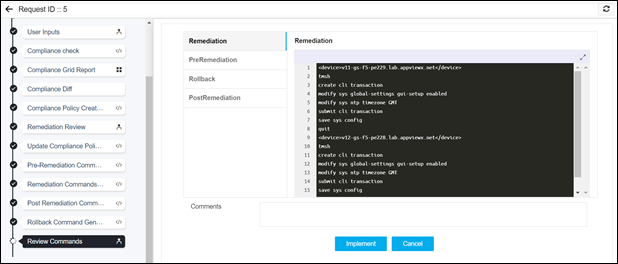
The update of remediation and rollback commands run automatically and generates Review Commands to review and implement the changes.
-
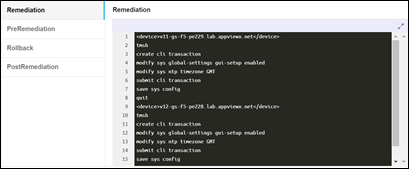
If required, review the commands that are about to be executed in the F5 load
balances in the following tabs:
- Remediation
- PreRemediation – List the values of the parameter, prior Remediation.
- Rollback – Revert the parameter’s value to the previous state of Remediation.
-
PostRemediation - List the values of the parameter, post
Remediation.