Create GTM Application Services
This workflow creates GTM Wide-IP along with GTM pool and monitor.
Pre-requisites
-
The AS3 service has to be enabled in the target F5 device.
-
F5 device list displays only AS3 service enabled and active devices.
To run this workflow,
- Go to
 Menu > Request > View/Run.
The Workflow Catalog page appears.
Menu > Request > View/Run.
The Workflow Catalog page appears. -
In the Workflow Catalog page, hover over the Create GTM Application
Services workflow.
The Run and Schedule buttons were shown.
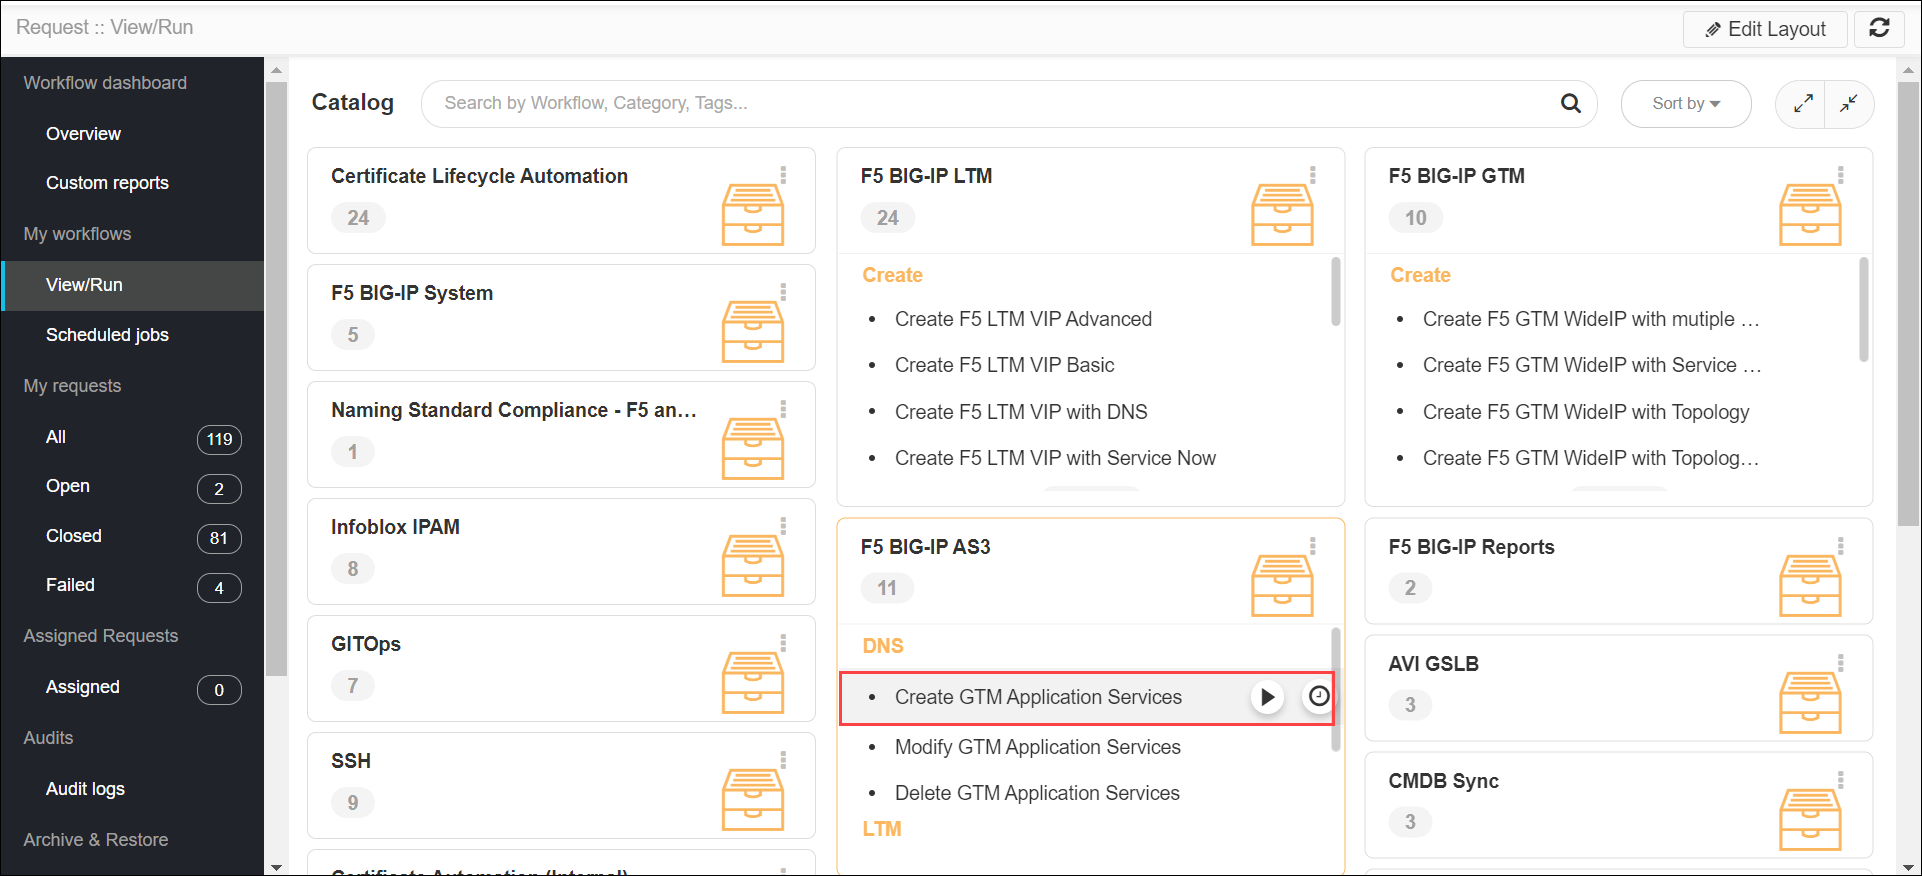
- Click the Run
 button.
The Form Input page opens:
button.
The Form Input page opens: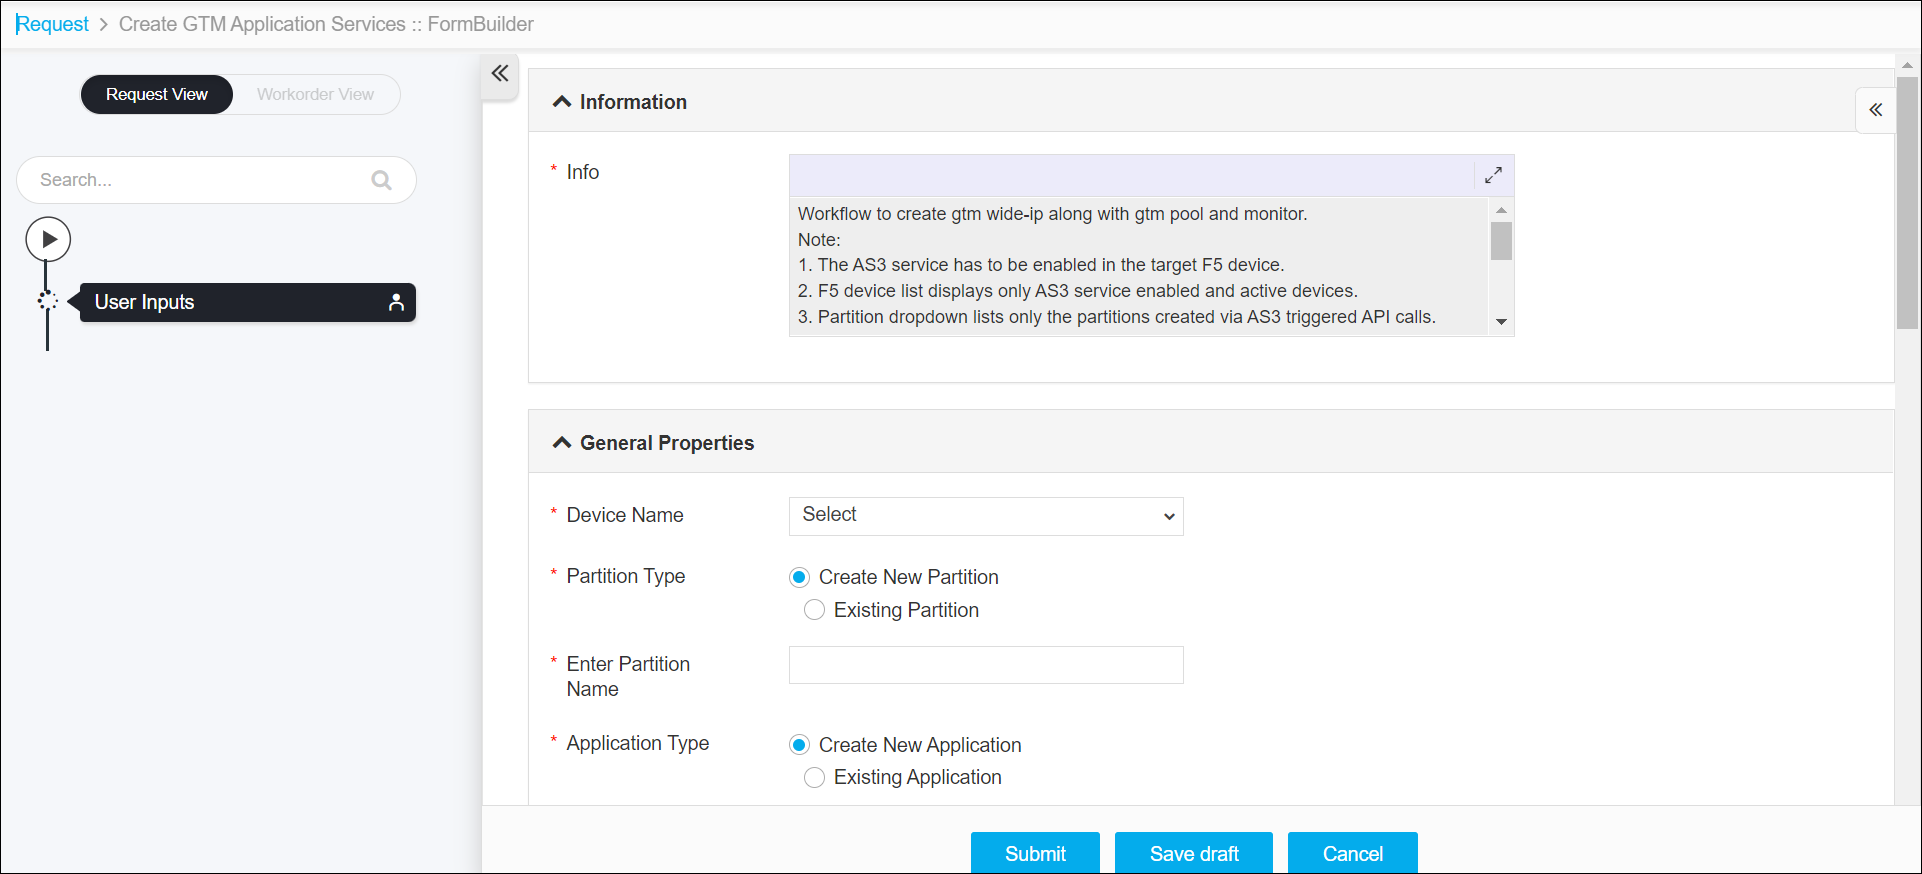
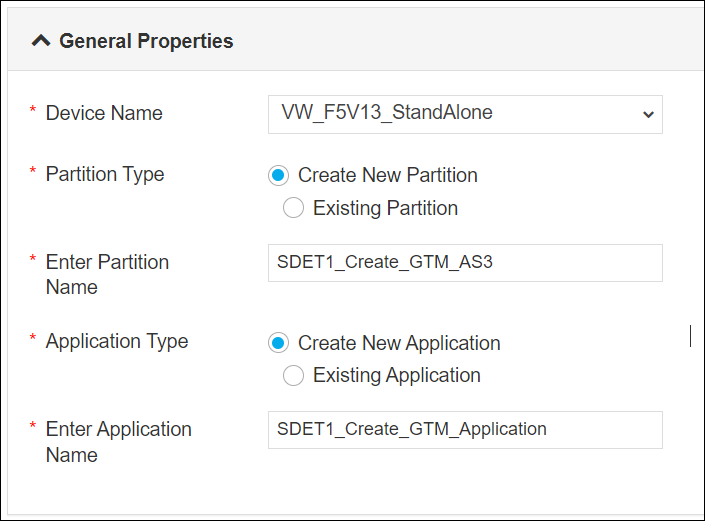
- Enter or select the field information in the General Properties section of
Form Input.
-
The following table provides the field description for the General
Properties section of Form Input:
Field Description **Device Name Select a device from the dropdown list. Only the devices that are AS3 enabled and active are displayed. *Partition Type Select a partition type. The options are: -
Create New Partition (default) - select this option to create a new partition.
-
Existing Partition - select this option to choose an existing partition.Note: Partition dropdown lists only the partitions created via AS3 triggered API calls.
*Enter Partition Name Enter the partition name. *Application Type Select a application type. The options are: -
Create New Application (default) - select this option to create a new application.
-
Existing Application - select this option to choose an existing partition.
*Enter Application Name Enter the name for the application. -
-
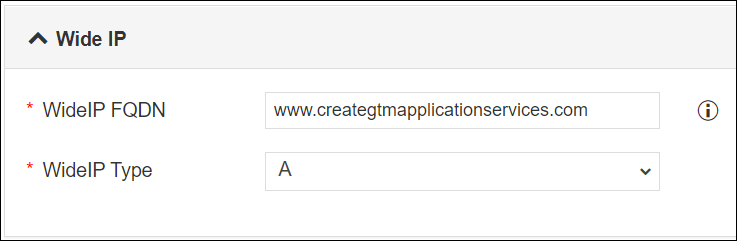
Enter or select the field information in the Wide IP section of Form
Input.
-
The following table provides the field description for the Wide IP section of
Form Input:
Field Description WideIP FQDN Enter the fully qualified domain name. WideIP Type Select Wide IP type from the dropdown list. -
Enter or select the field information in the Pool section of Form Input.
-
The following table provides the field description for the Pool section of Form
Input:
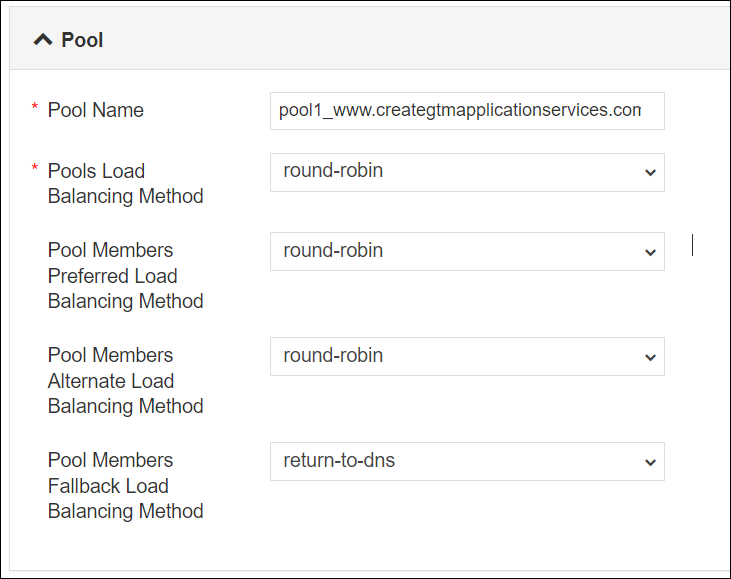
Field Description *Pool Name Enter the pool name. *Pools Load Balancing Method Select a load balancing method for the pools. Pool Members Preferred Load Balancing Method Select a preferred load balancing method for the pool members. The system tries this method first. Pool Members Fallback Load Balancing Method Select the alternate load balancing method. The system tries this method if the Preferred method is unsuccessful in picking the WideIP. -
Enter or select the field information in the Pool Members section of Form Input.
-
The following table provides the field description for the Pool Members section
of Form Input:
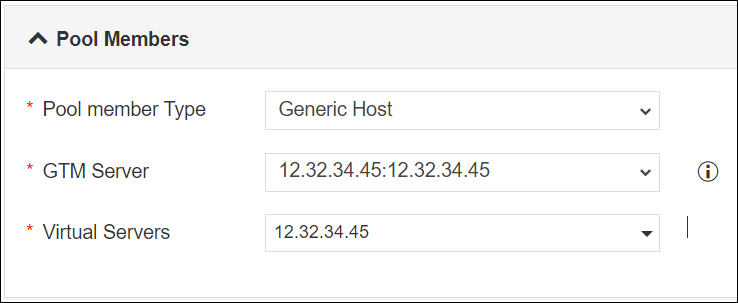
Field Description *Pool member Type Select a pool member type from the deopdown list. The types are: - Generic Host (default) - When you select this option you need to select GTM server and virtual servers.
- BIG-IP System -. When you select this option you need to select GTM server and existing VIP.
*GTM Server Select a GTM server from the dropdown list. *Virtual Servers Select the virtual servers from the dropdown list -
Enter or select the field information in the Monitors section of Form
Input.
-
The following table provides the field description for the Monitors section of
Form Input:
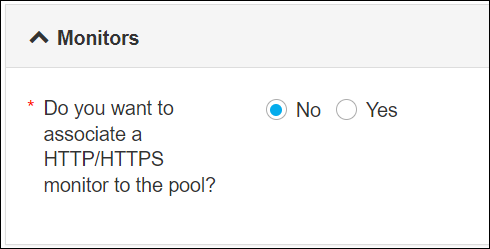
Field Description *Do you want to associate a HTTP/HTTPS monitor to the pool Select Yes to associate a HTTP/HTTP monitor, and then select monitor from the dropdown list otherwise select No. -
Click the Submit button.
The Confirmation popup opens.Note:
- If you want to save this form to edit it later, click the Save Draft button, and then click Ok in the Confirmation popup window. The form will be saved as Open request under Request > My Request.
- If you want to cancel this form, click the Cancel button.
-
Click Ok to submit the form.
The validation starts automatically and reaches the Review stage.Note:
- If there is any failure at this stage, start a new request by providing the correct data.
- Alternatively, select the failed request and clone it. Update the correct input data in the form input, and submit the workflow again.
-
The workflow is created.
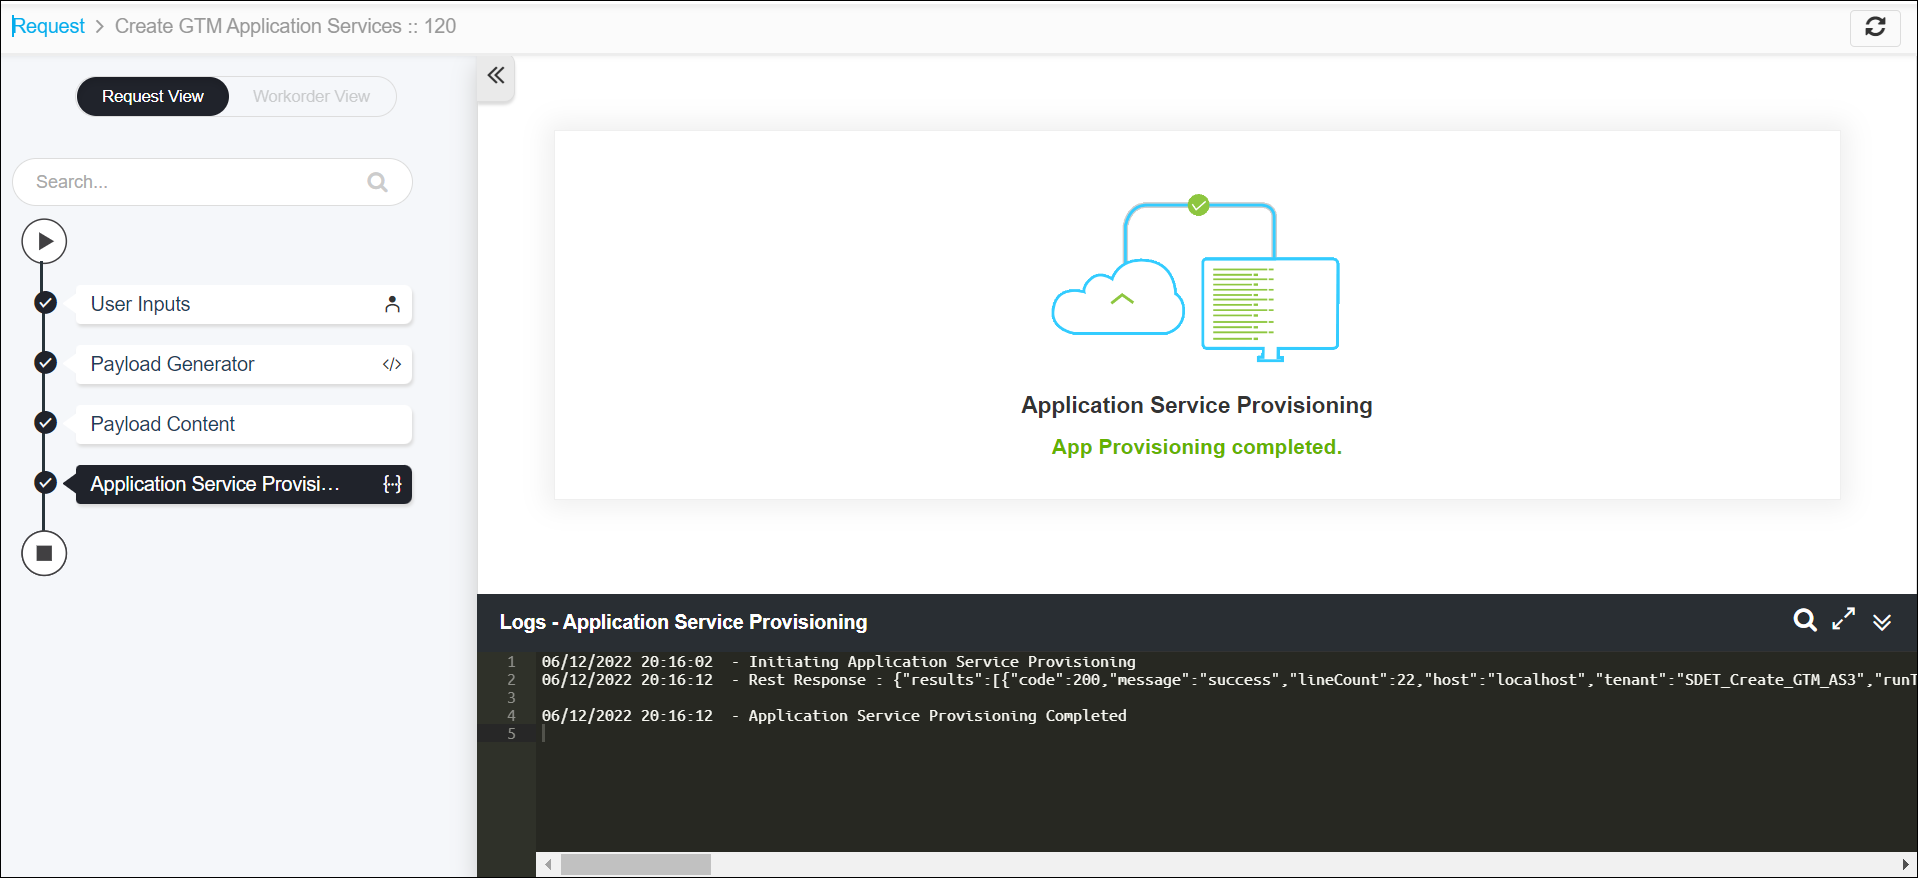
Note: The stages of the request are shown in the left side of the screen. To view a particular stage of the request, click the respective stage.