Add Application Connector
An application connector is a software application running on a server. To add the application connector the application should be managed under the AppViewX device inventory. All the supported devices in the AppViewX inventory can be provisioned with the certificate by adding the connector. The connector enables cloud-managed devices as will to provision certificates from on-premises infrastructure. To add an application connector to a server certificate,
- Log in to AppViewX application with valid credentials.
-
Click the menu button located in the upper left corner of the screen.
The left navigation pane appears.
-
Click CERT+.
The CERT+ left navigation pane appears.
- Expand CERTIFICATE ACTION.
-
Select Push to Device, and then
Server.
The Server Certificate page appears.
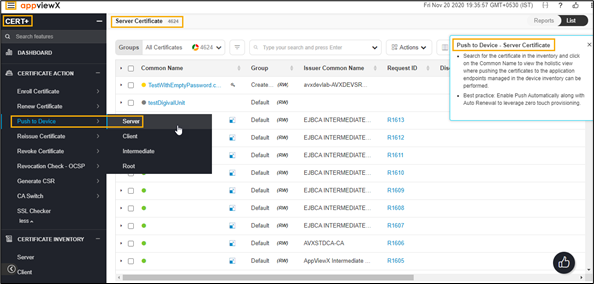
- In the Certificates list view, click the Common Name of a certificate you want to add a connector to.
-
In the Certificate topology page, click Add Connector.
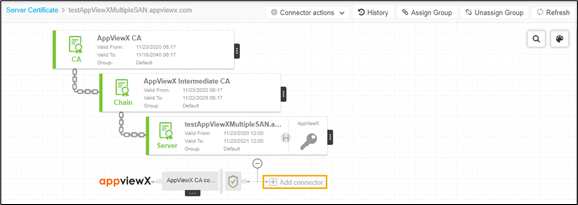 The Add Connector window appears.
-
In the General Information section, select/enter the
details as follows.
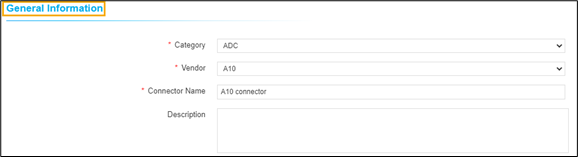
The following table describes the options available in the general information section:
Field Description Category Select the category from the dropdown list. The possible categories are:
- ADC
- Cloud
- Firewall
- MDM
- Server
- WAF.
Vendor Select the desired vendor from the dropdown list. Connector Name Enter a name for the connector that is descriptive enough when viewed within the Certificate topology. Description Enter the description in this field. - (Only applicable for Citrix application type) The SNI-enabled virtual server option is displayed. When the checkbox is selected, the virtual servers whose SNI is enabled, will be listed. Also, you can enable SNI for the virtual server by selecting Enable SNI push for Certificate and Enable SNI in Virtual Server.
-
From the list of available application objects, click the
.png) icon beside
each device you want to select.
icon beside
each device you want to select.
-
Based on the certificate format and the server type the certificate details
will vary. In the Certificate Details section,
select/enter the details as follows:
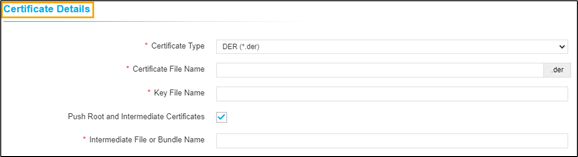
The following table describes the options available in the certificate details section:
Field Description Certificate Type Select the type of certificate to be pushed from the dropdown list. Certificate File Name Enter the desired certificate file name. Key File Name Enter the desired key file name. Push Root and Intermediate Certificates Select the push root and intermediate certificates check box, to push the certificate into the device. Intermediate File or Bundle Name Enter the desired intermediate File or bundle name. -
Push details are the optional fields that can be used based on client
requirements. In the Push Details section, select/enter the details as
follows:
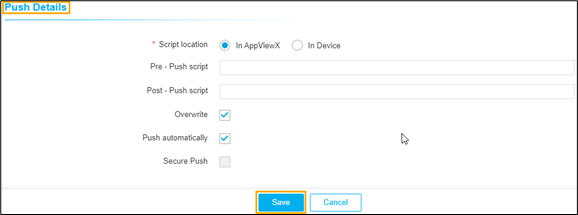 The following table describes the options available in the push details section:
Table 1. Field Description Script location Select the type of script location. The possible locations are:
- In AppViewX
- In Device.
Script location If the user wants to run a certain validation script before the push operation, the path can be specified in Pre - Push script. Post - Push script If the user wants to run a certain validation script after the push operation, the path can be specified in Post - Push script. Overwrite Select the checkbox to overwrite existing certificates with the new certificate. Push automatically Push automatically checkbox to push certificates to the device automatically when there is an update in the certificate. Secure Push (applicable for F5 application type) The Secure Push checkbox is selected by default. This option encrypts the certificates while pushing them into a device. You can uncheck this option if you have permission.
Note: For <.jks> Keystore, a valid alias needs to be entered to reference the certificate within the key store. - Click Save to add the application connector to the Certificate topology.