Scanning Uploaded Certificates
You can upload individual certificates or you can zip a group of certificates and then add them. For Windows-related servers and CA communication, an agent should be installed and configured in AppViewX.
To scan the uploaded certificate,
- Log in to AppViewX application with valid credentials.
-
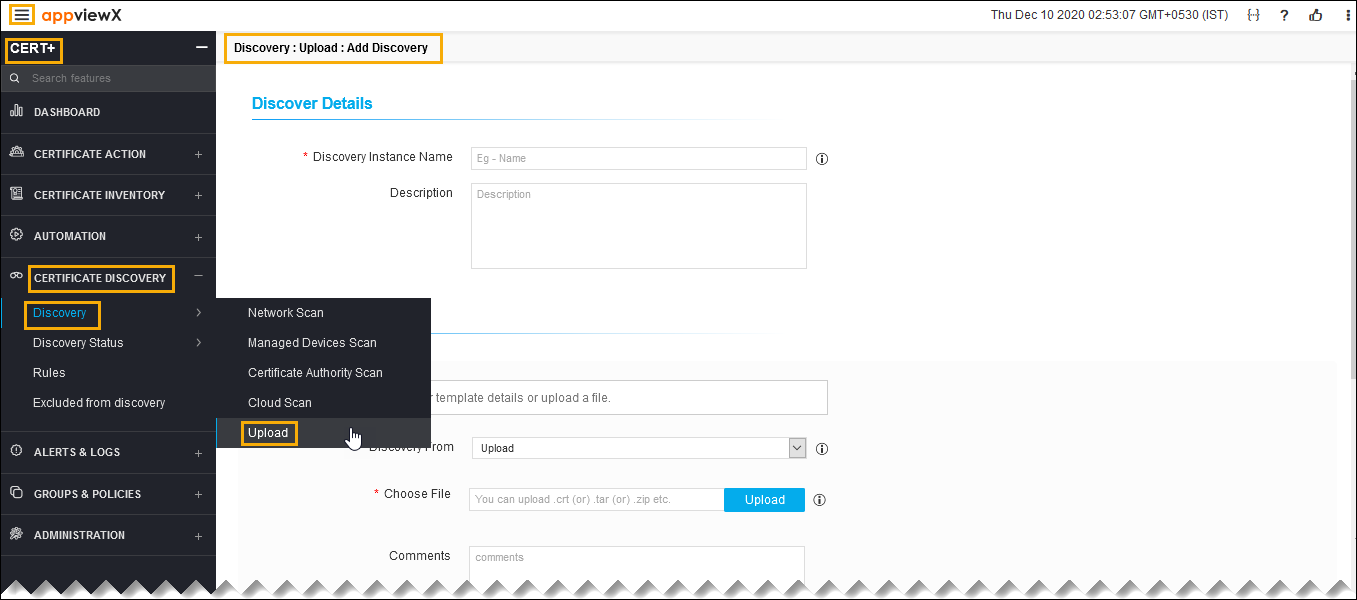
Click the menu button located in the upper left corner of the screen.
The left navigation pane appears.
-
Click CERT+.
The CERT+ left navigation pane appears.
- Expand CERTIFICATEDISCOVERY.
-
Click Discovery, and then select
Upload.
The Add Discovery page appears.
- In the Discover Details section, enter the Discovery Instance Name and Description.
- In the Discover By section, select/enter the details as follows.
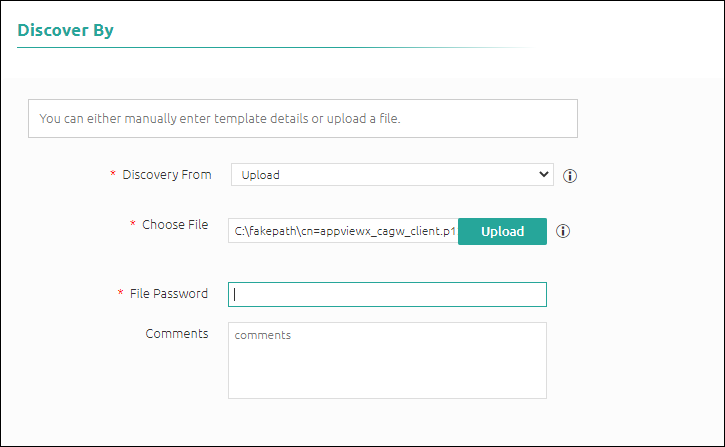 The following table describes the options available in the Discover By section:
Field Description *Discover From Select the source from the dropdown list to discover a certificate. *Choose File Click Upload and select the certificate you want to upload into the system, then click Open.
- You can also upload encrypted keys in the <.zip>, <.tar>, or <tar.gz> file To upload certificates in bulk, you can create a <.zip>, <.tar>, or <tar.gz> file containing all the certificates and then click upload.
- You can upload any of the following file types in the <.zip>, <.tar>, or <tar.gz> file: <.crt>, <.cer>, <.der>, <.p7b>, <.p7c>, <.pem>, <.pfx>, <.jks>, <.p12>.
* File Password Enter the file password.
Note: If the user uploads a password protected file, they need to enter file password.Comments Enter the necessary comments if required.
Note: The asterisk (*) symbol indicates a mandatory field. - In the Discovery Rules section, select the Associate
Rule from the dropdown list.
Note: Set of filters created as a rule in the Rules menu. The selection of rules will apply respective filters on discovered certificates.
- In the After Discover section, select/enter the details as follows.
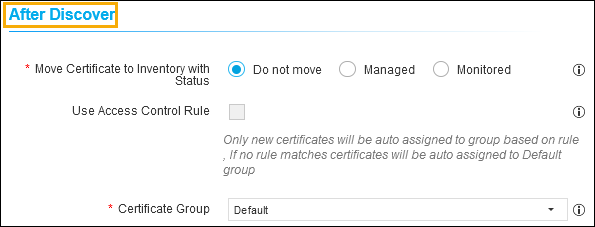 The following table describes the options available in the After Discover section:
Field Description *Move Certificate to Inventory with Status Click the checkbox to select the desired move certificate to inventory with status. The possible options are:
- Do not move - Newly discovered certificates and associated objects will not be moved to inventory.
- Managed - New discovered certificates and associated objects will be moved to inventory with status Managed.
- Monitored - New discovered certificates and associated objects will be moved to inventory with status Monitored.
Note: If the discovered certificates already exist in the inventory, the certificate status will not be changed.Use Access Control Rule Select the checkbox.
Note: If this checkbox is enabled, the certificate group will be associated automatically by the rule in access control.*Certificate Group Select the certificate group from the dropdown list. Discovered certificates will be associated with this provided group.
Note: If the discovered certificates already exist in the inventory, its certificate group will not be changed.Note: The asterisk (*) symbol indicates a mandatory field. - Click Discover or Schedule to perform an On-Demand or Schedule certificate discovery respectively.
- Click Reset to reset the form and re-loads the page.