Scan URL
The certificate public key is retrieved or stored during the handshake to the URL.
To discover a certificate via URL,
- Log in to AppViewX application with valid credentials.
-
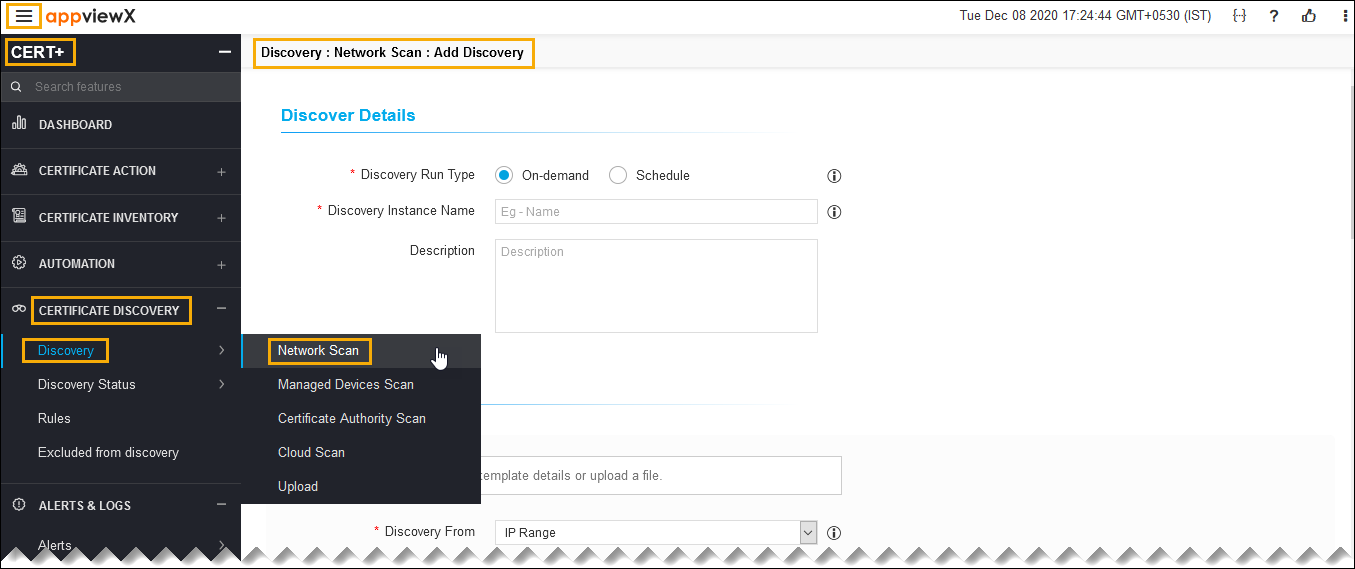
Click the menu button located in the upper left corner of the screen.
The left navigation pane appears.
-
Click CERT+.
The CERT+ left navigation pane appears.
- Expand CERTIFICATE DISCOVERY.
-
Click Discovery, and then select Network
Scan.
The Add Discovery page appears.
-
In the Discover Details section, select/enter the
details as follows.
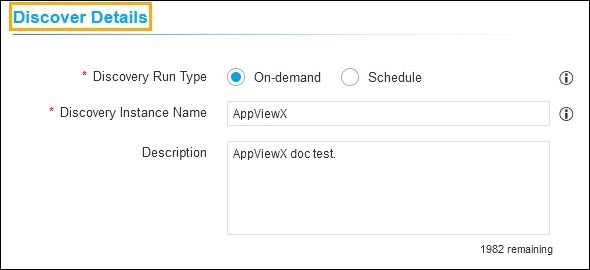
The following table describes the options available in the Discover Details section:
Field Description *Discovery Run Type Click the check box to select the desired discovery run type. The possible types are:
- On-demand - The user can trigger a discovery manually whenever he/she wants.
- Schedule -By scheduling the discovery, the user can automate the process for a defined time/ frequency.
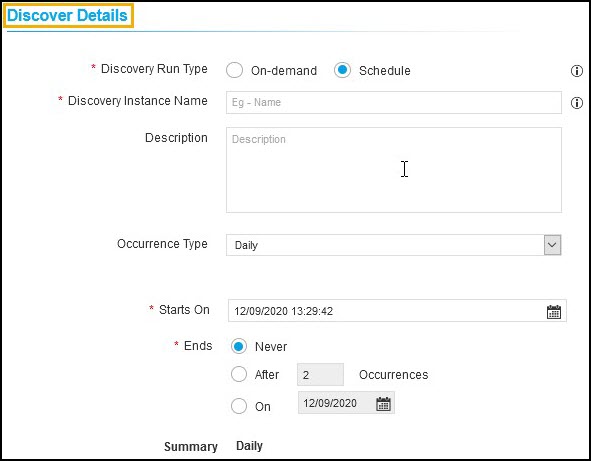
If you select Scheduled discovery fill the below details.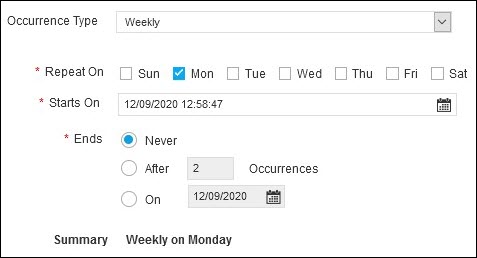
Field Description Occurrence Type Select the type of occurrence from the dropdown list.
The possible occurrences are:
- Daily
- Weekly
- Monthly
- Yearly.
*Repeat On Select a day in the week to schedule the weekly discovery.
Note:-
Repeat on is visible only when the Occurence type is selected as Weekly.
-
If Occurence type is weekly, select a day in the week to schedule the weekly discovery.
*Starts On Select the date to start the scheduled discovery. *Ends Select the desired last discovery.
- Never - Continues to discover the certificate.
- After - Stops the discovery process after a number of occurrences entered in the field.
- On - Stops the discovery process for the selected period from the calendar.
Note: AppViewX will trigger the discovery certificates process for that instance.Discovery Instance Name Enter the name of the discovery instance. Description Enter the required details in this field.
Note: You can enter a maximum of 2000 words in the field.Note: The asterisk (*) symbol indicates a mandatory field. -
In the Discover By section, select/enter the details as
follows.
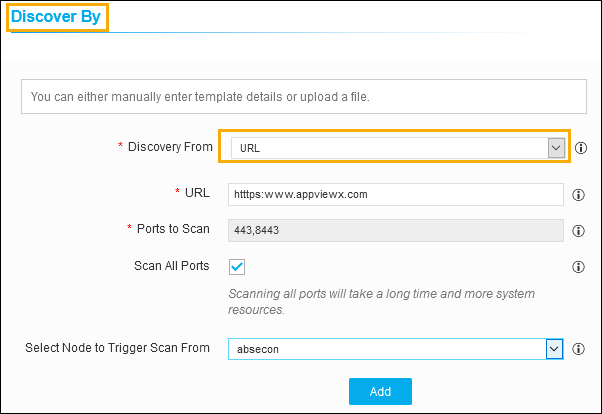 The following table describes the options available in the Discover By section:
Field Description *Discovery From Select the IP Range to discover a certificate from the dropdown list.
The possible options are:
- IP Range
- Subnet.
*URL Enter the valid URL in the field.
*Ports to Scan Enter the port number that ranges from 0 to 65535.
Note: You can set down port range with a hyphen (For example, 444-666,888-999,922,44).*Select All Ports Select the check box to scan all the ports.
Select Node to Trigger Scan From Select the CLM node from where the discovery node is performed. Select a File You can upload file to update the details.
Note: Allowed formats are <.xlsx>, <.xls>, or <.csv> file.Note: The asterisk (*) symbol indicates a mandatory field. -
Click Add.
The popup message appears as Network details added.
-
(or) you can fill all the details for Discover By section by uploading network
details via an excel sheet. To update network details via excel sheet,

- Click the Download Sample Template link, to download a sample file.
- Fill all the necessary details in the excel sheet.
- Click the Browse button.
-
Added network details are listed.
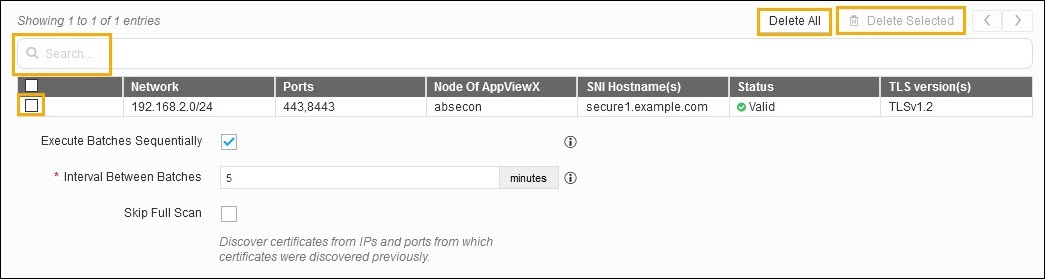
-
You use the search field to select the networks from the list.
- Use Delete All, if you want to delete all the network details.
-
Select desired check box, and then click Delete Selected
to delete specific networks.
-
Select the Execute Batches Sequentially checkbox if
required.
- If enabled, Based on the minute's value provided in Interval Between Batches field AppViewX will give the duration gap between each batch execution.
- If disabled, Scanning Intensity can be decided. An increase in scanning intensity will increase the scanning speed and network load. Maximum connections from a discovery engine will be chosen based on the Scanning Intensity.
- Select the Skip Full Scan check box if required. If enabled, Certificates will be discovered from IPs and ports from which certificates were discovered previously.
-
In the Device discovery option, select the required
discovery from the dropdown list.

-
In the Discovery Rules section, select the Associate
Rule from the dropdown list.
Note: Set of filters created as a rule in the Rules menu. The selection of rules will apply respective filters on discovered certificates.
-
In the After Discover section, select/enter the details
as follows.
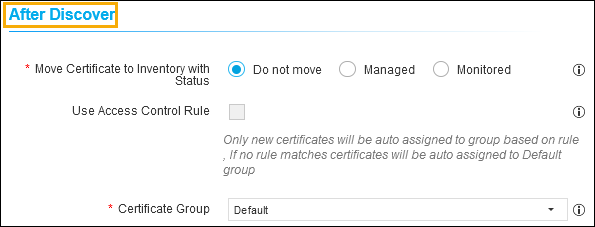 The following table describes the options available in the After Discover section:
Field Description *Move Certificate to Inventory with Status Click the check box to select the desired move certificate to inventory with status. The possible options are:
- Do not move - New discovered certificates and associated objects will not be moved to inventory.
- Managed - New discovered certificates and associated objects will be moved to inventory with status Managed.
-
Monitored - New discovered certificates and associated objects will be moved to inventory with status Monitored.
Note: If the discovered certificates already exist in the inventory, the certificate status will not be changed.
Use Access Control Rule Select the check box.
Note: If this checkbox is enabled, the certificate group will be associated automatically by the rule in access control.*Certificate Group Select the certificate group from the dropdown list. Discovered certificates will be associated with this provided group.
Note: If the discovered certificates already exist in the inventory, its certificate group will not be changed.Note: The asterisk (*) symbol indicates a mandatory field. - Click Discover or Schedule to perform an On-Demand or Schedule certificate discovery respectively.
- Click Reset to reset the form and re-loads the page.