Create a Group
Assign the user to a user group that (inherits from resource and role) have access to certificate group
- Log in to AppViewX application with valid credentials.
- Click the menu button located in the upper left corner of the screen.
The left navigation pane is displayed.
-
Click CERT+.
The CERT+ left navigation pane is displayed.
-
Click Groups under Groups &
Policies.
The Group inventory is displayed.
- CERT+ is packaged with default certificate groups Default and Certificate-Gateway.
-
Click the + Create button in the command bar to create a
new group.
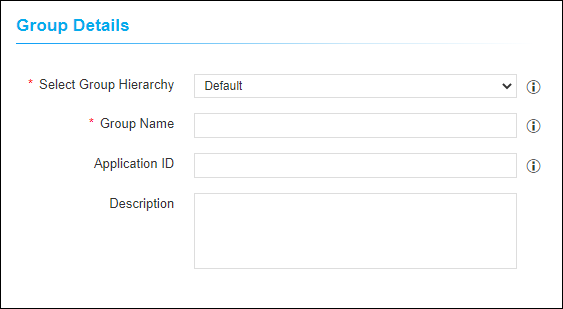
 The following table provides the field description under the Group Details section:
Table 1. Group Details - Field Description Table Name Type Mandatory Description Validation Select Group Hierarchy Select Yes Select the parent group to which the new group should be associated NA Group Name Text Yes Enter a unique name for the new group The name should not start with special characters and spaces. No special characters are allowed except('.', '-', '_') and name cannot end with space Application ID Text No Provide organization ID (if any) to associate with the new group NA Description Text No Provide the purpose of the new group NA Note: The asterisk (*) symbol indicates a mandatory field. -
Group Name is mandatory in the Group Details section.
Provide the Group Name to create a new group.
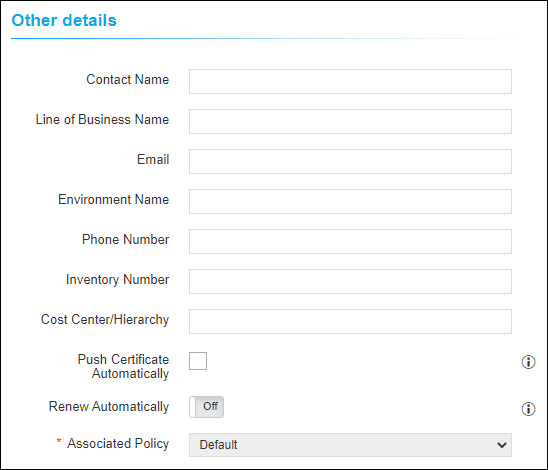
The following table provides the field description under the Other Details section:
Name Type Mandatory Description Validation Contact Name Text No Provide contact person to whom changes should be intimated NA Line of Business Name Text No Provide the name of the business unit NA Email Text No Provide contact mail address NA Environment Name Text No Provide environment name NA Phone Number Text No Provide a phone number for contact NA Inventory Number Text No Provide inventory number NA Cost Center/ Hierarchy Text No Provide Cost Center code/ label NA Push Certificate Automatically Check box No By enabling the check box, the renewed/ reissued certificates in this group are automatically associated with their device NA Renew Automatically Toggle button No Turn On to automatically renew the certificate belongs to this group. NA Associated Policy Dropdown (disabled) Yes Displays the policy associated with this group. NA Note: The asterisk (*) symbol indicates a mandatory field. - The fields in the Other Details section are used based on the
organization's needs.
-
Click Create button to create the group.
Users can view the group only if it is associated with the Resource of their User Group. To associate the Group to a Resource click the Update Group and Configure the Resources for User Access button instead of Create button. This will create the group and navigates to Resource. Refer the Create a Resource section to configure user access.
- The newly created Group is added to the Group inventory. Click the
Name (Group name) to view the group details.

- Post certificate discovery, you can view the count of certificates (Server, Client, Device, and Code Signing) associated with this group.
- Click the count in the Server Certificates column to view the certificates.