Create a Resource
To create a resource,
- Log in to AppViewX application with valid credentials.
-
Click the menu button located in the upper left corner of the screen.
The left navigation pane is displayed.
- Navigate to Account, and then click Resource
from the list.
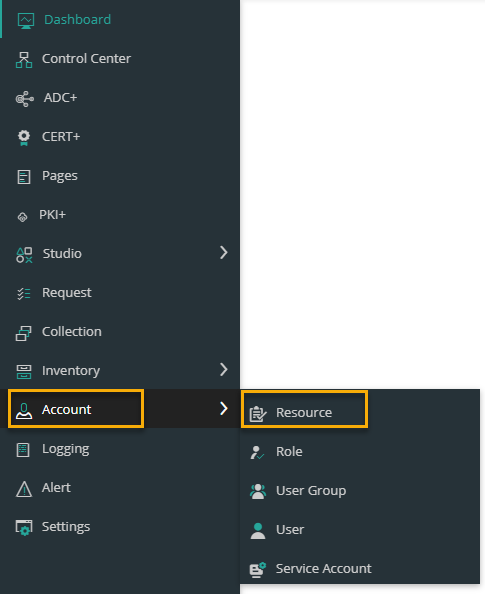 Note: AppViewX is packaged with default resource (super access) enabled. All the certificate groups have R (read) and RW (read and write) permissions to the super access resource.The Resource page is displayed.
.png)
-
Click the
 icon in the
command bar to create a new resource.
The Add page is displayed.
icon in the
command bar to create a new resource.
The Add page is displayed.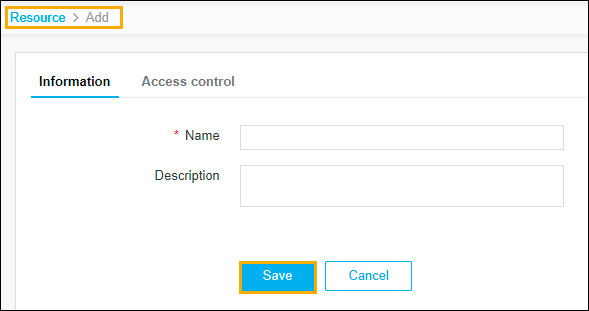
-
The following table describes the options available on the Add page:
Field Description * Name Enter the name of the resource. Description Enter a brief description of the resource and granular-level access associated with the resource.
Note: You can enter a maximum of 255 words in the field.Note: The asterisk (*) symbol indicates a mandatory field. -
Click Save.
The pop-up message is displayed as Resource added successfully.
- Click Access control to associate the required resources and to provide permission.
-
The Access control tab lists the categories that can be
controlled by RBAC using resources. Under the Access
control tab, from the left pane, select one of the required
categories. The available categories are,
-
Device (to filter and select the devices that need to be assigned to a resource, click the
 icon.)
 -
Certificate
-
ADC (to filter the ADC objects that need to be assigned to the resource, click the
icon.) -
SSH
-
Command Session Control
-
Provisioning Templates
-
Provisioning Requests
-
Security Policy
-
Application Security Policy
-
Proxy List
-
Blueprint
-
Application
-
Workflow Studio
-
Workflow Requests.
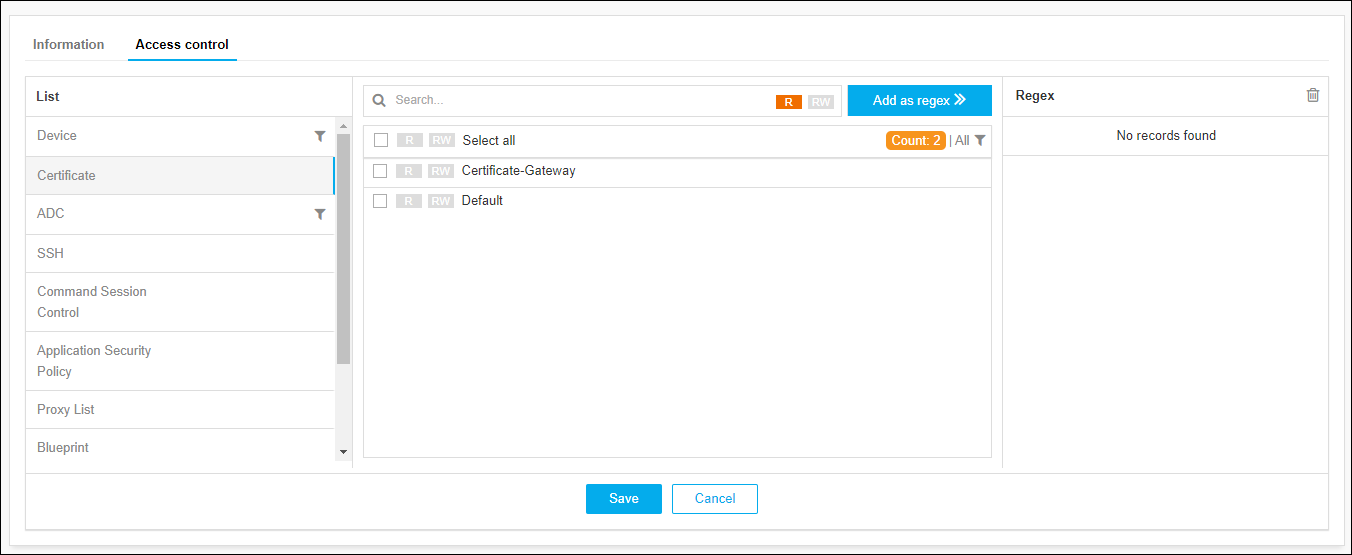 Note: AppViewX is packaged with default certificate groups (Certificate-Gateway and Default).
-
-
Associate the certificate groups to the resource and assign permission:
-
Use regular expression (regex) to identify and associate the certificate groups
to the resource:
.png)
-
Enter the regex in the Search field. For example, enter CA in the search field and click R or RW to assign Read-only or Read and Write permission respectively.
-
Click the Add as regex button. All the certificate groups that match the regex will auto associate to the resource with the relevant permission. For example, all the certificate groups with CA in their name, such as CA-Digicert, CA-Entrust, CA-Sectigo will auto associate to the resource with R read permission.
-
One or more than one regex can be added.
Note: The purpose of the regex is, the search string continues to work in the background and auto-associate all the new certificate groups to the resource when the certificate group matches the regex you created.
-
- Click Save.