Configure an Application View Widget Using Predefined Layout
Using Predefined Layout, you can configure application view widget by performing the following quick steps:
-
choose the widget Layout/Application grouping format.
-
configure Application patterns
-
tag Widgets to a Dashboard
Gain instant visibility into your Applications across Devices, Data centers, Sync groups etc., in less than 30 seconds. With frequent change in addition and removal of applications, AppViewX ensures that the Dashboards are dynamic in nature and updates any change in the Application configuration instantly.
To configure an Application view widget using predefined layout:
- Go to Menu > ADC+ > TRAFFIC MANAGEMENT > Dashboards.
-
In the left navigation pane, click the add icon located beside
Dashboards.
The Configure Dashboard page appears. In this page, the layouts are categorized as follows:
-
SLB Management & Monitoring
-
GSLB Management & Monitoring
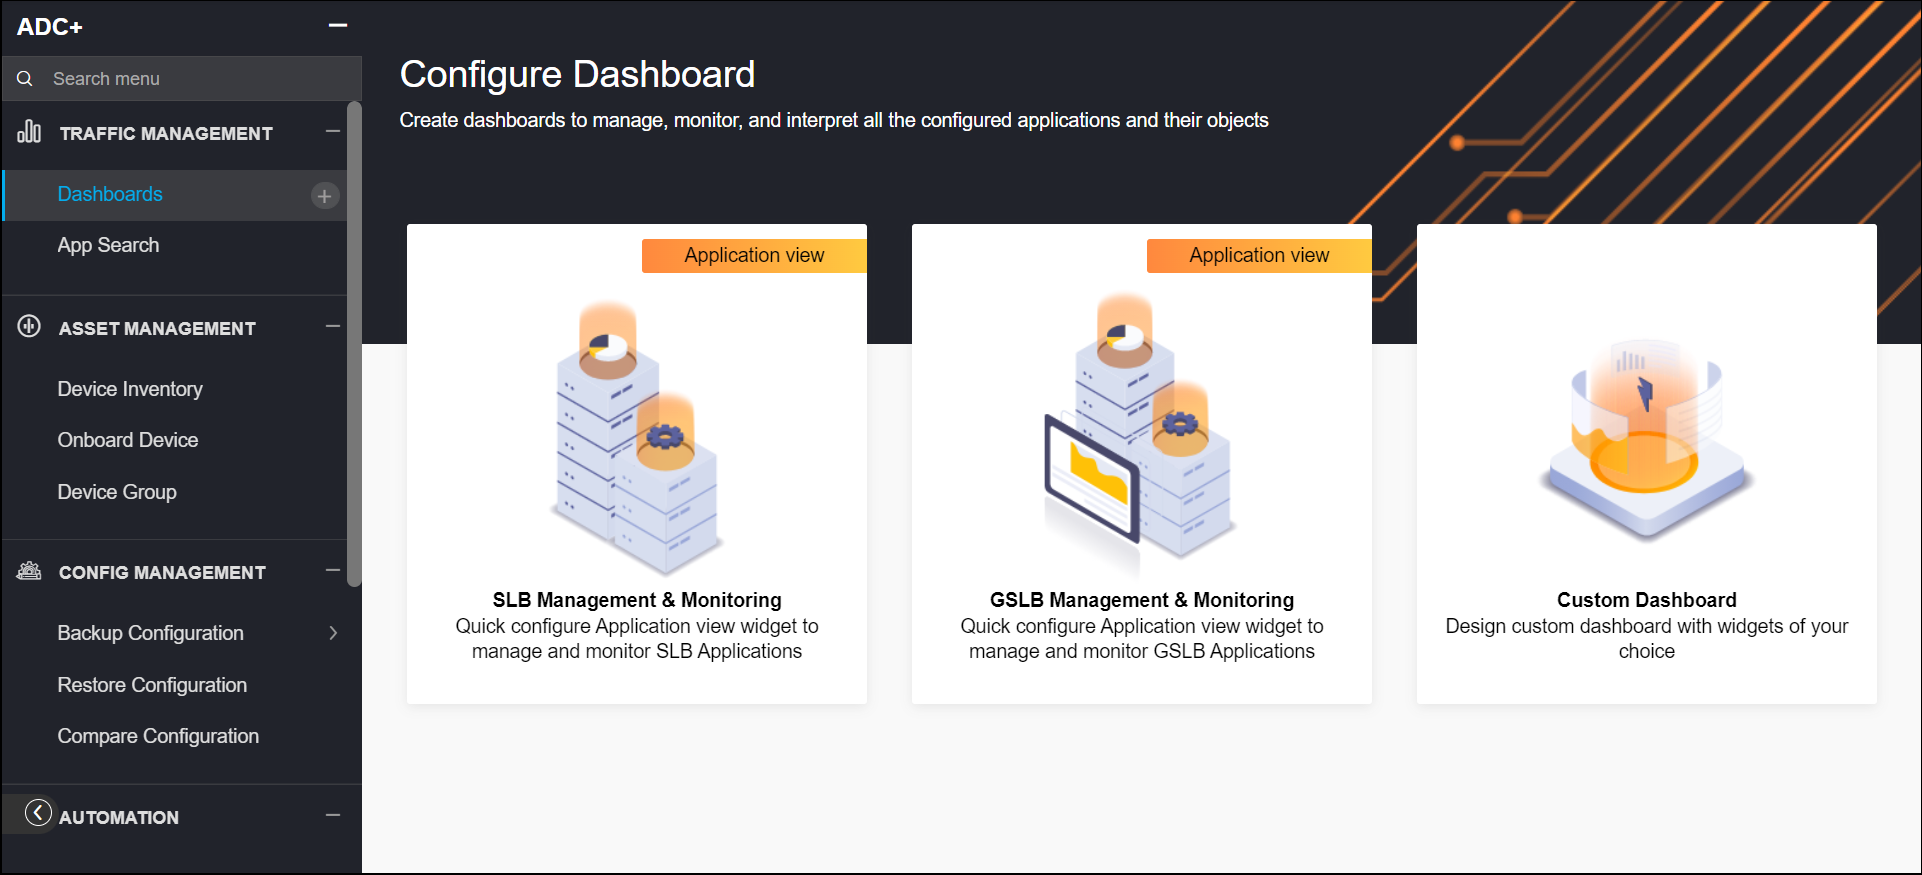
-
- Hover the mouse over the desired layout category.
-
Click the Use button.
The configuration page opens.
-
Select the field information in the Application Layout
section:
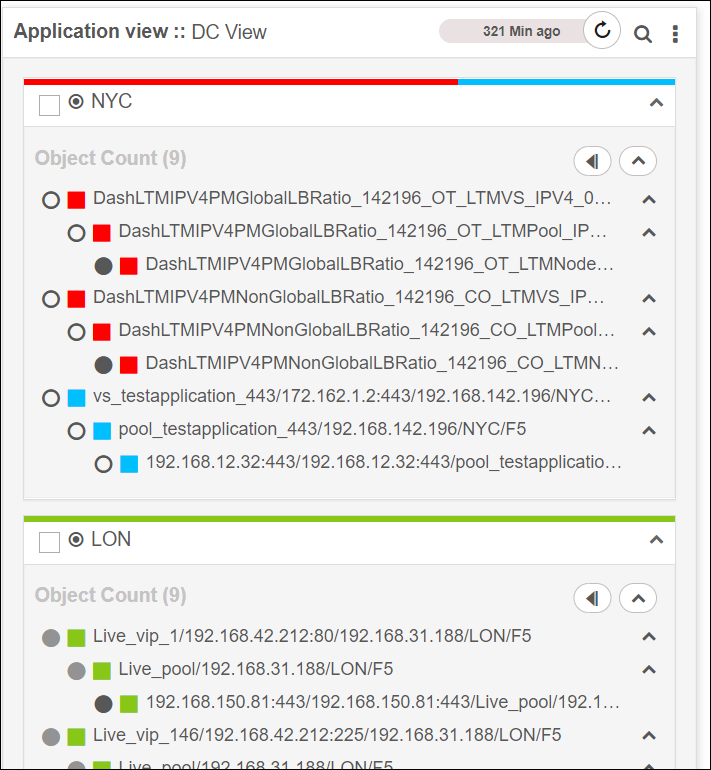
Table 1. Application Layout Section - Field and Description Table Field Description Object Type* Object type of the application. Select the kind of object you want to add. The options that appear in this field vary based on the selected option in the previous screen. Select Object Grouping Format* Choose how the applications should be grouped within the widget. The above image depicts how the applications will be grouped within the widget. The options are as follows: -
Data Center View - select this option to group the applications based on the value given while adding the device.
-
Device View - select this option to group the applications based on device name.
*: Mandatory fields -
-
Enter or select the field information in the Add Objects section.
Table 2. Add Objects Section - Field and Description Table Field Description Name Name of the widget. Add Resource (or) Add Objects Add Resource - Click this button to configure the widget with a resource, which is already configured within AppViewX in Accounts > Resource page. By doing this, any updates made to the resources will automatically be seen in the widget as well.
Add Objects - Click this button to add objects manually or use specific regex patterns so that any new applications matching the given regex will automatically be added to the widget.
Note: Only 1000 objects can be included in each widget.Add Widget Click this button to configure one more widget with the same layout selected. Maximum of three widgets can be created for a layout. -
Select the field information in the Dashboard Allocation section.
Table 3. Dashboard Allocation Section - Field and Description Table Field Description Dashboard* Select the New/Existing option to either create a new dashboard or select an existing dashboard into which newly created widget(s) to be added.
Note: When you select New dashboard option, you need to provide name for the Dashboard. -
Click Create.
The widgets are created and you will be landed in the dashboard. You can see the widgets created with the input applications grouped based on the layout selected.
-
To reconfigure the applications or to change the layout,
Note: For a widget configured with layout, you cannot add/delete objects or perform any group level actions from the below screen as the groups are updated dynamically based on layout selected.
-
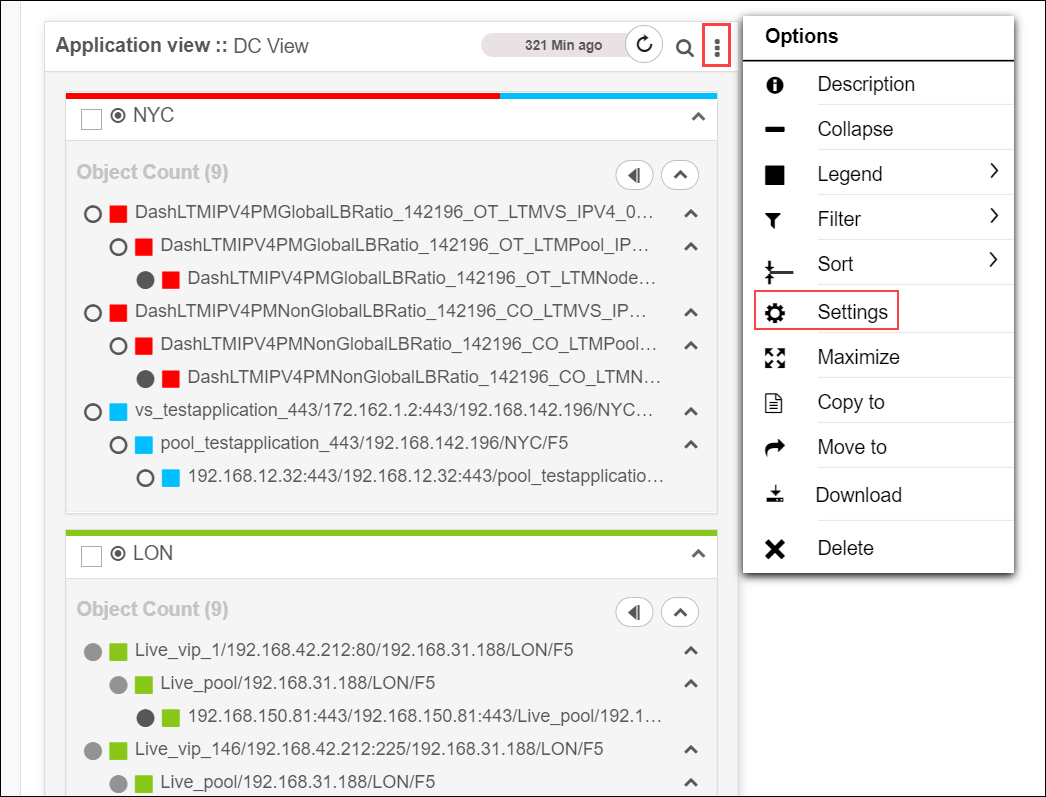
Select Settings from the dashboard options.
-
To change the layout,
-
Click the edit icon located next to the layout name.
The configuration page opens.
-
Change the layout in the configuration page, and then click the Update button.
-
-
To remove the applied layout, click the delete icon locate next to the layout name, and then click Proceed in the confirmation pop-up.Note: Removing the layout converts the widget to a custom layout and the associated widget group will no longer update dynamically.
-