Creating Certificate Authority
- Go to
 (Menu) icon > PKI+
> CA Inventory.
(Menu) icon > PKI+
> CA Inventory. - From the CA Inventory page, you can choose any of the certificate authority type:
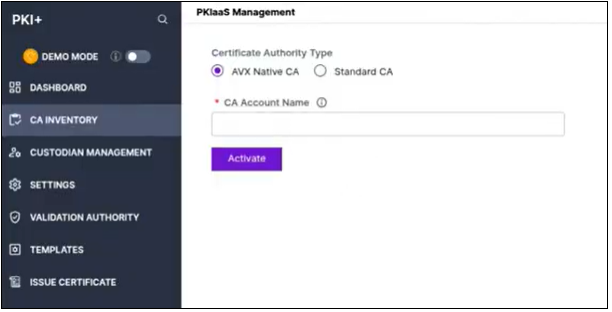
- AVX Native CA: By default, this is selected. This CA is a PQC-ready
PKI owned by AppViewX for issuing digital certificates with both traditional
and PQC algorithms. These certificates are used to verify the authenticity
and identity of parties in secure communications, such as SSL/TLS for
websites, email encryption and
others.Note: AVX Native CA once activated cannot be reversed.
- Standard CA: This is a private CA with a cloud CA backend to issue
digital certificates with only traditional algorithms.
To use this CA, you need to first initialize PKI. Reach out to [email protected].
Once initialized, go to (Menu)
icon > CERT+ > Administration > Certificate Authority > AppViewX
PKIaaS to create the CA account.Note: You must create a CA account before adding custodians or CAs.
- AVX Native CA: By default, this is selected. This CA is a PQC-ready
PKI owned by AppViewX for issuing digital certificates with both traditional
and PQC algorithms. These certificates are used to verify the authenticity
and identity of parties in secure communications, such as SSL/TLS for
websites, email encryption and
others.
- Enter a unique name in the CA Account Name field and click Activate.
Note: Alternatively, you can create an AVX Native CA by going to
(Menu) icon > CERT+ > Administration > Certificate Authority.
(Menu) icon > CERT+ > Administration > Certificate Authority.
What to do Next:
- Create a root CA. See Creating Root CA.
- Create a subordinate CA from AppViewX PKIaaS root CA. See Creating Subordinate CA from PKIaaS Root
CA.
-OR-
- Create a subordinate CA from an external root CA. See Creating Subordinate CA from External Root CA.