Create Client Authentication Certificate Using AppViewX CA
- Log in to the AppViewX application with valid credentials.
-
Click the menu button.
The left navigation pane appears.
-
Click CERT+.
The CERT+ left navigation pane appears.
- Expand CERTIFICATE Inventory.
-
Select Enroll Certificate, and then Server.
The Enroll Server Certificate page appears.
-
In the General Information section of the Enroll Server
Certificate page, select the desired Assign Group from the
dropdown list.
Note: By default, the Default option is selected.
- In the CA Details section, select/enter the details as required.
- Select a CSR Generation mode: AppViewX, Upload CSR, HSM, or Endpoint.
- Under the CSR Parameters section, enter a Common Name for the certificate.
- While creating certificates, you can attach supporting documents by uploading it in the Attachment section.
- Click Add to generate the certificate. The certificate holistic view with the newly created CSR appears.
- Click Submit.
- On the submit dialog box, enter relevant comments and click Yes.
- Click Refresh on the top-right to refresh the holistic view. Now, a chain of certificates is displayed.
-
Hover over the vertical eclipse icon on the certificate and download the
Certificate and Key.
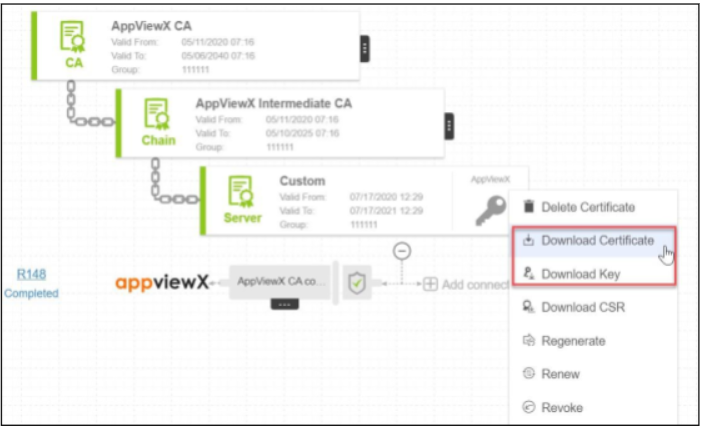
Note: The user has to trust the AppViewX Intermediate CA certificate and select this certificate as Issuer Certificate during the EST configuration.