Enable EST Services
- Open the terminal window.
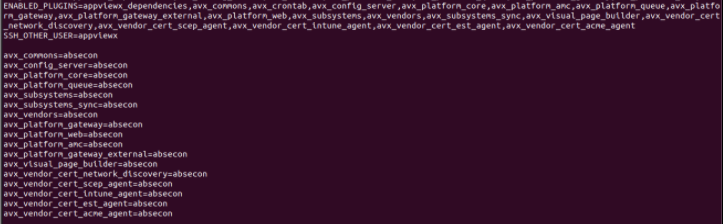
- Add the avx_vendor_cert_est_agent and avx_platform_gateway_external in ENABLED_PLUGINS in appviewx.conf that is available inside the scripts folder </home/appviewx/appviewx_kubernetes/scripts>.
-
Specify the data center (DC) where the gateway must be deployed.
-
Execute the command:
<plugins_install.sh> -
Verify the EST is enabled by executing the command:
<kubectl get
                        services –A | grep est>
-
Verify the plugin status and port number, do the steps as follows:
- Execute the
<kubectl get services -A | grep est>command and make sure that the avx-vendor-cert-est-agent and avx-vendor-cert-est-agent is running. - Make sure that the port number is 5301:30021 in
avx-platform-gateway-est.Note: The number 5301:30021 must be used in the UI configuration.

- Execute the
<kubectl get pods -n external-system -o
                                wide>
command to identify the nodes running in the EST service. EST will be available on all the nodes where external system runs.
- Ping to the node names to get IP addresses.
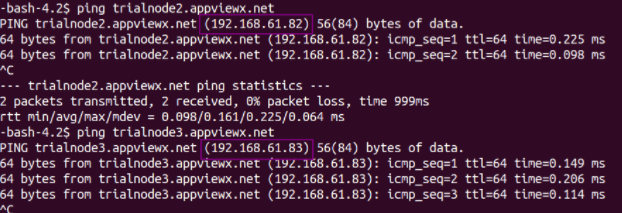
- Execute the
-
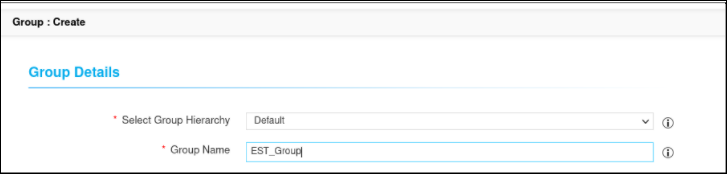
[Optional] Create a separate group for EST if required or else use the Default
Group, where the Certificate Request Needs Approval should be disabled
for the associated CA Policy.
-
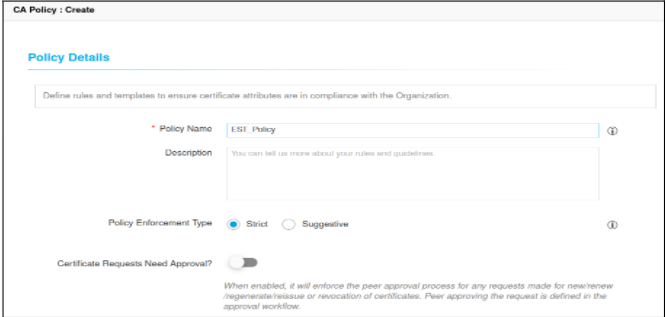
Create a CA policy and associate with group. For more details, refer to the
CERT+ Admin Guide.
- Disable Certificate Requests Need Approval? in the Policy
Details page.
- To configure a policy with AppViewX details, click AppViewX in the Certificate Authority pane on the left side of the screen.
- In the CA detail section, select CA Accounts from the dropdown list.
- Add validity, and then click Add.
- Select bit length as 2048 and above (AppViewX Client supports 2048 RSA)
- Select ECDSA curves based on requirement.
- Select the hash function as SHA-256 and above.
- Click Save CA Details.
- Select the Group that is created earlier and update policy.
- Disable Certificate Requests Need Approval? in the Policy
Details page.
-
Upload a client authentication issuer certificate in AppViewX
application.
- By default, AppViewX EST Client software (Windows/Linux/Mac) will have an Authentication Certificate Encoded within the software (which will be encrypted and kept within Client software), user will never have direct access to it and this will be used for agent to communicate with AppViewX EST Server.
- For initial validation, you can use the default encoded authentication
certificates in the Client software and issuer certificate. The file
will be available in a common share folder with the following file
name.
- The file name <AppViewXIntermediateCA_D2 E3 B6 15 EE E6 2D 4C 1D 99 AC 11 6D 47 B5 CD.crt>
- Upload the above file in the respective AppViewX environment and trust it in EST Settings.
- To upload a certificate, log in to AppViewX application with valid credentials.
- Click the menu button located in the upper left corner of the
screen.
The left navigation pane appears.
- Click CERT+ > Certificate Inventory.
- Click Upload > CA Certificate.
- Select CA, and then upload the file.
- Note the Serial Number B5:CD of the CA Certificate (This needs to be added as Issuer Certificate in EST Client Authentication Configuration later).
- If you want to use non AppViewX Certificate as the Issuer CA for EST Authentication. Refer the EST Server Update FP5 Authenticate with External CA guide and section Adding External CA Trust Certificate for EST Client Authentication
- Description: TLS Authentication handshake is happening in the GW and by default GW is holding only AppViewX Intermediate and AppViewX Root in the EST_TRUSTED_CA_CERTS, AppViewX GW will be sending these Certificates as the DN(Distinguished Name) response to the Clients.
- During TLS Handshake Client validates whether the DN response from server contains the CA Certificate with Signed Client’s Authentication Certificate. If not, client will not send the authentication Certificate to the Server, assuming this is not the right server.
Note: OCSP and CRL Validation of Client Authentication Certificate for EST request is disabled by default in AppViewX. To enable reach out to AppViewX Support ([email protected]).If it is getting enabled, make sure OCSP or CRL responder is reachable from AppViewX to validate the client certificate status; else all the client enrollment requests will fail with the status OCSP or CRL responder is not reachable.