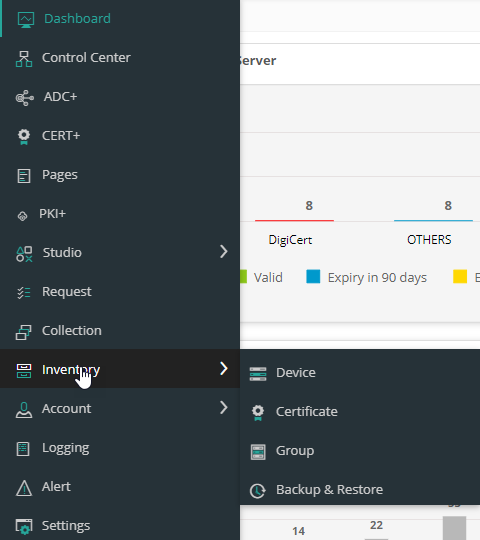
Adding a New AWS Device
- Login to AppViewX.
-
From the top left corner of the screen, click
 .
.
-
From the menu displayed, select Inventory > Devices.
 The Device :: ADC page is displayed.
 -
To navigate to the cloud device inventory, click
Cloud.
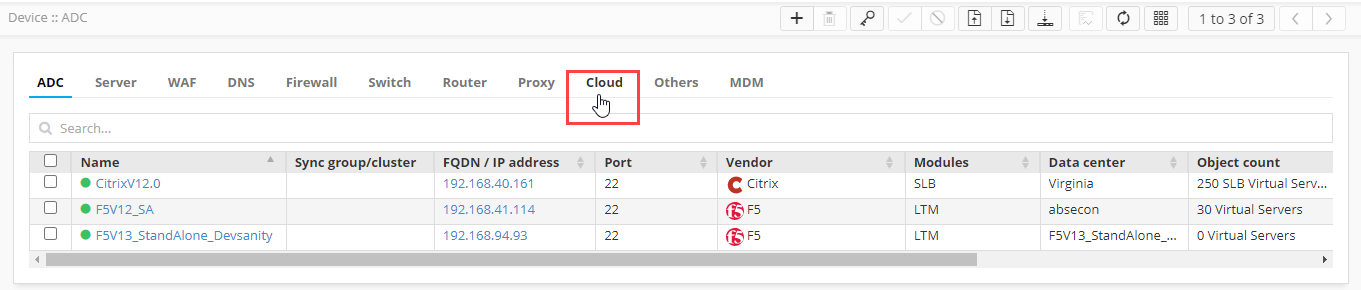
-
On the Device :: Cloud > Add page, from the list of Vendors,
select AWS.
-
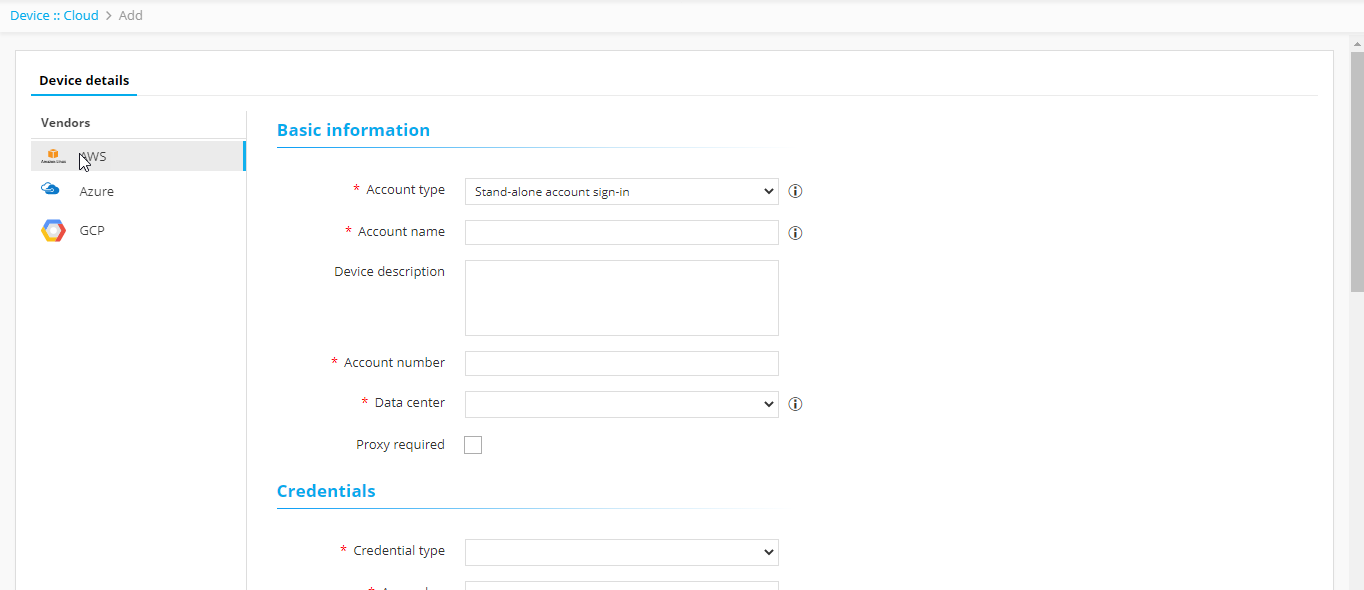
Enter/Select the following Basic information:
Field Description Account type* From the dropdown list, from the following options, select the customer’s AWS account type:
- Stand-alone account sign-in: The user account and the resources are available in the same account.
- Cross account sign-in: Resources are available across multiple accounts and users are given role-based access.
Account name* Enter the customer’s unique AWS account name.
Constraints:
- A duplicate account name should not exist in the cloud inventory.
- The account name should include only alphanumeric and period (.) characters.
Description Enter a description of the device to be added. Account number* Enter the customer’s AWS account number. Data center* From the dropdown list, select the data center through which communication with the Certificate Authority will be established. Proxy required To use a proxy server for communication, select this checkbox. -
Enter/Select the following Credentials-related information:
Field Description Credential type* From the dropdown list, from the following options, select the credential type:
- Manual Entry: Manually enter the access and secret key for the customer’s AWS account)
Access key* Enter the access key for the customer’s AWS account.
Note: This field is displayed only when Credential type is set to Manual Entry.Secret key* Enter the secret key for the customer’s AWS account.
Note: This field is displayed only when Credential type is set to Manual Entry.Credential name* If the customer’s AWS credentials are stored in CyberArk, from the dropdown list, select the CyberArk credential name.
Note: This field is displayed only when Credential type is set to Credential List - CyberArk. -
Enter/Select the following details for the Amazon Cloud Service
Settings:
Field Description Services* According to the type of the new cloud device being added, select the corresponding Amazon Cloud Service for the device. Default region* Based on the customer’s requirement, select the default region in which the customer’s AWS cloud account is deployed. AppViewX will use this region to communicate with the other (geographically farther) regions. Service region* Service regions are regions that are supported by the selected service.
From the dropdown list, select the service regions that should be scanned for certificates.
Note: To be able to fetch and select from the available regions, ensure that the credentials have been provided in the Credentials section.Cert sync Select from one of the following options:
- Managed: AppViewX will connect with the customer’s AWS account and discover certificates. These certificates will be added to the inventory. Users with the relevant permissions can then perform the required certificate-related actions.
- Monitored: AppViewX will connect with the customer’s AWS account and discover certificates. These certificates will be added to the inventory where the users will be allowed to only view the certificates.
- Ignored: AppViewX will connect with the customer’s AWS account but certificate discovery will be disabled.
-
In the Discover Resources section, enter/select the following details:
Note: This section is displayed instead of the Amazon Cloud Service Settings section if the Account Type is Cross or Federated.
Field Description Auto Discover Resources To discover all the cross or federated/child accounts for the master account details provided, enable this field. Advanced Settings To customize the auto discovery process, enable this field. Auto Discovery Mode* Select the auto discovery mode from the following options:
- Organization Based Discovery: On selecting
this option, the Organization based discovery
popup window is displayed. For instructions on
configuring organization based discovery, click
here.Tip: An alternate way to access the Organization based discovery popup window is by clicking
 , located as shown in the
image below:
, located as shown in the
image below: 
- IAM Policy: On selecting this option, the
IAM Policy based discovery popup window is
displayed. For instructions on configuring IAM
policy based discovery, click here.Tip: An alternate way to access the IAM Policy based discovery popup window is by clicking, located as shown in the
image below:

Note: You can select one or both auto-discovery modes.Service* From the Select the Service(s) dropdown list, select the services required for the CLM operations.
Tip: To select all services, select the Select all check box displayed at the beginning of the list of services.Note:- When ACM (Certificate Authority) is selected from the Service dropdown list, an additional set of fields is displayed under the section ACM Certificate Authority Serviceto configure the ACM services. These fields are explained in the table in Step 10.
- When Amazon Private CA is selected from the Service dropdown list, an additional set of fields is displayed under the section ACM Private CA. These fields are explained in the table in Step 11.
- When the EC2(EC2 Instance) service is selected, an additional set of fields is displayed to configure the EC2 services. These fields are explained in the EC2 Services table in Step 7.
Service Region* To select a service region:
- To fetch the service regions for the account
information provided, click Fetch
Region.
The retrieved service regions are populated in the Select the Region(s) dropdown list.
- From the Select the Region(s) dropdown list, select the required service region.
Cert Sync* Select from one of the following options:
- Managed: AppViewX will connect with the customer’s AWS account and discover certificates. These certificates will be added to the inventory. Users with the relevant permissions can then perform the required certificate-related actions.
- Monitored: AppViewX will connect with the customer’s AWS account and discover certificates. These certificates will be added to the inventory where the users will be allowed to only view the certificates.
- Ignored: AppViewX will connect with the customer’s AWS account but certificate discovery will be disabled.
Auto Sync To enable/disable automatic synchronization, use the Auto Sync key.
If Auto Sync is enabled, select the checkbox for the type of synchronization from the following options:
- Organization Based Discovery: On selecting
this option, the Organization based discovery
popup window is displayed. For instructions on
configuring organization based discovery, click
here.
-
In the ACM Certificate Authority Service section, enter/select the
following details:
Note: This section is displayed only when one or both ACM services are selected from the Services dropdown list.
Field Description Role Setting Preference* Note: This field is displayed only when both auto discovery modes (Organization Based Discovery and IAM Policy Based Discovery) are selected.From the dropdown list, select one of the following options:
- Organization Based Discovery
- IAM Policy Based Discovery
Route53 Zone Auto Approval To support DNS validation as an automatic process, enable this toggle. -
In the ACM Private CA section, enter/select the following details:
Option Description Field Description CA Operation Mode* From the following options, select one/both operation mode(s) for discovering all the certificates enrolled by the Private Certificate Authority:
-
ACM Private CA
-
AWS Certificate Manager (ACM)
S3 Bucket* NOTE: This field is displayed only when the ACM Private CA operation mode is selected.
-
Enter the S3 bucket name.
-
Click
.The ARN Advanced Settings action pane is displayed.
In the ARN Advanced Settings action pane, enter the following details:
sTable 1. Field Description Role ARN* Amazon Resource Name of the role that the caller is assuming Role Session name Role Session name is an identifier for the assumed role session.
Use the Role Session name to uniquely identify a session when the same rule is assumed by different principals or for different reasons.Duration Seconds Enter the duration, in seconds, for which the credentials should remain valid.
Acceptable durations for IAM user sessions:
-
Minimum: 900 seconds (15 minutes)
-
Maximum: 129,600 seconds (36 hours)
External Id External Id is a unique identifier that might be required when you assume a role in another account. Source Identity The source identity is specified by the principal that is calling the AssumeRole operation. Session Tags Session Tags are key-value pairs that you pass when you assume an IAM role or federate a user in AWS STS.
To create a session tag:
-
In the Enter Key field, enter a key for the key-value pair.
-
In the Enter Value field, enter a value for the key-value pair.
-
Click Add.
The added key-value pair is shown in the table below the fields.
-
- Click Apply.
Discover Certificate To enable instant certificate discovery at the time of device addition, select this checkbox. -
-
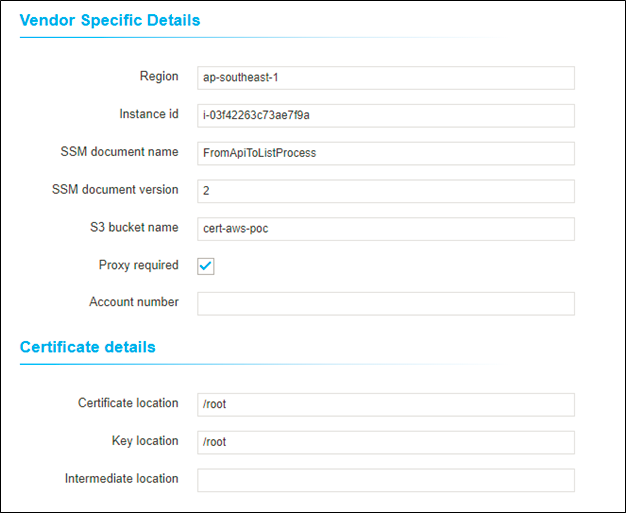
In the EC2 Services section, enter/select the following details:
Field Description Communication mode By default, the SSM communication mode is selected. Certificate Discovery Mode By default, the File System Scanning certificate discovery mode is selected. S3 Deployment Type* From the dropdown list, select the deployment type for the S3 bucket. S3 Bucket Name* - Click .
The ARN Advanced Settings action pane is displayed.
- In the ARN Advanced Settings action pane, enter the following details:
Field Description Role ARN* Amazon Resource Name of the role that the caller is assuming. Role Session name* Role Session name is an identifier for the assumed role session.
Use the Role Session name to uniquely identify a session when the same rule is assumed by different principals or for different reasons.
Duration Seconds Enter the duration, in seconds, for which the credentials should remain valid.
Acceptable durations for IAM user sessions:- Minimum: 900 seconds (15 minutes)
- Maximum: 129,600 seconds (36 hours)
- Default: 3600 seconds (1 hour)
External Id External Id is a unique identifier that might be required when you assume a role in another account. Source Identity The source identity is specified by the principal that is calling the AssumeRole operation. Session Tags Session Tags are key-value pairs that you pass when you assume an IAM role or federate a user in AWS STS.
To create a session tag:- In the Enter Key field, enter a key for the key-value pair.
- In the Enter Value field, enter a value for the key-value pair.
- Click Add.
The added key-value pair is shown in the table below the fields.
- Click
-
To add the new device to the cloud device inventory, click Add.
Tip: To select multiple services for a device, after you click Add, go back to the Services dropdown list and select the next service you want to enable for the device. Enter/select the rest of the details and click Add. Repeat this process for as many services you want to enable for the new device. The table is populated with a separate entry for each service.Details of the added cloud device are displayed in the inner inventory table at the bottom of the page. The details captured in the inner inventory are explained here.
-
After enabling all the services for the new device, click
Save.
- On saving the device, through SSM, AppViewX will communicate with EC2 instances through SSM.
- AppViewX will discover the processes from these instances and manage them in the Server device inventory.
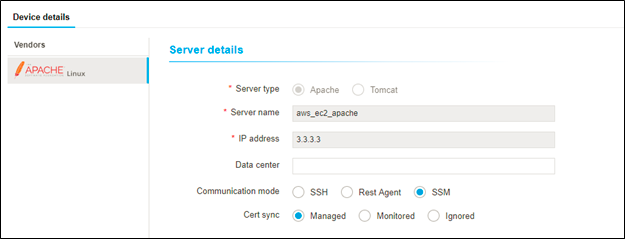
Once all the details are entered, you can add them to the Apache Linux server.
Note: Apart from the Apache and Tomcat processes vendor, the rest of the processes will be managed in the server inventory only as "Generic Linux".