Configuring Trigger Based Sync
-
In the Discover Resources section, enable Auto
Sync and select Trigger Based.
The Trigger Based Sync popup window is displayed.
-
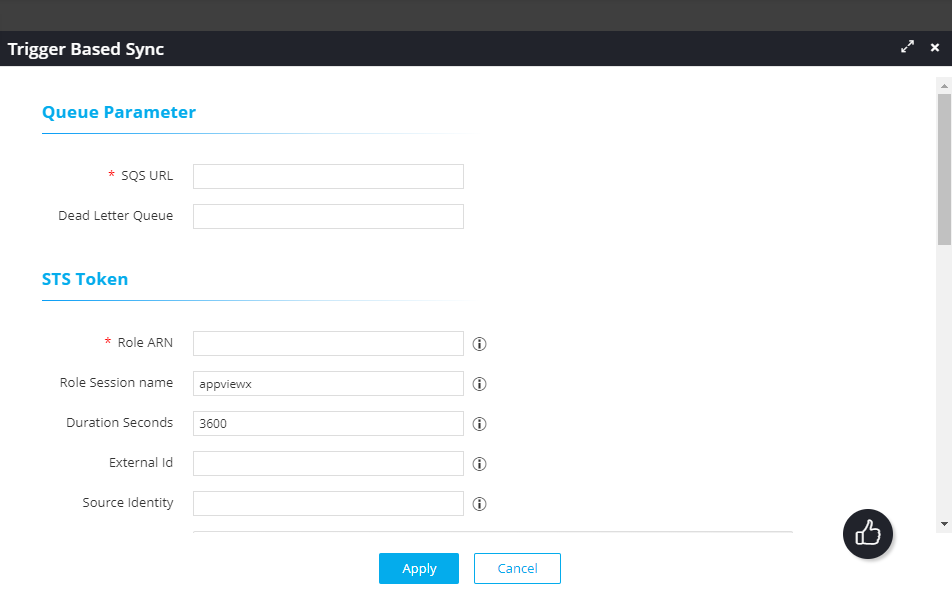
In the Queue Parameter section, enter the following details:
Field Description SQS URL* Enter the URL of the SQS queue. Dead Letter Queue Enter the URL of the Dead Letter Queue.
Note: This field is optional and can be used for user reference purposes only. Currently, AppViewX does not have any insights based on DLQ messages. -
In the STS Token section, enter/select the following details:
Field Description Role ARN* Enter the Amazon Resource Name that will interact with the SQS queue through the AWS STS. Role Session name Role Session Name is an identifier for the assumed role session.
Use the Role Session Name to uniquely identify a session when the same rule is assumed by different principals or for different reasons.
Duration Seconds Enter the duration, in seconds, for which the credentials should remain valid.
Acceptable durations for IAM user sessions:- Minimum: 900 seconds (15 minutes)
- Maximum: 129,600 seconds (36 hours)
- Default: 3600 seconds (1 hour)
External Id External Id is a unique identifier that might be required when you assume a role in another account. Source Identity The source identity is specified by the principal that is calling the AssumeRole operation. Session Tags Session Tags are key-value pairs that you pass when you assume an IAM role or federate a user in AWS STS.
To create a session tag:- In the Enter Key field, enter a key for the key-value pair.
- In the Enter Value field, enter a value for the key-value pair.
- Click Add.
The added key-value pair is shown in the table below the fields.
-
In the SQS Attributes section, enter/select the following details:
Field Description SQS Polling Interval* Enter an interval value for the SQS message polling from AppViewX. Max Number of Messages* Enter the maximum number of messages that will be returned by the queue per request. Visibility Timeout in Minutes* After messages are retrieved by a ReceiveMessage request, they need to be made invisible to subsequent retrieve requests for a custom duration.
In this field, enter this duration in minutes.
Wait time in seconds* Enter a duration, in seconds, for which a call will wait for a message to arrive in the queue before returning. - In the Auto Sync Services section, select the list of services for which the trigger-based sync mechanism is required.
-
In the Service Specific Parameters section, from the EC2 Sync
Delay Time dropdown list, select the delay interval (in hours)
for the synchronization of EC2 instances when they are discovered for the first
time.
Note: This section is displayed only if the EC2 service is selected in the Auto Sync Services section.
- Click Apply.