Add Server Details
To add the server,
- Log in to AppViewX application with valid credentials.
-
Click the menu button located in the upper left corner of the screen.
The left navigation pane appears.
-
Click Inventory > Device.
By default, the ADC tab opens.
- Click the Server tab.
-
Click the Add button.
The Device details page appears.
.png)
- Select the desired vendor from the Vendors list.
-
In the Server details section, select/enter the details
as follows.
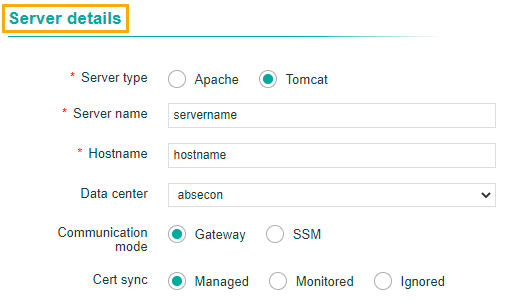
The following table describes the options available in the Server details section:
Options Description *Server Type Select the required server type.
Note: Based on Vendor selected, this option would appear as radio button with options for Apache and Tomcat, or a dropdown option with a list of servers to select from.*Server name Enter the name of the server. Hostname Enter the name of the host. Data center Select the data center from the dropdown list. Communication mode Select the required communication mode.
The possible options are:
- Gateway
- SSM
Cert sync Select the required cert sync.
The possible options are:
- Managed
- Monitored
- Ignored.
Note: The asterisk (*) symbol indicates a mandatory field. -
In the Credentials section, select/enter the details as
follows.
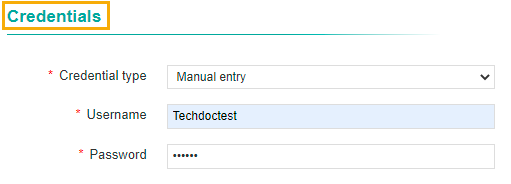
The following table describes the options available in the Credentials section:
Options Description *Credential Type Select the type of credential from the dropdown list that will be entered in the username and password field. - Credential List - AppViewX
- Credential List - CyberArk
- Credential List - Thycotic Secret
As part of release 2022.1.0 FP1, the value Credential List - Thycotic Secret will now be available for the following vendors:
- Linux
- Microsoft IIS
- Microsoft Server
*Username Enter the desired username. This field is displayed only if the Credential Type = Manual
*Password Enter the secure password. This field is displayed only if the Credential Type = Manual
*Credential list Select the credential value set in the Credentials page. This field is displayed only if the Credential Type is any of the below values:- Credential List - AppViewX
- Credential List - CyberArk
- Credential List - Thycotic Secret
Note: The asterisk (*) symbol indicates a mandatory field. - In the Windows gateway details section, select/enter the details as
follows.
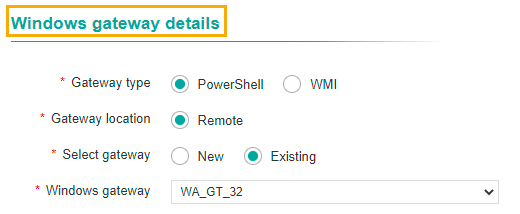
The following table describes the options available in the Windows gateway details section:
Options Description *Gateway type Select the required type of gateway.
The possible options are:
- PowerShell
- WMI.
*Gateway location Select the gateway location. *Select gateway Select the gateway.
- New
- Existing.
*Windows gateway Select the windows gateway from the dropdown list. Note: The asterisk (*) symbol indicates a mandatory field. - In the Certificate details section, enter the server path.
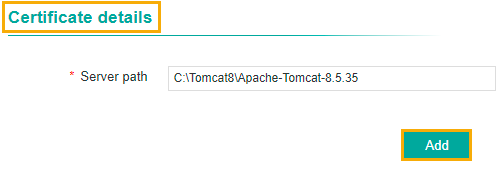
Enter the following path as mentioned in the table, depends on the OS that you choose:
OS Server Path Windows C:\Tomcat8\Apache-Tomcat-8.5.35 Linux /opt/tomcat/apache-tomcat-9.0.52 - Click the Add button.
- Once the server is added successfully, the server path will be listed in the Server
path section.
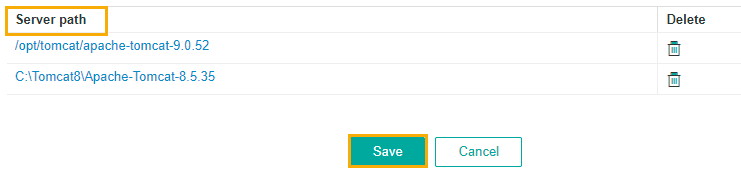
- Click the Delete icon, if you want to delete the server path from the list.
- The status of the server can be viewed in the Status column.
- You can configure multiple device details for the same vendor.
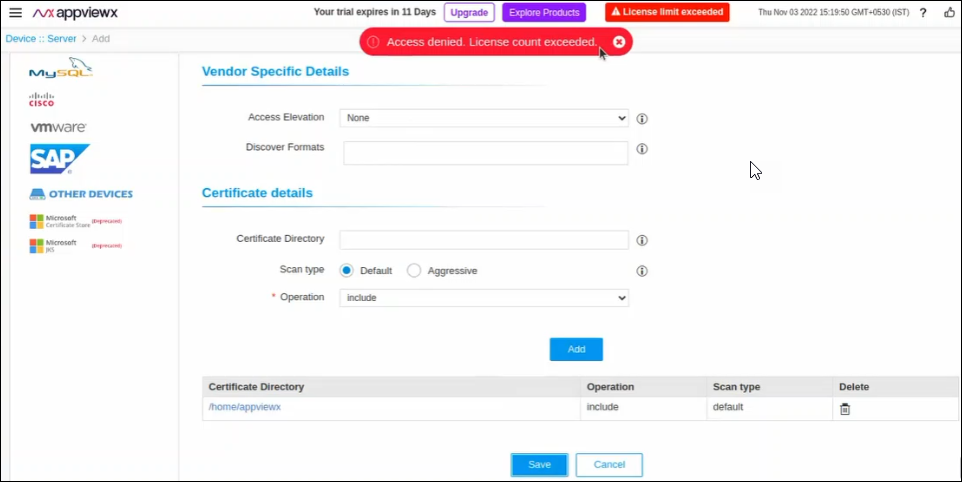
License Enforcement
AppViewX has enabled a feature to set a limit for the licensed certificates. If the number of certs exceeds this limit then the additional certs added to the inventory will be moved into the Monitored status.
-
A red indicator labeled "License Limit Exceed" appears on the title bar of the page, if the limit has exceeded.
-
A pop-up message "Access denied. License count exceeded." is displayed on the click of the Save button while adding a new server device.
-
All the new on-boarded server certs (Server/ADC/Firewall/WAF Device config sync) into the inventory will be mapped to theMonitored state.
IBM Vendor
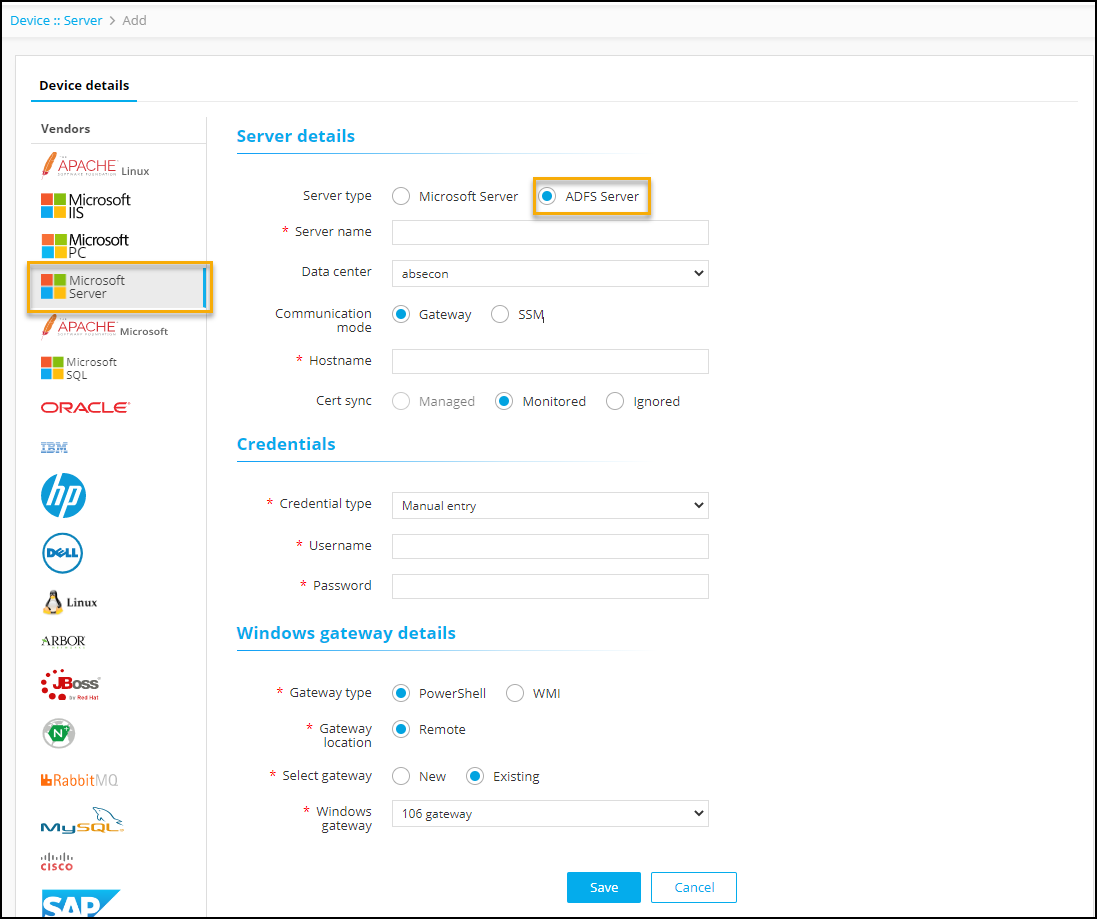
ADFS server in Microsoft Server in Device
As a part of FP2 changes, the ADFS server can now be on-boarded into the AppViewX inventory. To onboard the ADFS server,
- Log in to the AppViewX application with valid credentials.
-
Click the menu icon located in the upper left corner of the screen.
The left navigation pane is displayed.
- From the menu, click CERT+.
-
On the Cert+ page’s left menu, in the Administration section click Device
Management.
By default, the ADC tab opens.
- Click the Server tab.
-
Click the Add (+) button.
The Device details page is displayed.
-
Select Microsoft Server from the Vendors list. The following screen is
displayed.
-
In the Server Type radio button, select ADFS Server. Enter details as
mentioned below.
Field Name Description Server Type Select Server Type as
-
Microsoft Server - to onboard the Microsoft server to AppViewX
-
ADFS Server - to onboard the ADFS server to AppViewX
*Server name Enter the server name. Data center Select the data center from the dropdown list. Communication mode Select the required communication mode.
The possible options are:
-
Gateway
-
SSM
Host name Enter the hostname Cert sync Select the required cert sync.
The possible options are
-
Managed - this option is disabled (as push, bind, and rollback are not supported)
-
Monitored - selected by default (as the discovered certificates will only be in the monitored status)
-
Ignored
-
-
In the Credentials section, select/enter the details as follows.
Field Name Description Credential Type Select the type of credential from the dropdown list that will be entered in the username and password field.
-
Manual entry
-
Credential List - AppViewX
-
Credential List - CyberArk
-
Credential List - Hashicorp
*Username Enter the server name Password Select the data center from the dropdown list. -
-
In the Windows gateway details section, select/enter the details as
follows.
Field Name Description *Gateway type Select the required type of gateway.
The possible options are:
-
PowerShell
-
WMI
*Gateway location The gateway location is default selected (single option) to Remote. *Select gateway Select the required type of gateway.
-
New
-
Existing
*Windows gateway Select the windows gateway from the dropdown list. -
-
Click Save
The device is onboarded successfully
The ADFS Server device can also be onboarded by the import functionality using the standard .xlxs and .csv templates available.
To onboard the ADFS server into the AppViewX inventory using the import functionality:
-
Log in to the AppViewX application with valid credentials.
-
Click the menu icon located in the upper left corner of the screen. The left navigation pane appears.
-
From the menu, click CERT+.
-
On the Cert+ page’s left menu, in the Administration section click Device Management. By default, the ADC tab opens.
-
Click the Server tab.
-
Click the Import button. The Import details page is displayed.
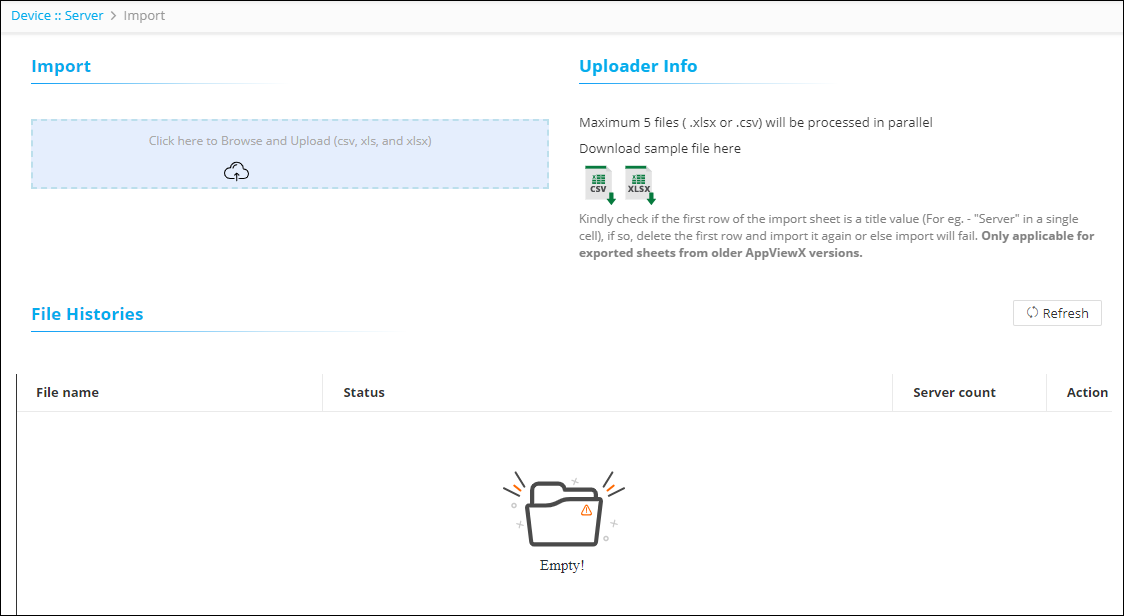
-
Click on the CSV or XLSX icons in the Uploader Info section. The sample templates are downloaded and saved at the default file location.
-
Open the CSV or XLSX templates, enter the relevant information for onboarding the ADFS server, and save the file.Note: Ensure all the mandatory and relevant fields are entered in the .csv or .xlsx template.
-
Click the upload icon in the Import section, and select the .csv or .xlsx file from the file dialog box. The status of the uploaded file is displayed in the File Histories section.

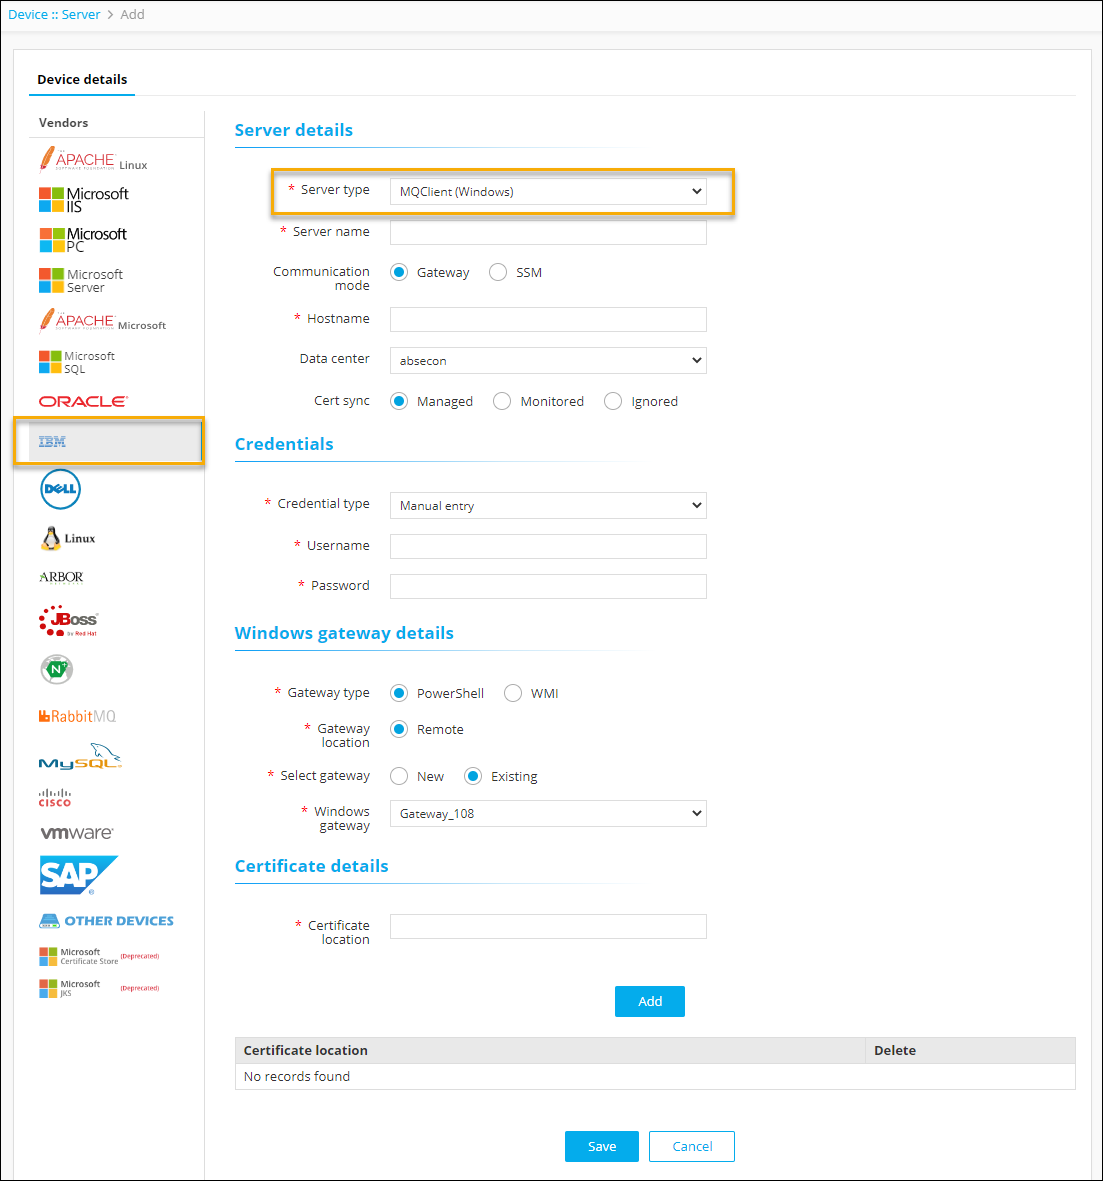
HPiLO for IBM Vendor
As part of FP2 a new feature of adding a HPiLO server device for the IBM Vendor of Server Type as MQClient(Windows). To onboard the server device,
- Log in to AppViewX application with valid credentials.
- Click the menu button located in the upper left corner of the screen.
- Click Inventory > Device OR CERT+ > Device Management (under the Administration section of the menu). By default, the ADC tab opens.
- Click the Server tab.
- Click the Add button.
-
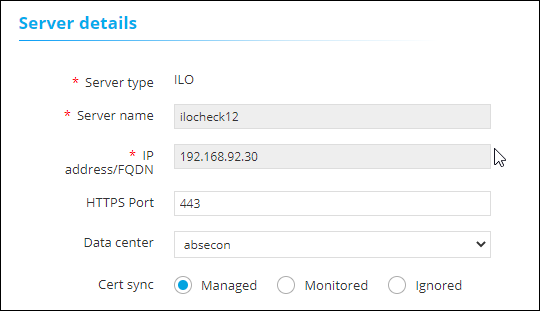
Select the HP logo from the Vendors list.
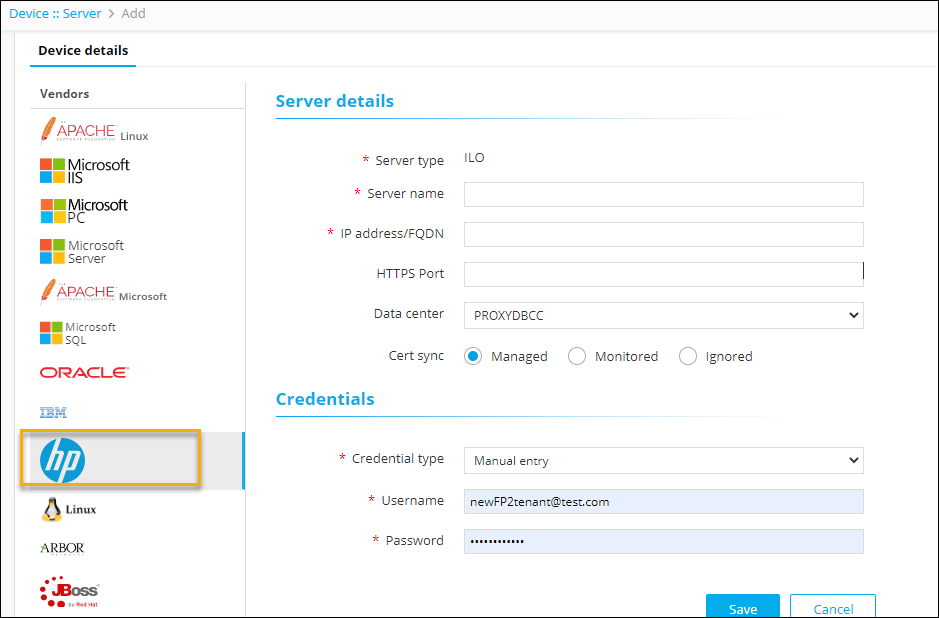
-
In the Server details section, select/enter the details as follows (as
required).
-
In the Credentials section, select/enter the details as follows:
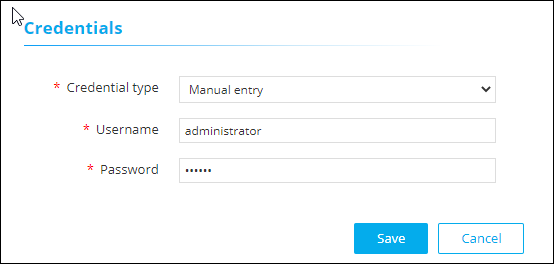
-
Click the Save button.
Multiple devices can be configured for the same vendor.