Configure a Script Execution Widget
To configure a Script execution widget on your dashboard, complete the following steps:
-
If you are creating a Script execution widget as part of creating a new dashboard,
complete the steps in theCreate a Dashboard
topic above, then jump to Step 5 below. If you are creating a Script execution widget for
an existing dashboard, click
 in the Command bar of the dashboard.
- On the Create widget screen that pops up, select Script execution as the widget type.
- Enter a name for the widget.
- Click Create.
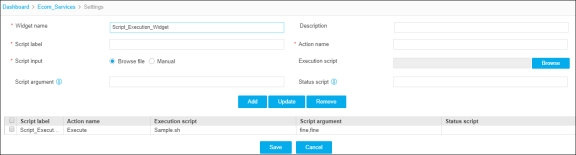
- On the Settings screen that appears, enter a description of what the script does so that it can be readily identified when viewed through the widget
- Enter a label for the script bar you will be adding to the widget. The Label should help identify what sort of script you are adding so that it can be readily identified when viewed through the widget.
- In the Action Name field, enter the action that you want to perform using the script execution widget.
- Select the Browse file or Manual radio button based on how you want to upload the scripts.
-
In the Execution script field, do the following:
- If the Browse file radio button is selected in Step 8, click the Browse button and navigate to the file you want to add, then click Open.
- If Manual is selected in Step 8, enter the full path of the script. These scripts will need manual intervention to execute.
- In the Script argument field, enter any information for the script with space as delimiters.
-
(Optional) In the Status script field, enter the full path of the script to update the
color and status message of the bar.
The status and result of the script are updated simply by loading or refreshing the widget.
-
Click Add to add the details in the table at the bottom of the screen.
- Repeat steps 5-12 for each additional script you want to add.
- Select the checkbox beside the script label column and then, click Save.
-
When the widget is viewed on the dashboard, each script appears with a
 beside it.
 The color and message on the bar is determined by the following return message of the status script:
echo Color:Green,Response:"Pool failover_pool_web is up" Color: Green - to update the color of the bar to green Response:"Pool failover_pool_web is up" - to show the string inside "" as status Color: Red - to update the color of the bar to red The status script will update or run on every refresh of the widget, to get the latest status.
-
To run the execution script, click the Play button and select one of the
following:
- Action name: To internally trigger the execution from the AppViewX server CLI.
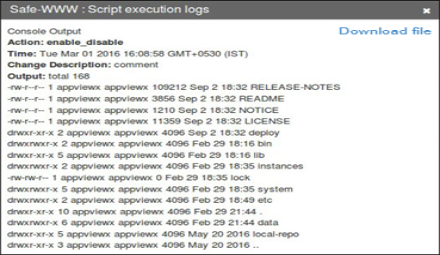
- View Logs: To check the previous logs of the script that are executed.
When it finishes, a popup screen appears listing the script execution logs, as shown in the following example.
-
Click the Download file button if you want to download an output file.
The file is downloaded to your computer.
- Navigate to the location where you want the file to go, then click Save.