Configuring ADC Alerts
-
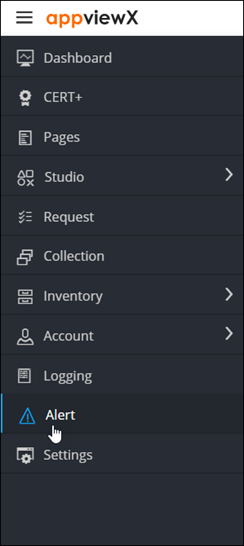
To access the navigation pane, in the top-left corner of the screen, hover the
mouse pointer over the
 icon.
icon.
-
From the menu displayed, click Alert.
The Alert :: All page is displayed (by default).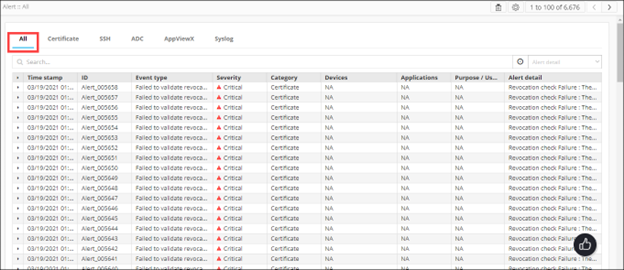
-
From the top-right corner of the screen, click
 .
The Settings :: Certificate page is displayed.
.
The Settings :: Certificate page is displayed. -
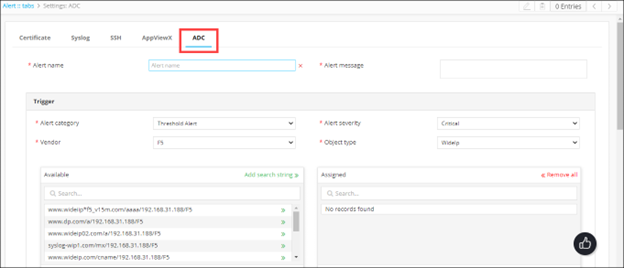
To configure ADC alerts, click ADC.
The Settings :: ADC page is displayed.
-
Enter the following details:
Field Description *Alert name Enter the name you want to give this alert. *Alert message Enter the message that will be displayed with this alert. All * marked fields are mandatory. -
In the Trigger section, enter the following details:
Field Description *Alert category From the drop-down menu, select one of the following alert categories: - Threshold alert
- Application alert
- Device alert
*Alert severity From the drop-down, from the options given below, select a severity for the alert: - Critical
- Fatal
- Major
- Minor
- Notification
Vendor From the drop-down menu, select the vendor whose device or devices you want to set an alert for. Object type From the drop-down menu, select the vendor object that you want to set an alert for. Note: The contents of this field will vary depending on the vendor selected.Detail contains Note: This field is applicable only for the Device Alert category.Available Depending on the Object type and Vendor selected, a list of all available ADC objects or devices is displayed here. To add an object/device to the alert, click
 for that
object/device.
for that
object/device.Add search string Instead of adding devices manually, AppViewX lets you automatically assign all existing devices or objects that match your criteria. To do this:
- In the Available section, in the Search field, enter the search criteria.
- Click Add search string.
Note: The benefit of using a search string rather than selecting devices manually is that the search string continues to work in the background and auto-assigns all new devices that match the search criteria.Assigned To add an object to the Assigned column, click the check box corresponding to that object. -
In the Alert condition section, enter the following details:
Table 1. Field Description *Alert interval From the drop-down menu, from the following options, select how often you want the system to check for breaches of the threshold levels that you are about to define: - 10 seconds
- 20 seconds
- 30 seconds
- 40 seconds
- 50 seconds
- 60 seconds
*Cool off period From the drop-down menu, from the following options, select how much time the system should wait before sending another alert about a continuing threshold breach: - 10 minutes
- 20 minutes
- 30 minutes
All * marked fields are mandatory. Note: This section is applicable only for the Threshold Alert category. -
In the Statistics section, define the conditions that will generate an
alert by selecting values in the Statistics, Operator, and Value fields.
- To add more than one Statistics conditions, click
 .
. - To delete a condition, click
 .
.
- To add more than one Statistics conditions, click
- In the Action section, to send the syslog alert as an email, execute the steps for configuring SMTP for email alerting.
-
Enter the following details:
Field Description Email configuration To send the syslog alert as an email, select this check box. *Email address To send the syslog alert as an email, enter the email address to which this specific syslog alert will be sent. Note: Separate multiple email addresses with a comma.Subject To send the syslog alert as an email, enter a subject line. All * marked fields are mandatory. -
To use the Simple Network Management Protocol (SNMP) to send the alert, enter
the following details:
Field Description SNMP configuration To use the Simple Network Management Protocol for sending the alert, select this check box. *Destination IP Enter the destination IP address for the alert. *Version From the drop-down menu, from the following options, select the SNMP version to be used: - V1
- V2
*Port Enter the port number to be used for the alert. *Community string Enter the community string for the alert. The community string is similar to a user ID or password that allows users access to the requested information on the device. All * marked fields are mandatory. -
To save the ADC alert configure above, click Add.
The saved details are displayed in the table shown at the bottom of the screen.