Creating a Custom Role
-
To access the navigation pane, in the top-left corner of the screen, hover the
mouse pointer over the
 icon.
icon.
-
From the menu displayed, click Account >
Role.
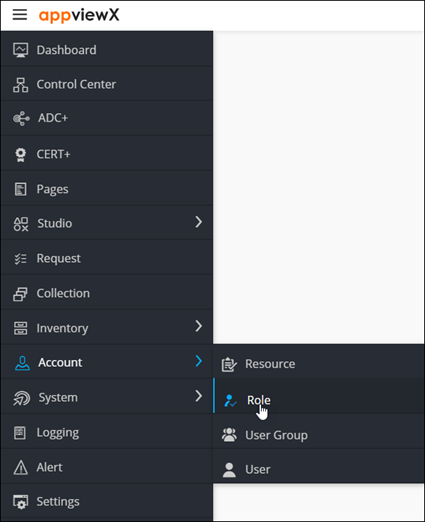
The Role page is displayed.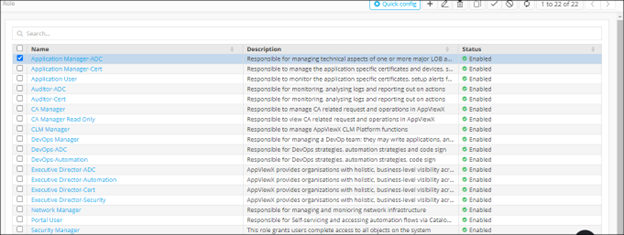
-
From the top-right corner of the screen, click Quick Config.
The RBAC Journey :: Authentication page is displayed.
-
Navigate to the Role stage as part of the wizard flow to add roles into
AppViewX.
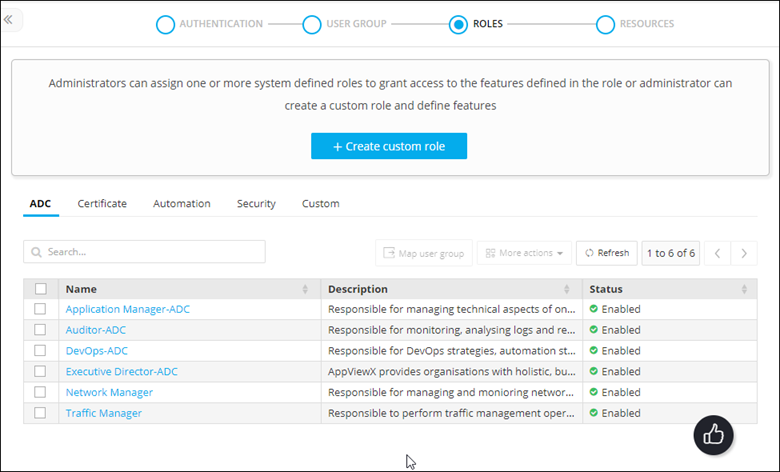
-
Click
 .
The Create custom role action pane is displayed.
.
The Create custom role action pane is displayed. -
Under the Information tab, enter the following details:
Field Description *Name Role name. Description Brief description of what users assigned to the role can do and/or what features or functionalities are associated with the role. All * marked fields are mandatory. - Click Save.
- In the Authorized functions section, select the check box against the functionalities that you want to associate with the role.
-
To assign functions at a granular level, click the
 icon for
the functions’ check box and then select individual sub-options within the
functions.
icon for
the functions’ check box and then select individual sub-options within the
functions.
- Click Save.