Import a Task
-
Click
 and select
Studio > Workflow.
The Workflow screen appears.
and select
Studio > Workflow.
The Workflow screen appears. - Click the Folders section on the left-hand side.
-
Click Import.
The Import Tasks screen appears.Note: If you do not use these options, the tasks will automatically be imported to the Default folder. All the tasks added to this folder will be deleted once you exit the workflow.
- From the Workflows dropdown list, select the required workflow.
- Click Fetch Tasks. A list of all the tasks corresponding to the selected workflow is displayed.
- Select the required task(s).
- Select the Assign to folder check-box if you want to import the task(s) to a specific folder of your choice.
-
From the Folder dropdown, select the folder to which the task(s) must be
imported.
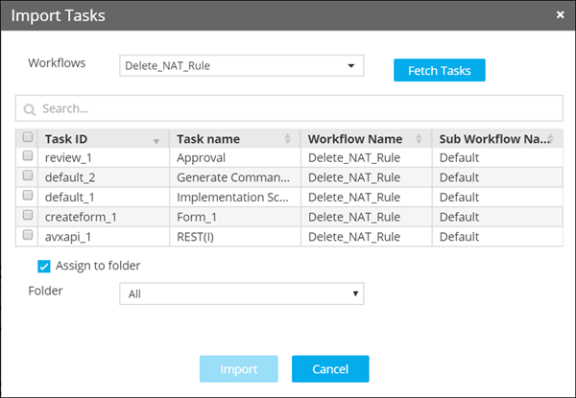
- Click Import. The selected tasks are added to the selected folders.
- Click the required folder to display all the tasks it consists of. You can drag and drop those tasks to the workspace whenever required.