HashiCorp Vault CA
Prerequisites
- Login and password to access AppViewX.
- Base URL, Role ID, and Secret Key for the APP ROLE method and Base URL, Access Key, Secret Key, and Role Name for the AWS method in the CA Configurations.
Configuring HashiCorp Vault
Steps to Configure HashiCorp Vault CA
-
Go to
 (Menu) > SIGN+ > ADMINISTRATION > Certificate
Authority.
(Menu) > SIGN+ > ADMINISTRATION > Certificate
Authority.
-
From the displayed CA, Select HashiCorp Vault.
The HashiCorp Vault home page is displayed.
-
Click the Configure Now button or +Add icon from the
middle or top-right of the page respectively.
The HashiCorp Vault configuration page is displayed.
-
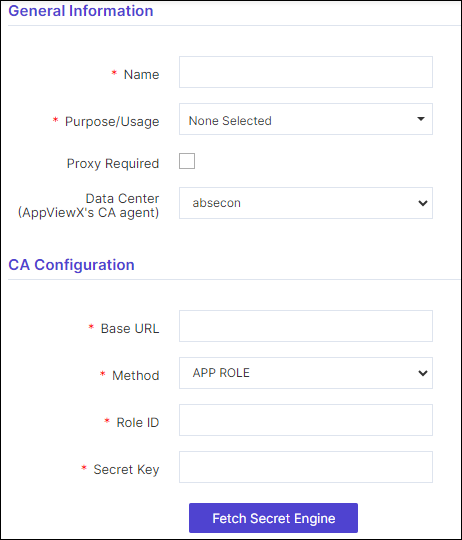
Update the details in the General Information section as described in
the table below:
Table 1. General Information - Field Description Table Fields Description *CA Account name A unique name to identify the CA setting. Note: No special characters other than ‘.’, ‘-’, and ’_’ are allowed. Names should not start with special characters.*Purpose/Usage The dropdown contains checkboxes for the certificate type for which the CLM actions will be enabled. The values are:
- Server
- Client
- Code Signing
One or more values can be selected depending on the type of account users need to create.
Proxy Required Enable this field if the CA communication needs to happen via Proxy. The proxy details configured in general settings will be used for communication. Data Center (AppViewX's CA agent) Select the data center through which the CA communication needs to happen. *: Mandatory fields -
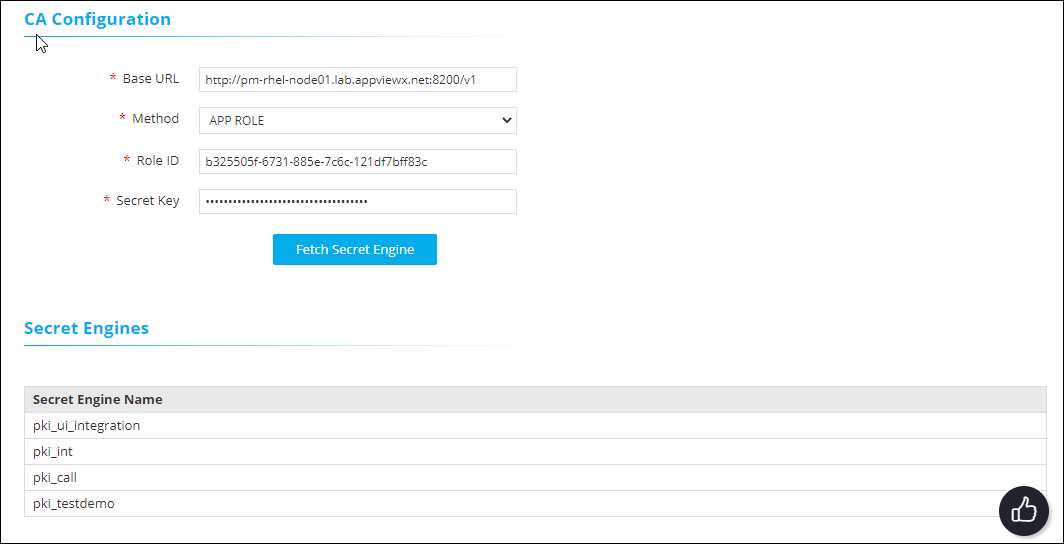
Update the details in the CA Configuration section as described
in the tables below. These fields are necessary for invoking the
Hashicorp CA Secret Engine for Certificate Management. The fields
displayed in the CA Configuration section depend on the value selected
in the Method field. The two auth method values are
- APP ROLE - The APP ROLE auth method allows machines or apps to authenticate with Vault-defined roles. An "AppRole" represents a set of Vault policies and login constraints that must be met to receive a token with those policies. An AppRole can be created for a particular machine, or even a particular user on that machine or a service spread across machines. The credentials required for successful login depend upon the constraints set on the AppRole associated with the credentials.
- AWS - The AWS auth method provides an automated mechanism to retrieve a Vault token for IAM principals and AWS EC2 instances. Unlike most Vault auth methods, this method does not require manual first-deploying or provisioning of security-sensitive credentials (tokens, username/password, client certificates, etc), by operators under many circumstances.
Table 2. CA Configuration for App Role - Field Description Table Fields Description *Base URL The base of URL of the CA account. *Method APP ROLE *Role ID RoleID is an identifier that selects the AppRole against which the other credentials are evaluated. When authenticating against this auth method's login endpoint, the RoleID is a required argument at all times. By default, RoleIDs are unique UUIDs, which allow them to serve as secondary secrets to the other credential information. *Secret Key Secrey Key (SecretID) is a credential that is required by default for any login and is intended to always be secret. They can be created against an AppRole either via generation of a 128-bit purely random UUID by the role itself or via specific, custom values. Similarly to tokens, Secret keys have properties like usage-limit, TTLs and expirations. *: Mandatory fields Table 3. CA Configuration for AWS - Field Description Table Fields Description *Base URL The base of URL of the CA account. *Method AWS *Access Key Access Keys are used to sign the requests that are sent. Access Key and Secret Key are used for programmatic (API) access to AWS services. *Secret Key Secret Key (SecretID) is a credential that is required by default for any login and is intended to always be secret. Similar to tokens, SecretIDs have properties like usage-limit, TTLs, and expirations. *Role Name The basic mechanism of operation (AWS authorization workflow) is per-role. Roles are registered in the method and associated with a specific authentication type that cannot be changed once the role has been created. Roles can also be associated with various optional restrictions, such as the set of allowed policies and max TTLs on the generated tokens. *: Mandatory fields The correct values entered in the fields establish a connection with the Hashicorp vault to be able to fetch the secret engine.
-
Click the Fetch Secret Engine button.
A list of PKI secret engines is displayed. These will be presented to users in the policy. from where they can select the respective secret engines.
-
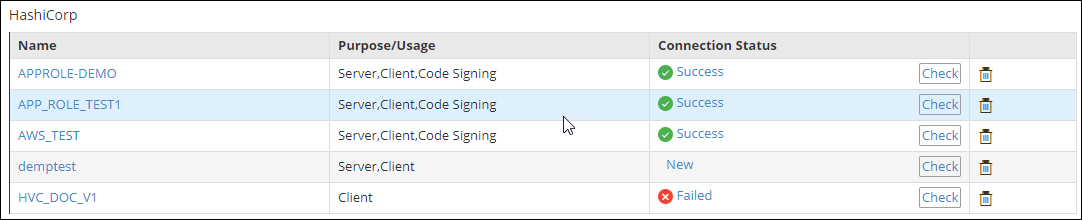
Click Save.
The Account details are displayed in a grid at the bottom of the screen, with options to options to edit, check (connection status), and delete.
Editing an Account
-
Go to the HashiCorp Vault CA account home page
The list of Accounts is displayed in the grid.
-
Click the account name from the ‘Name’ column in the grid.
The General Information and CA Configuration sections are displayed with pre-populated values.
- Change any of the editable fields and click the Fetch Secret Engine button.
- Click the Update button.
Deleting an Account
-
Go to the HashiCorp Vault CA account home page
The list of Accounts is displayed in the grid.
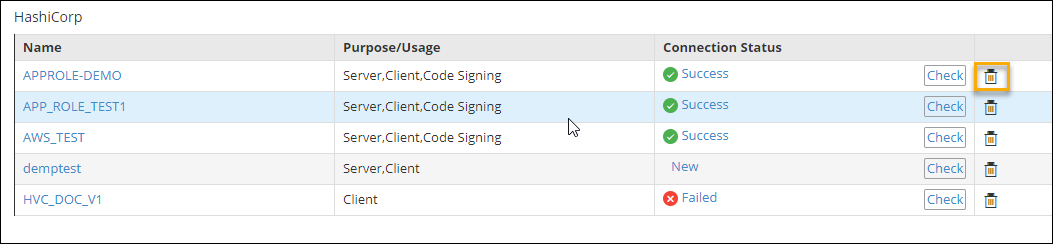
-
In the last column of the grid with the listed accounts, click the
Delete or bin icon.
The Delete Confirmation pop-up is displayed.
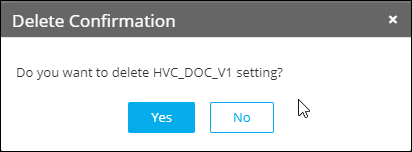
- Click Yes.
Validating HashiCorp Vault
-
Go to
(Menu) > SIGN+ > ADMINISTRATION > Certificate
Authority.
-
From the displayed CA, Select HashiCorp Vault.
The HashiCorp Vault home page is displayed.
-
In the Status column of the grid with the listed accounts, click the
Check button.
The Success or Failure value is displayed.
- Update the account details accordingly to get a “success” status.