Enroll a Certificate
-
Click
 and select CERT+ > Certificate Action.
- Under Certificate Action, click Enroll Certificate and select Server, Client, or Code Signing depending on the type of certificate(s) you want to enroll.
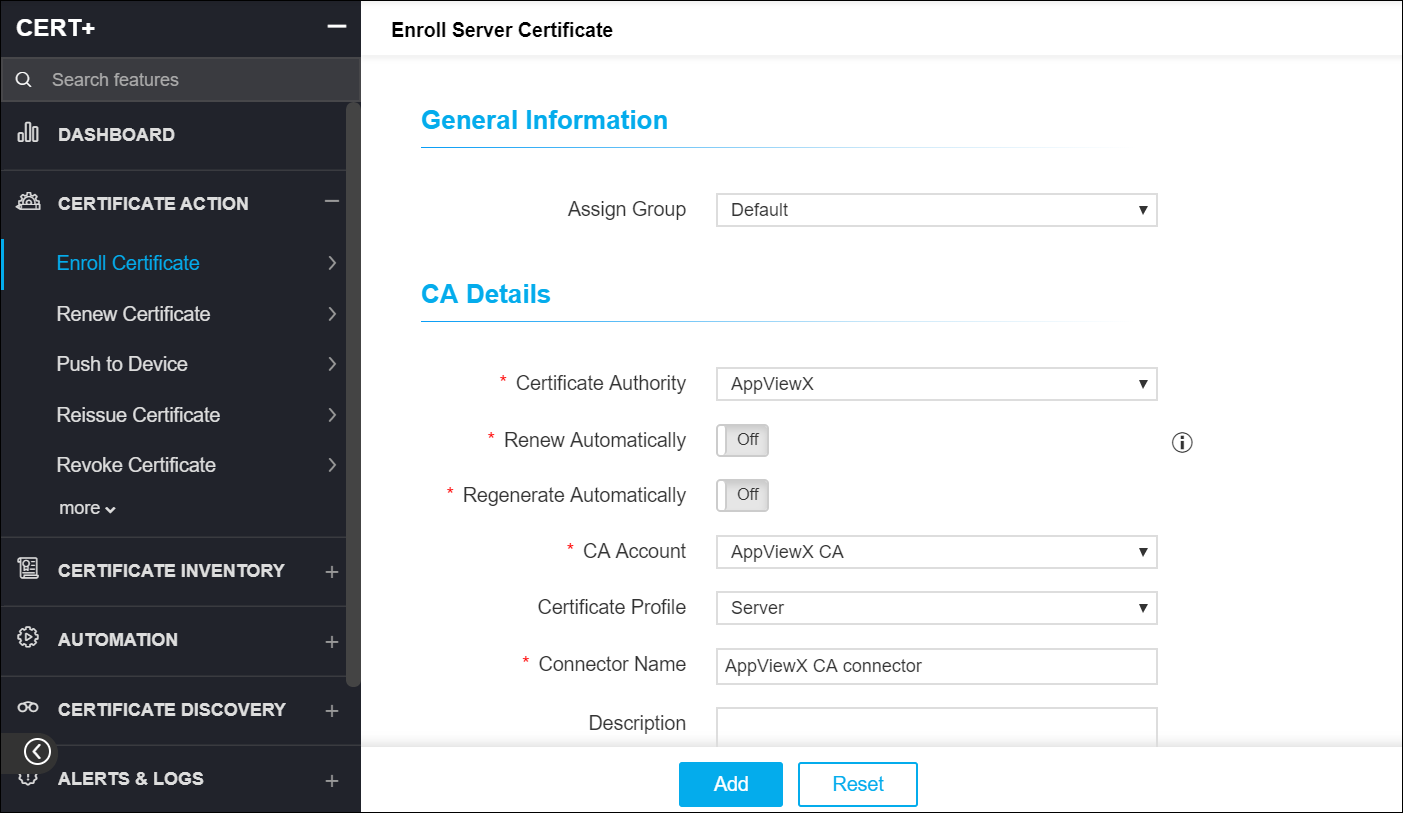
- On the Enroll Server Certificate details page, under General Information, assign a group to the certificate.
- Under CA Details, in the Certificate Authority field, select a CA for the certificate. Other fields and options vary depending on the CA you chose.
- Choose a CSR Generation mode:
AppViewX, Upload CSR, HSM, or Endpoint. For all
the CA types except Amazon, you have the option to generate
the CSR. Fields displayed will vary for each CSR generation
method.
Note: For Microsoft Enterprise, Microsoft Standalone, and Entrust CA(s), provide the Subject Alternative Name for certificates by selecting Directory Name, DNS, Email, IP Address, Registered ID, URL, and Other Names.
- Under CSR Parameters, enter a Common Name for the certificate and fill in all the mandatory fields.
- While creating certificates, the user can attach supporting documents by uploading it in the Attachment section.
-
Click Add to generate the certificate.
The certificate holistic view with the newly created CSR appears.
- Click Submit.
-
On the Submit pop up window, enter relevant comments and click Yes.
A request ID and work order ID are generated automatically and the work order status In Progress (Approval level 1) is displayed beside the connector on the topological view.
- Click Approve to approve the work order.
-
On the Approve pop up window:
- Turn On or Off the Manual Implementation.
- Select the Implementation Time.
- Enter comments to approve the CSR and click Yes.
The work order status displayed beside the connector updates to In Progress (CSR submission). - Click Implement to submit the request to the CA.
-
On the Implement pop up window:
- Turn On or Off the Manual Implementation.
- Select the Implementation Time.
- Enter comments to implement the request and click OK.
The work order status displayed beside the connector updates to In Progress (Awaiting certificate retrieval). -
Click (Refresh) on the top to update the topology. After the CA is generated, the
status updates to Completed.
Note: You can perform a wide range of actions on the certificate by hovering over
 and selecting one of
the options in the dropdown.
and selecting one of
the options in the dropdown. - To return to the certificate list view and view the new certificate, click Certificate on the top left.
-
After CSR is requested, to view details in the certificate holistic page, hover over
the CA Connector icon and click View.
 Note: You can enable Automatic CSR Generation during the certificate enrolment process in CERT+.